Table of Contents
If you are sick and tired of having to manually connect to your VPN on Windows or if you are currently using a third party app supplied by your VPN. There is a way to automate this task using the Windows Task Scheduler.
How to Setup a VPN on Your Android Smart Phone or Tablet.
Virtual private networks (VPN’s) have a lot of handy uses, the most useful of which is protecting your privacy online, helping you stay far more anonymous. They can even mask your location. Setting up a VPN will ensure that your browser traffic and download habits are encrypted end to end.
If you are currently searching for a reliable free VPN there are many to choose from online, all of which will offer a slightly different level of protection. Below are 3 well rated free options you can try if you are currently looking for a VPN. Remember to read through each of the provider's terms and services before deciding which one to use. If you don’t mind paying a few dollars, there are alternatives that offer way faster servers and better end to end protection of your data.
How to Make Your VPN to Automatically Connect on Windows.
The first thing you will need to do is make sure you have a VPN setup in Windows. If you haven’t already done this you will need to open Network Settings from the taskbar by clicking your Network icon (Wifi or Wired) Then, select network settings. You can also access this menu from the Control Panel. With the network settings menu open in front of you select VPN from the left-hand menu, then select Add VPN Connection From the top of the main screen.
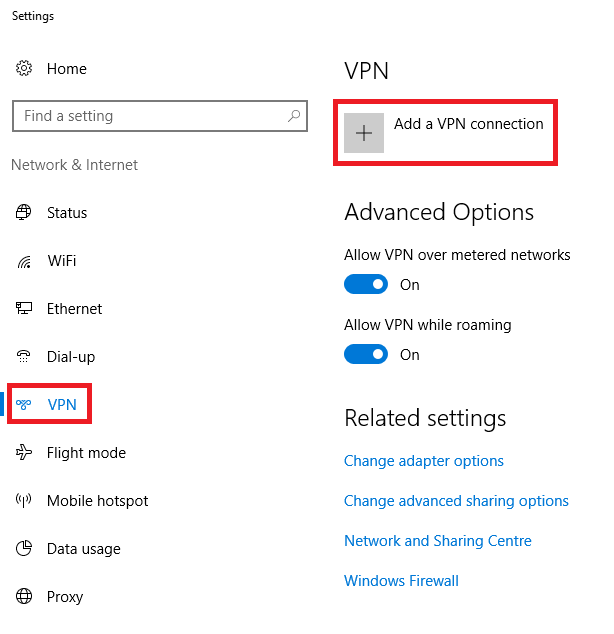
On this screen, you will have to enter the information from your chosen VPN provider, be it free or paid. The top option VPN Provider will always be Windows (built in). Once you have entered all the information tick Remember my sign-in information and Save.

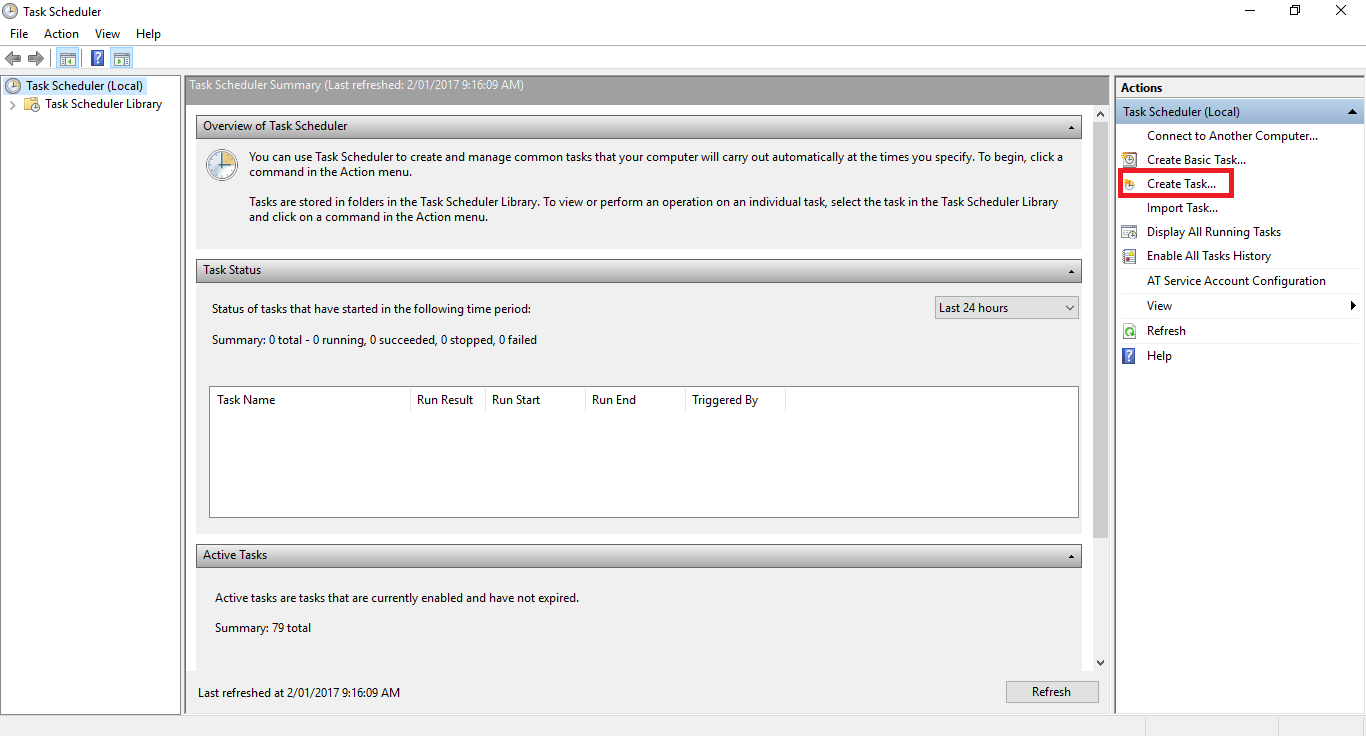
Now that your VPN has been set up, you can start the next step of making it connect automatically at login. To do this we will be creating a Scheduled Task using the Windows Task Scheduler tool. To find this tool, simply search Task Scheduler from the start menu. Once you have Task Scheduler open, click Create Task from the right-hand menu (it’s small so will be hard to spot)
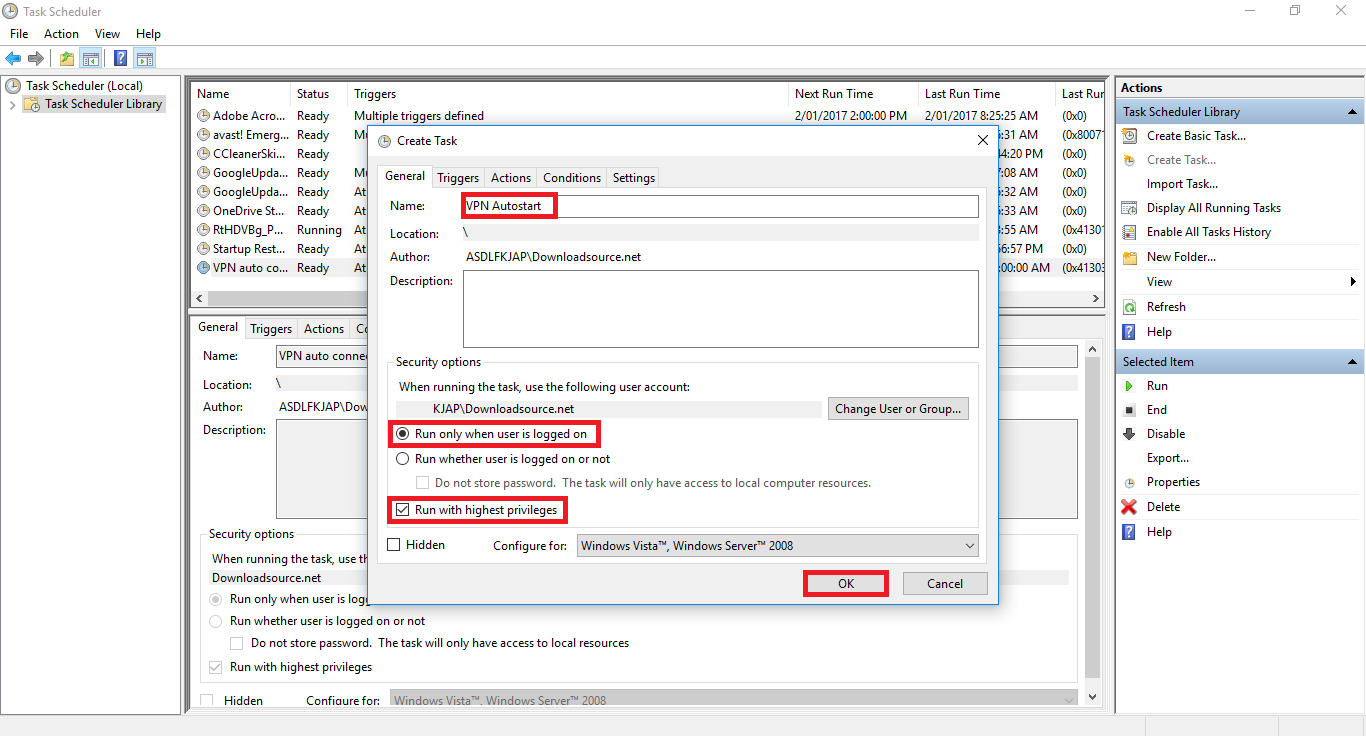
This part of the process might look a little complex but it is quite simple to use and setup. From the first tab General, choose a name for your task. Something easy to find is a good idea, I’m going to use VPN Autostart for this guide. Next, make sure you select the box Run only when user is logged on, also make sure to tick the box Run with highest privileges
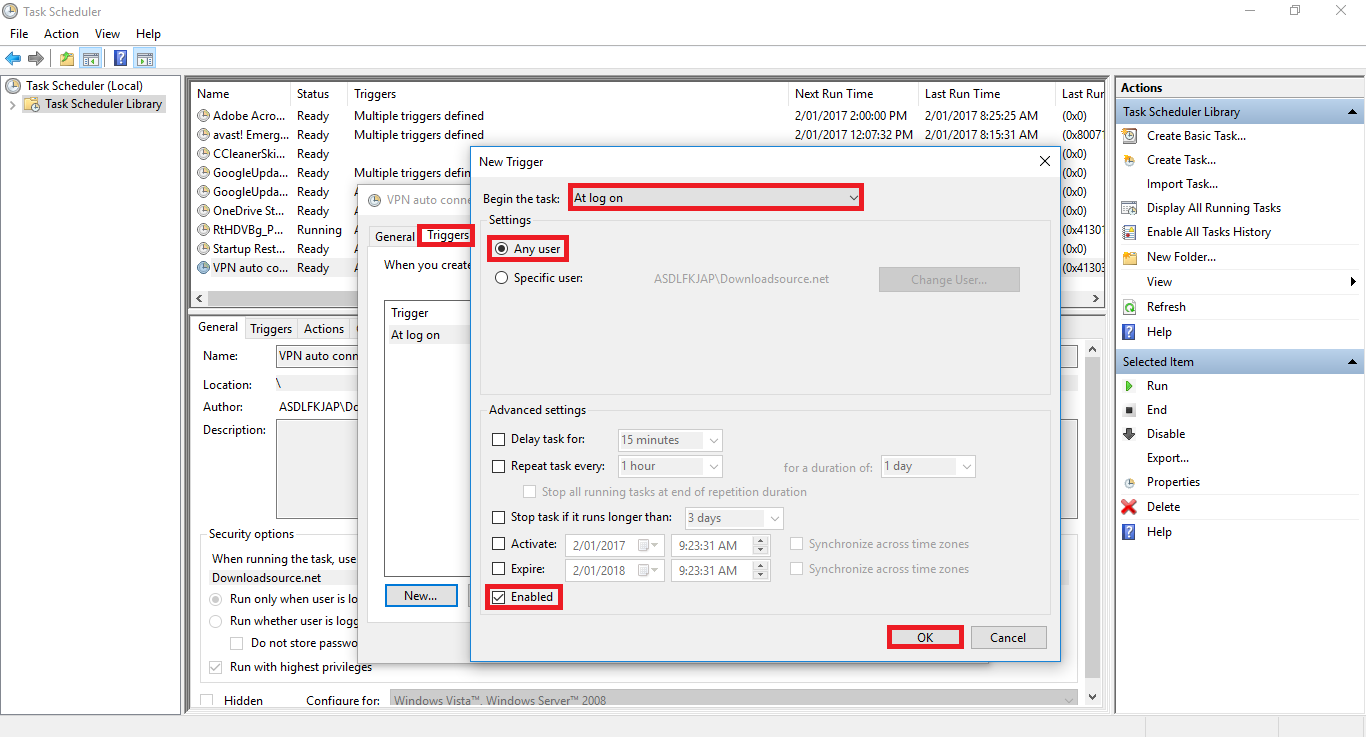
Now we can jump to the Triggers Tab and set up the next step. Here click New, then from the top drop down tab select At Log on and pick Any User. At the bottom make sure the box is ticked for Enable.
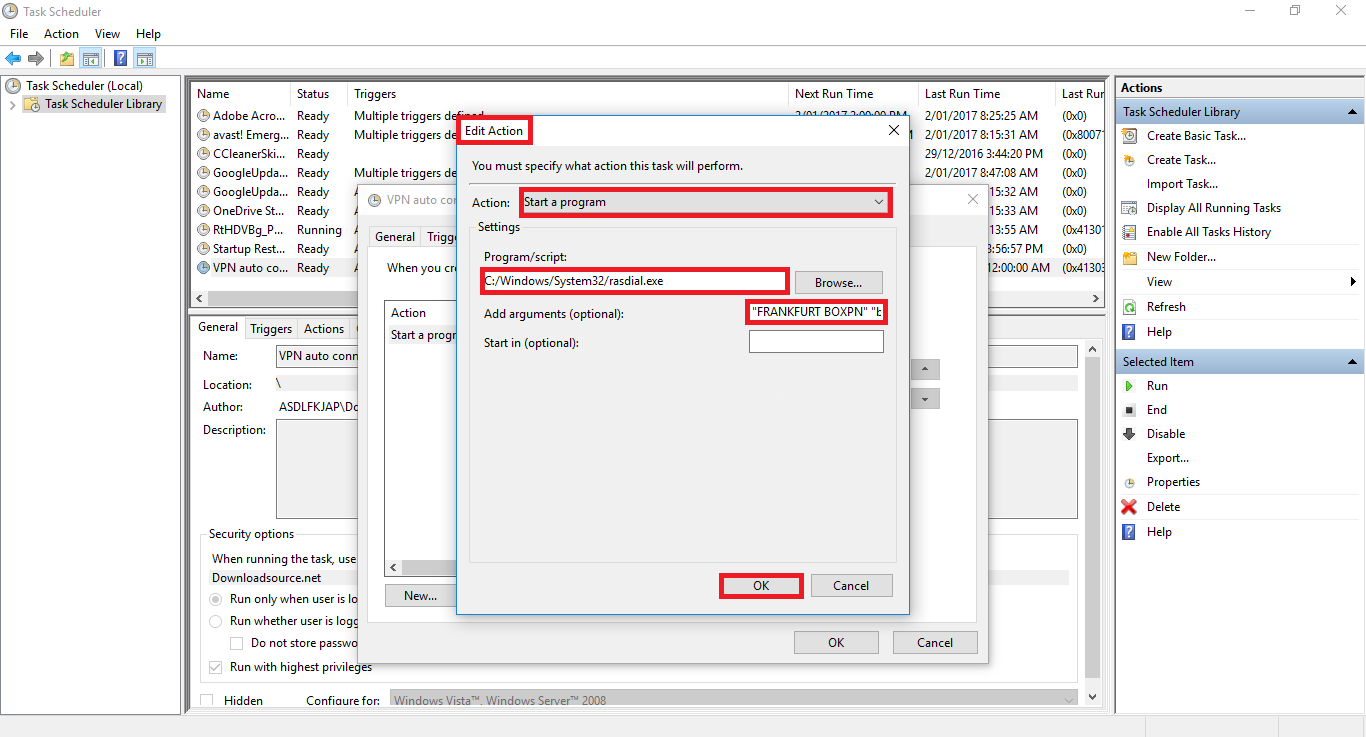
Next, we are jumping over to the Actions tab, which is where we are going to specify the task that is going to take place. Click New to make a new task and select Start a Program. In the Program/Script box enter the following text:
C:/Windows/System32/rasdial.exe
In Add arguments (optional) you will need to enter the exact name of your VPN, encased in quotes. Followed by your username and password in the same format. It should look something like this when you are done.
“FRANKFURT BOXPN” “bentcarrots” “1234567890”
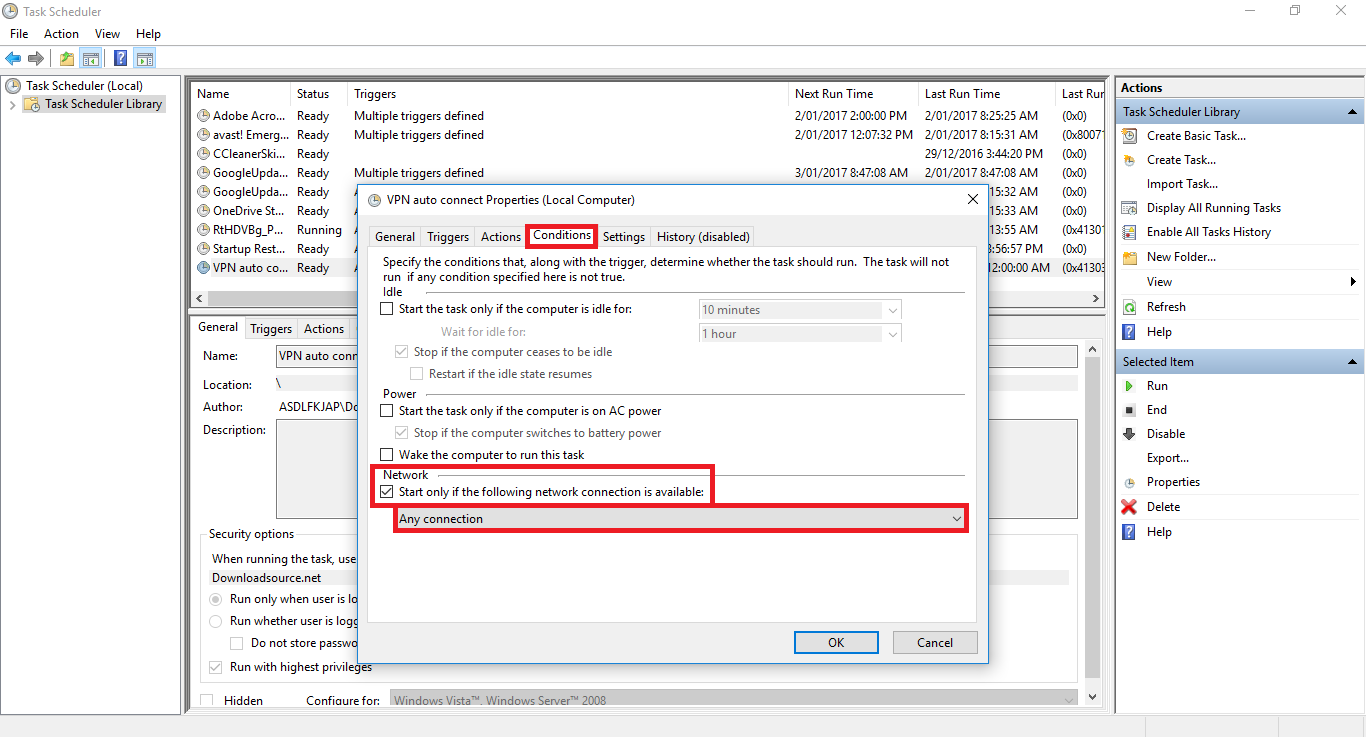
When you have entered the information, click Ok and move on to the next tab, Conditions. Here make sure the only box ticked is Start only if the following network connection is available and make sure it’s set to any connection
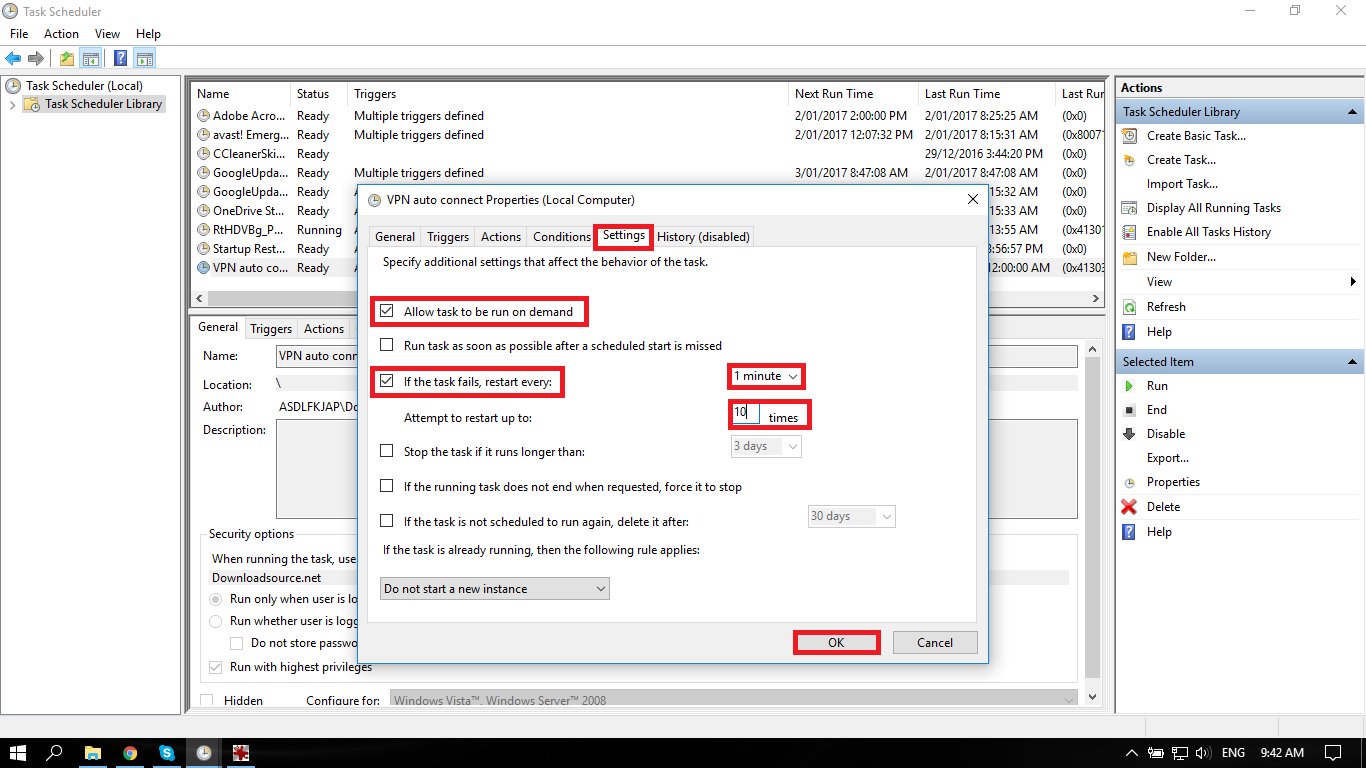
Moving on to the final tab, we will need to make changes in Settings, so make sure:
Allow task to be run on demand is enabled.
and
"If the task fails restart every" is set to 1 minute with an attempt to restart 10 times.
In order to make the final change and save, you will be prompted to enter your account login password. (Remember to use your password and not your pin number if you are using a Pin)
The task is now saved and you can restart your PC to see if everything has worked. On sign in, you should now see a Command Prompt window run for a few seconds (depending on how quick your VPN connection is to sign in to the server) Once that has passed, you will see your VPN connection running when you hover your mouse over the network/WiFi icon. If you wish to remove this task at any stage, just go back into the Task Scheduler, right-click on the task you made and select Delete.