If you have a printer connected to your Windows 11 computer that you are having major problems with, you may need to uninstall the drivers so that you can reinstall the printing from scratch and start on a fresh slate. Printers have traditionally been problematic on most versions of Windows, so follow along as we guide you through the process.

Table of Contents
Printing problems have been a major issue on Windows operating systems for a long time, there isn’t a single version of Windows that has mastered the art of printers and printing. So, as to be expected Windows 11 is no different, with most of the same problems from Windows 10 finding their way over to the new OS. Thankfully there are quite a few different things you can do to solve a range of different issues.
Uninstalling a printer and its driver on Windows 11 is a multi-stage process, it’s not as simple as right-clicking the driver and selecting uninstall. You also need to remove the driver package from your system. This will make sure that the next time you install your printer you will be doing so from a fresh, uncorrupted state. Although the first part of this process is quite easy and you probably already know how to do it, we’ll be going through it anyway.
How do you remove a printer driver and the printer driver package on Windows 11?
In order to remove a printer on Windows 11, you’ll need to do the following.
- First open Settings by pressing the Windows Key + I, then click Bluetooth & devices in the left-hand pane.
- Next, click Printers & scanners in the central pane and select the printer to open its properties window.
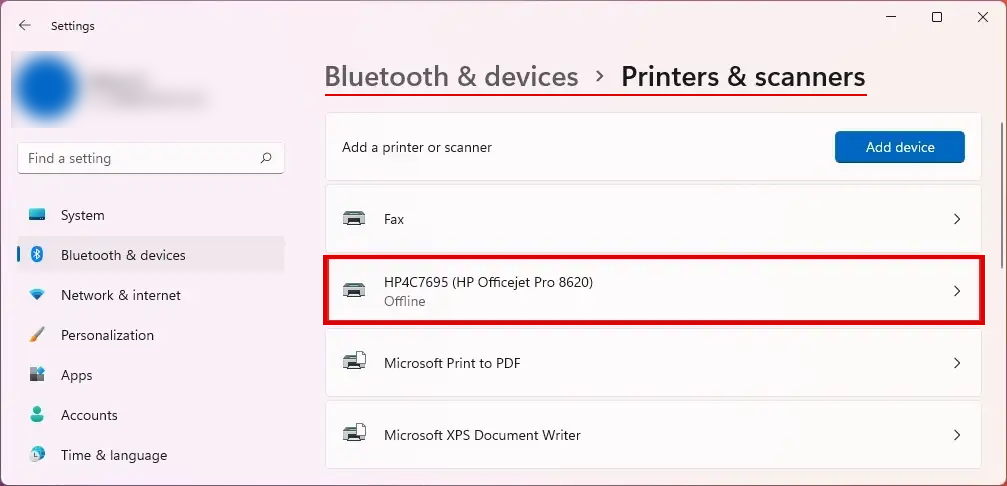
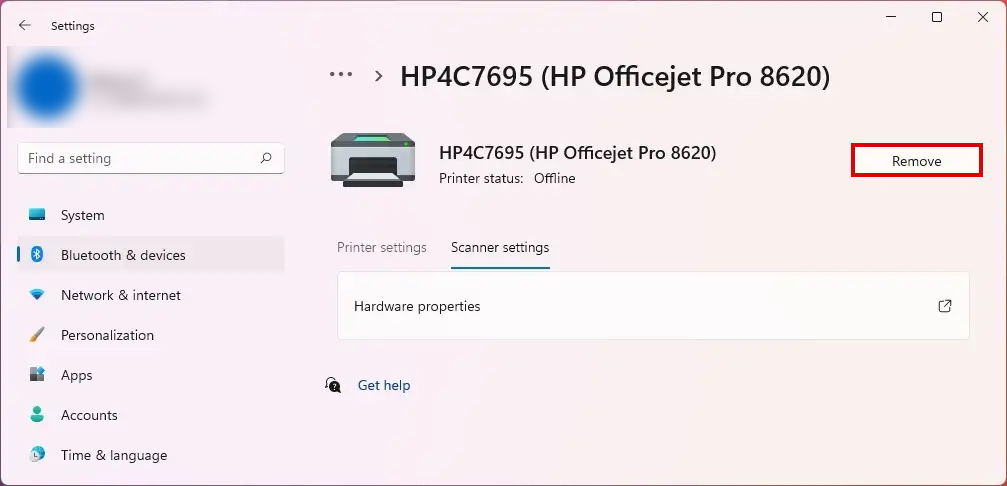
- Now click the Remove button over on the right, confirm the change.
That’s half the process done, you’ll now need to follow the next step to remove the remaining components from your computer. This isn’t compulsory but it will help with a clean install.
Delete printer driver using PowerShell on Windows 11.
The next part of the process is to use the PowerShell tool to uninstall the remaining components of the printer.
- Open the Start menu and search PowerShell, when it appears right-click on it and select Run as administrator.
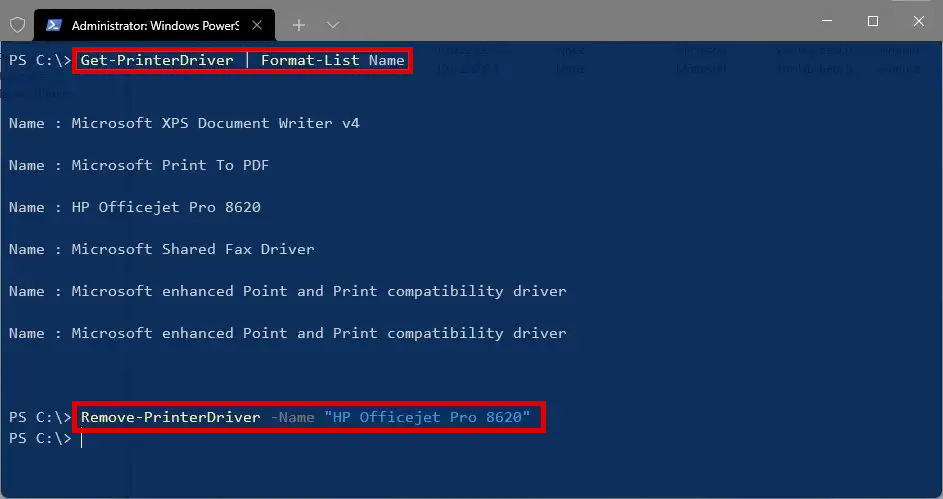
- Now type the following command to list all the print drivers installed on Windows 11 and press Enter.
Get-PrinterDriver | Format-List Name
- Now find your printer on the list then enter the following command:
Remove-PrinterDriver -Name "Your printer name here"
Note: The command should like something like the example below. Referencing my printer (3rd on the list)
Remove-PrinterDriver -Name "HP Officejet Pro 8620"
If you don’t see your printer listed after running the Get-PrinterDriver | Format-List Name everything is already removed and you are good to go with a clean install, just make sure you restart your computer before proceeding.
Installing your printer again after removing everything.
After you have followed all the steps shown above make sure you are using the newest possible printer driver. Simply download this from the manufacturer’s website and install it. Don’t let Windows 11 install a generic driver, this is where a lot of problems stem from.