Table of Contents
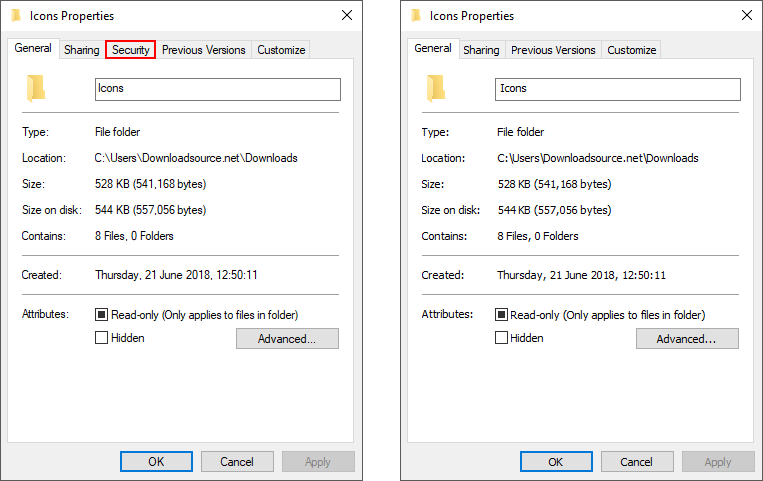
If you are currently in the process of making some security and permission changes to a shared computer in your household or workplace. This article will guide you through the process of hiding/removing the Security tab from folder and file properties on Windows 10. Without this tab, users will be vastly restricted when trying to make certain changes.
How to Help Plant Trees Using Your Internet Searches.
On Windows 10 having the ability to customize the level of restriction on accounts, files, folders, and permissions is a very important part of the operating system and something that Microsoft takes very seriously. For the most part, basic permissions, access levels, and security options can be tweaked and restricted by simply using a standard account over an admin account.
However, there are times when this level of access prevention isn’t enough and you may want to take some more advanced precautions. If you your main goal is to prevent access and keep permissions for specific files and folders locked, removing the Security tab from the Properties menu of all Windows items is one of the quickest and easiest ways to do so. It’s also one that a lot of standard users won’t be able to override. As with most restrictions, any users with advanced knowledge will still figure out how to restore the option.
How Do You Remove the Security Tab From File and Folder Properties on Windows?
As this process requires making some changes to the Windows registry, it’s best to create a system restore point in case you need to revert back to a working state if something goes wrong. If you’ve never made a system restore point before, do the following. Open the start menu, type Restore, then select Create a Restore Point when it appears on the list. In the new window that appears, click Create in the bottom right section of the screen, then follow the instructions given by Windows. After you have made a restore point the fun can begin.
How to Manually ‘Remove’ the Security Tab From Files and Folders on Windows 10.
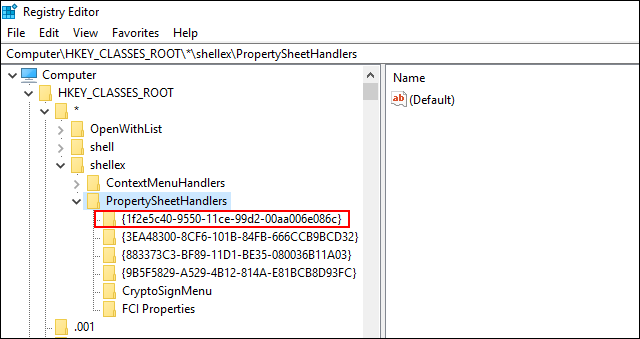
Open the Windows Registry Editor by pressing Windows Key + R, then type regedit into the Run tool text box and press Enter. When you have the tool open, navigate to the following three locations and remove the {1f2e5c40-9550-11ce-99d2-00aa006e086c} subkey (folder)
HKEY_CLASSES_ROOT\*\shellex\PropertySheetHandlers
HKEY_CLASSES_ROOT\Directory\shellex\PropertySheetHandlers
HKEY_CLASSES_ROOT\Drive\shellex\PropertySheetHandlers
Once done exit the registry editor and Sign out or Restart your computer. When you log back in, the Security tab will be missing from all properties windows. If you wish to restore the Security tab manually, simply replace the deleted key again.
How to Automatically ‘Add or Remove’ the Security Tab From Files and Folders on Windows 10.
If you prefer to use a simpler method, you can download the registry files below and run them to make the change in an instant.
Download Remove/Add Security Tab Registry Files. (Google Drive Download)
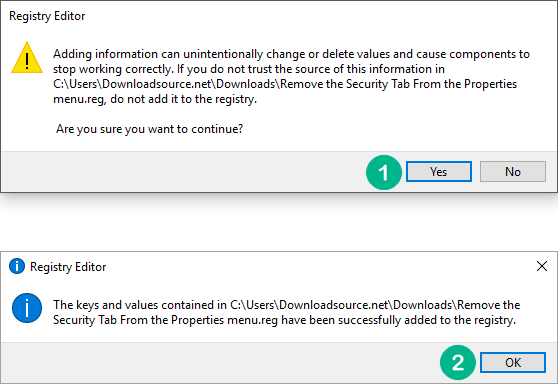
Once you have the files on your computer, simply double-click the one you wish to use, either Add the Security Tab to the Properties Menu to add the security tab (if you’ve previously removed it) or Remove the Security Tab From the Properties Menu to remove the security tab. You will have to accept two warnings and prompts in order for Windows to run the files. If something adverse happens (which is very unlikely), simply use your restore point and you’ll be back to your working state.
Once done exit the registry editor and Sign out or Restart your computer. When you log back in, the Security tab will be missing from all properties windows, just like the example shown below.