Table of Contents
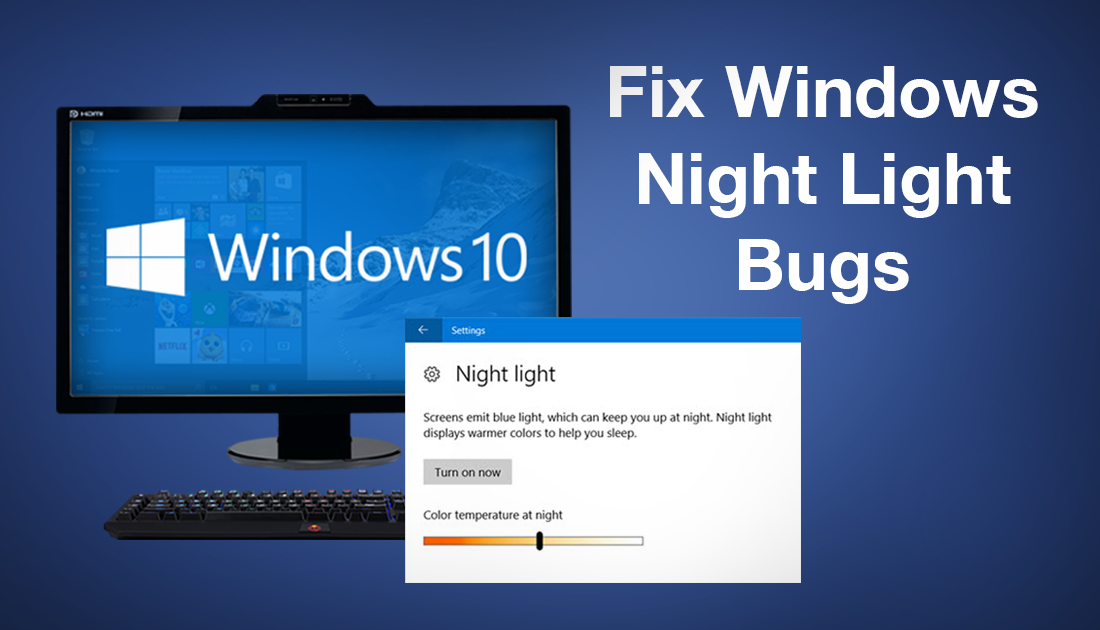
Night Mode or Night Light was recently added to Windows 10 in the last major update, the Windows 10 Creators Update. It is intended to change the colour range of your computer monitor's light, reducing eye strain to help you get a better night's sleep. The idea is great and it works very well most of the time, however, some users are reporting a bug in which Night Mode greys out or has colour loss. If you are suffering Night Light/Night Mode colour problems this guide will show you how to fix them.
The idea of night mode isn’t an entirely new thing, Apple and Android have offered a similar feature for quite some time. Its aim is to reduce eye strain and reduce blue light emission, which helps you get a better night sleep. Apart from Apple and Android, there are also plenty of third party Apps and Programs that allow you to use this feature. If you are looking for a workaround that doesn’t use the Window 10 based option, below is a guide you can follow.
How to Add Night Mode to Windows 10 (Third-party Alternative)
As we mentioned above, night light is now a standard feature on Windows 10 (so long as you have Creators or newer) and for the most part, it works very well. If however, you are experiencing any trouble with the feature, follow the steps below to reset night light and correct any weird colouring bugs.
Fix Windows 10 Night Light/Night Mode Color Bugs.
As the solution for Windows Night Light problems requires changes to the registry, it’s important that before starting these steps, you have a backup of your data, in case something goes wrong. You should also have a Restore Point set. If you aren’t 100% sure how to create a restore point, open the start menu, type Restore, then select Create a Restore Point when it shows on the list. From the new window that appears click Create in the bottom right section of the screen, then follow the instructions given by Windows. Once you have successfully made a restore point you can continue with the steps below.
First up, press the Windows Key + R to open the Run tool. In the run toolbox type regedit then press Enter. Confirm the registry popup with a Yes, then proceed to the following location in the registry editor Window:
HKEY_CURRENT_USER\Software\Microsoft\Windows\CurrentVersion\CloudStore\Store\Cache\DefaultAccount
(Cut and pasting it into the address bar will save you tons of time)
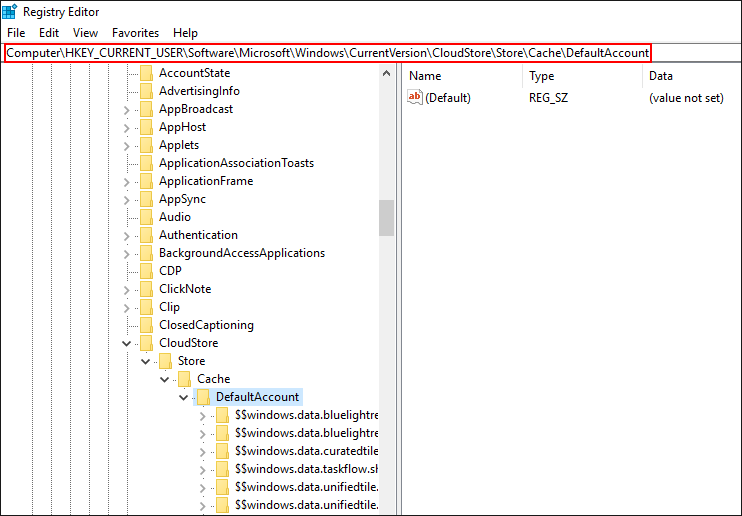
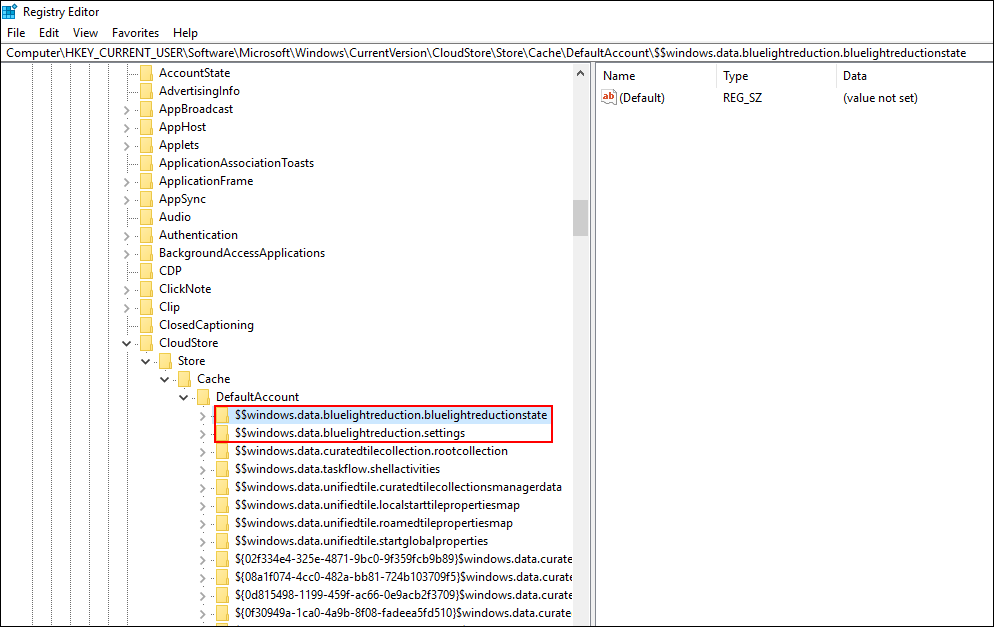
Inside the DefaultAccount key (folder), right-click and Delete the following two keys (folders):
$$windows.data.bluelightreduction.bluelightreductionstate
$$windows.data.bluelightreduction.settings
After you have deleted both of these keys (folders) Restart your computer. When your computer has rebooted, go back into the Settings menu and re-enable Night Light. Everything should now be reset back to default.
If you are still having Night Light colouring issues after resetting Night Light in the Windows registry, you should check to see if there are any updates available for your graphics drivers. If there aren’t any updates available, try a fresh reinstall of your graphics drivers. To find your driver's type Device Manager into the Start Menu, then select it from the options that appear. Next, select Display Adapters, choose your graphics hardware from the list, then finally right-click choose Uninstall Device. Once the driver is uninstalled restart your computer and Windows will automatically re-download the latest version when you log back in. Alternatively, you can visit your Graphics hardware manufacturer's website and download the latest drivers.