Table of Contents
If you have changed the ownership of a file, folder or drive on your Windows computer at some stage and are having trouble restoring its ownership back to TrustedInstaller. This guide will show you how to revert folder, file and drive ownership back to Windows TrustedInstaller.
How to Safely Remove 'Windows.old' and 'WindowsUpgrade' Folders From Windows.
Before we start, it’s important to understand exactly what TrustedInstaller is and why it’s an important part of Windows. TrustedInstaller is a specific user account that owns a vast assortment of Windows system files, most prominently located in the Program Files folder, Windows folder, and the Windows.old folder (for a period of time after updates) This account is used by the Windows Modules Installer service and is responsible for installing, modifying, and removing Windows updates, as well as an assortment of other Windows components/features. However, it is also in place to prevent you and malicious outside sources from renaming, deleting or changing important system files and folders.
On odd occasions, it is necessary to make changes to file, folder and drive ownership on Windows. Situations such as adding exceptions to the Windows Hosts file, moving files to another location or deleting them altogether. In situations like this, you are required to take ownership away from TrustedInstaller, transferring it to your own administrator name.
How to Change File, Folder and Drive Permissions in Windows.
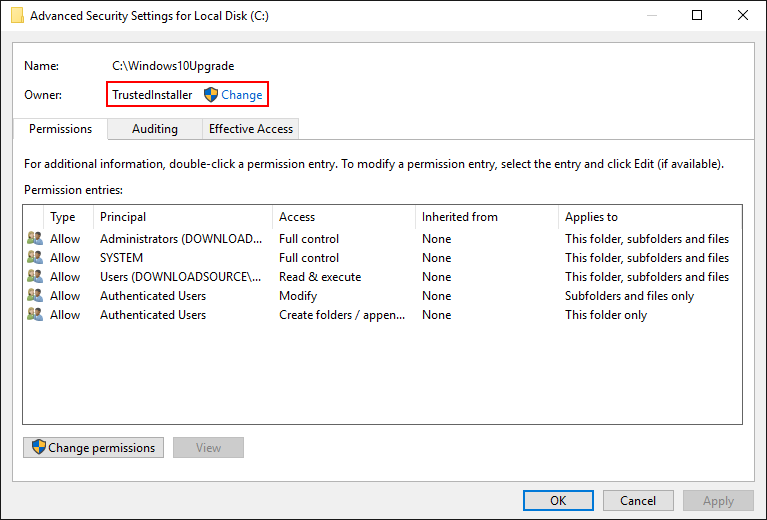
If on the other hand, you need to restore folder permissions to TrustedInstaller, the process is a little more difficult, especially since you can’t just find TrustedInstaller in the long list of users and administrators inside the folder permissions section of Windows. Instead, you will need to add TrustedInstaller folder permissions a slightly different way.
How to Change Ownership Back to TrusterInstaller on Windows. (Files, Folders, Drives)
To change the owner of a file, folder or drive back to TrustedInstaller, you will first need to make sure you have administrator rights. (If you are the sole user or your system you will have admin rights by default) When you are sure you have admin rights, find the item you wish to change ownership for, right-click on it, select Properties then finally change to the Security tab.
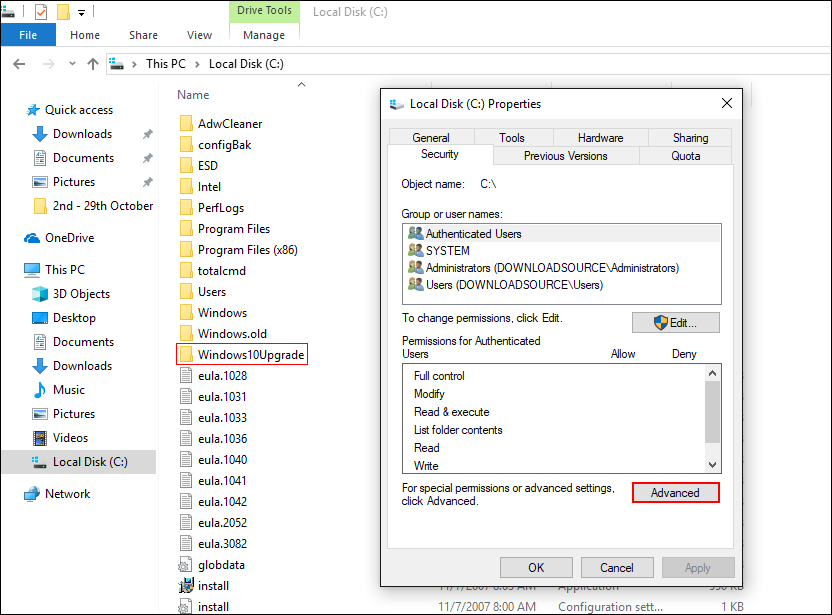
Inside the Security tab, click Advanced at the bottom of the Window. At the top of this page, you will see the current owners name with a blue link next to it called Change, which you will need to click.
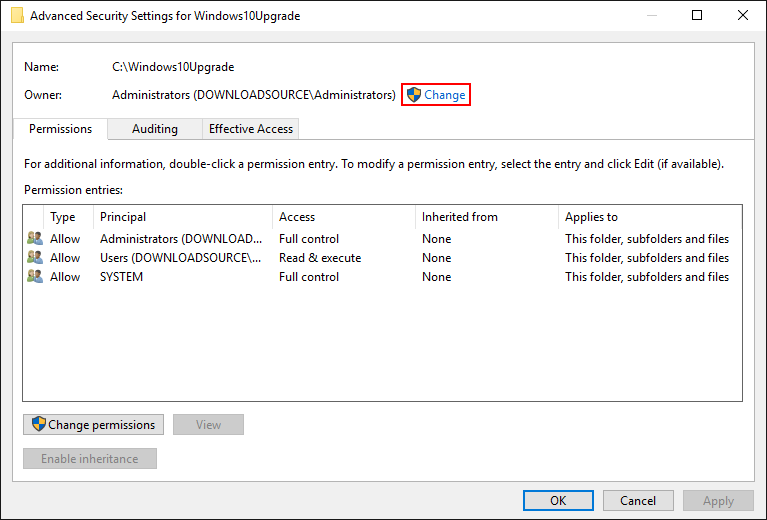
In this window, type the following text into the Enter object name to select box.
NT SERVICE\TrustedInstaller
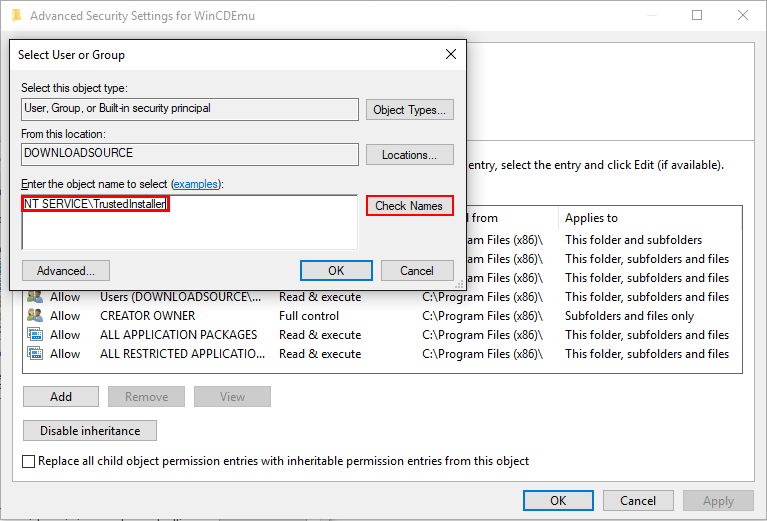
Once you have entered the text, click Check Names. If you have entered it correctly and the file can actually be changed to TrustedInstaller, the text you entered will update and be underlined. Now all you have to do is click Ok, accept the warning message and you’re done.

Just be aware that not all files, folders and drives can be changed to TrustedInstaller, you will know when you come across one, as clicking Check Names will display an error, preventing you from continuing.