YouTube is one of the most popular websites, which have been used by almost all of us. While some users visit Youtube in order to watch the videos, someone may want to create his own channel, upload a video and gain popularity. This guide offers a walkthrough to help beginners upload their first video.
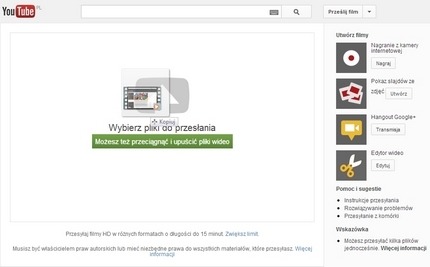
To get started, you'll need to have a Google account if you don't already. To transfer the video, just click "Upload Video" button in the main window, and then select or drag the file to the "Select files to upload". The service supports various formats including . Mov,. Mpeg4. Avi,. Wmv,. Mpegps. Flv, .3 gpp and. Webm. If the loaded video is recorded in HD and FullHD it will be available for viewing in these resolutions as well.
Then you will be redirected to a new page where you wait until the video is uploaded and processed.
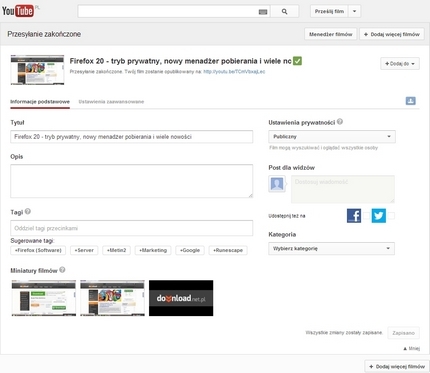
Later on, add some details about the video. The more brief description the better popularity of the movie and as a consequence the whole channel. It is worth giving them more time, so that our clips received as top positions in search engines.
Title – the main name of our video. It has to be attractive for the recievers.
Descritpion – brief description of the title allows other users to learn more information about the video. Keep in mind to use important search keyboards.
Tags –includes all the important keywords from our video. Accurate tagged video is of great importannce when it comes to popularity. It is worth noting, to create a group of tags which describe our channel, that we will throw to each video.
Post to your subscribers- this option is available if you choose the Private video, and it is all about the cluster of activities in the channel
Privacy settings–there are three options to choose from, namley Public,Unlisted and Private.The former can be searched for and viewed by anyone. The second option, is only accessible by those who know the video link. Whereas the latter can be accessed only by visitors we invite.
Advanced options
Let's go back to the main window where we add the videos. In addition to the " Basic information", there are also "Advanced Settings" in which we can enable or disable comments, copyright, date of recording, etc. If you want to gain more popularity, it is recommended to allow comments. Alter the other options adjust individually.
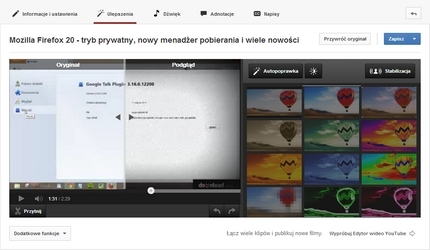
Using the video editor
The inclusion of Video Editor is very useful, as it helps cut the videos into Youtube friendly sizes, add annotations and other notes to the videos. The number of included options is really impressive. It allows users to make minor edits to videos they've uploaded, add various effects, such as HDR, sepia, pixelization, automatic lighting and color corrections, or even remove camera shakes. With the use of the editor we can change the audio track and improve the description of the clip. There are also some extra features, including the ability to blur the faces. The tool is available under the video manager.
Creating clips out of photos
With the use of YouTube tools we can stitch together several photos in order to create a slideshow. This option is available while you add a new video. You can create a slideshow with the photos from the disc, or your Google account. Once you select the images, organize them the way you like, add music to them, using simple or advanced editor, send the video and voilà.
