Photo and image effects are some of the best ways to make your content pop on social media services like Facebook, Instagram, Twitter, Minds, etc. So let us introduce you to one of the coolest modern effects before it starts to go viral, Triangulation is the new Fractius effect! Cool right? Let us know what you think!

Related: Four of the Best Free Photo Filter Apps for Android and iOS Devices.
Unique photo effects are some of the coolest ways to increase your follower account on social media and create a great discussion point for your fan base. Traditionally a lot of the coolest effects people come across usually take quite a bit of work in software like photoshop to pull off. However every now and then something comes along that looks amazing and doesn’t eat into your free time or your wallet.
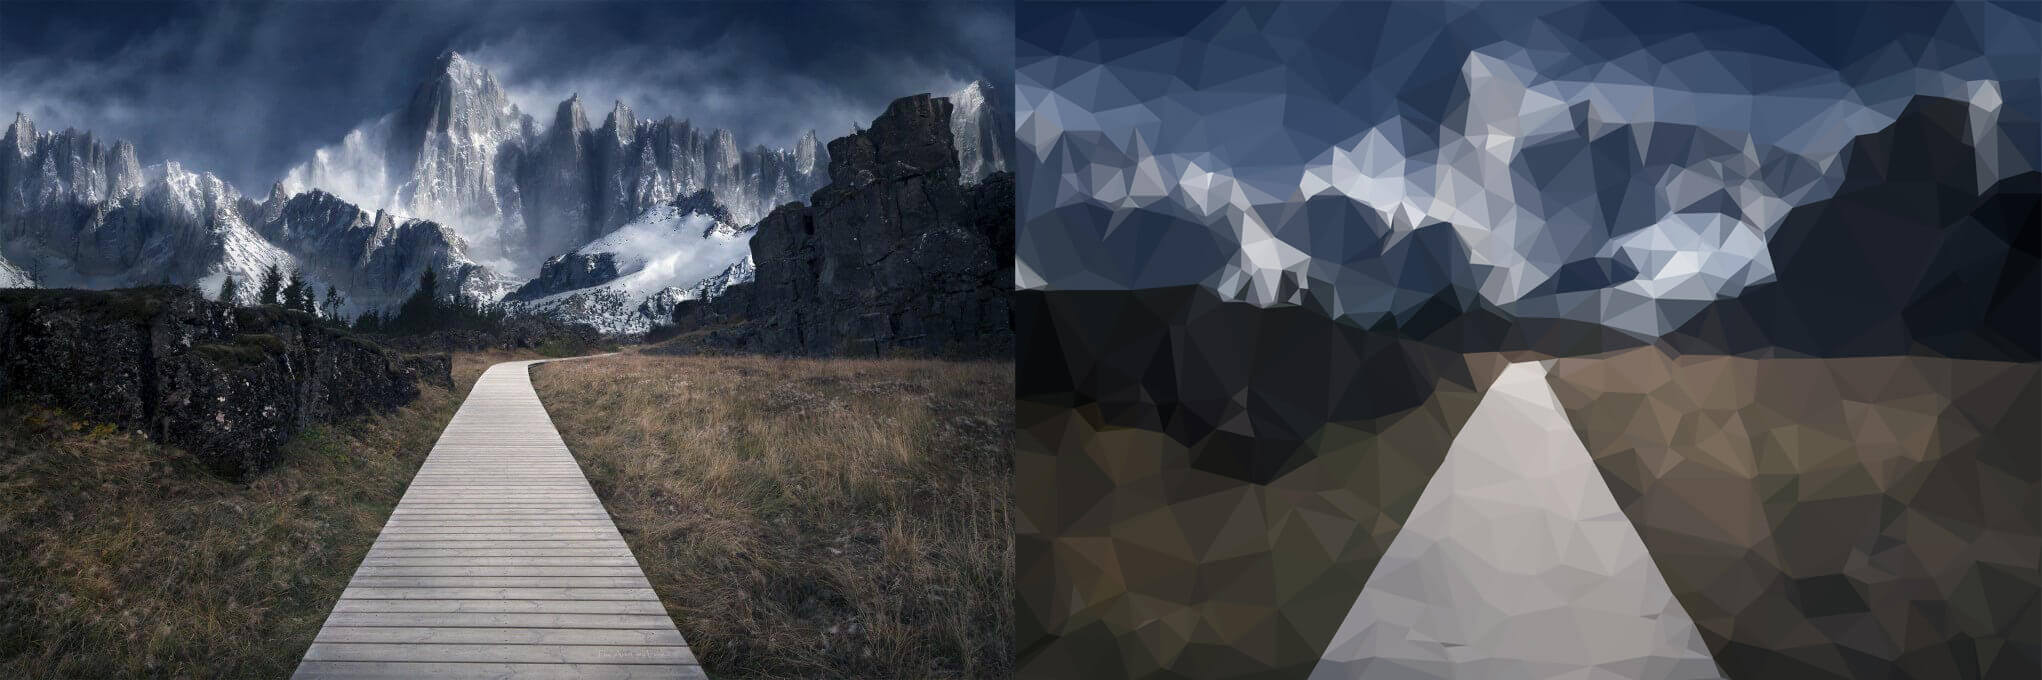
Triangulation effects are some of the coolest ways to create art out of images that may seem mundane. Check out the image in our cover photo as an example of what you can do with a simple image using a Triangulation effect. Traditionally creating an effect like this would take quite a long time to pull off in photoshop without special plug-ins which often cost more to purchase than the amount of use you’ll get out of them.
So what’s the alternative? Well until a Triangulation effect is added to one of the global apps like Facebook, or Instagram, you’ll need to use a tiny program called Triangula. The tool is available on Windows, macOS, and Linux, so you’ve got plenty of options where you can use it.
How do you create Triangulation effects on photos and images? Turn any image into Triangula art.
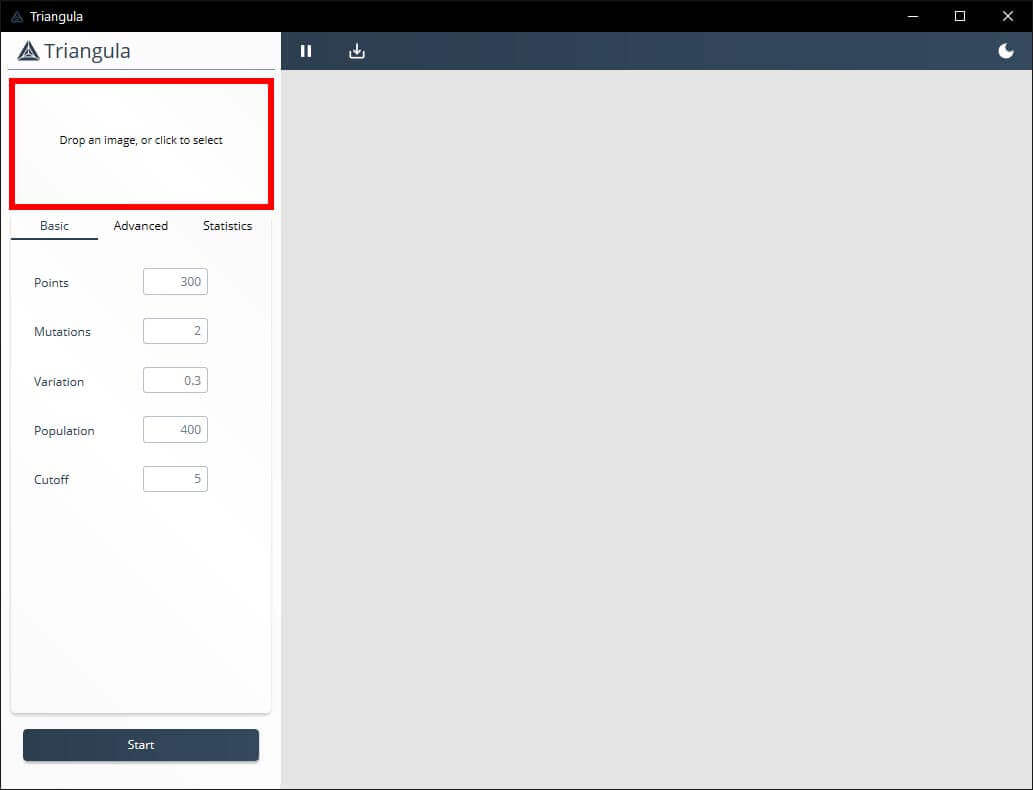
To begin, you’ll need to download Triangula from GitHub, then extract it and open it. As it’s a portable tool, you won’t need to install it on your computer to start using it. There is also a dark mode option you can switch to in the top right-hand corner if you want to use it.
Note: You’ll only be able to upload jpg files and get .png or .svg files in return.
- Once you have Triangula open, upload an image using the upload option in the top left-hand corner. Once your image is visible, use the options in the Basic tab to customise how you want your Triangulated image to generate. (You’ll want to experiment a fair bit with this.
- Now that you have your settings ready to go, click Start at the bottom of the screen and your image will start being generated. This seems to be an endless process so click the pause option whenever you feel the image looks just right. (I’ve let it run for 30 mins and it doesn’t seem to stop, it keeps randomising the image)
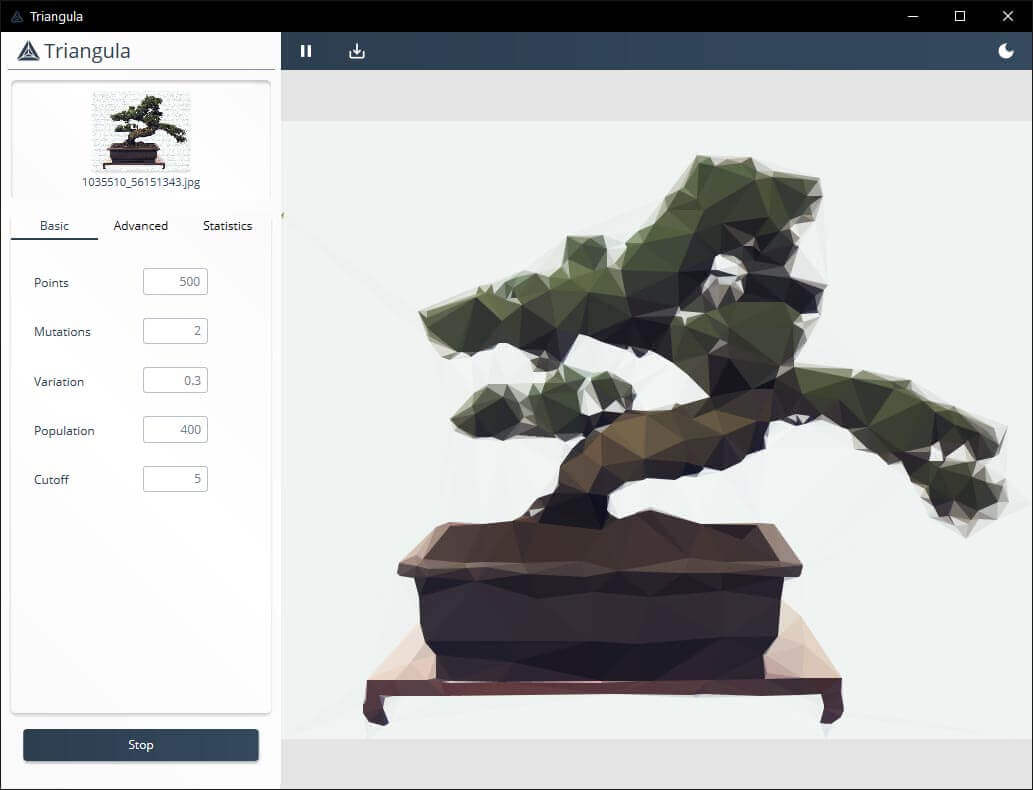
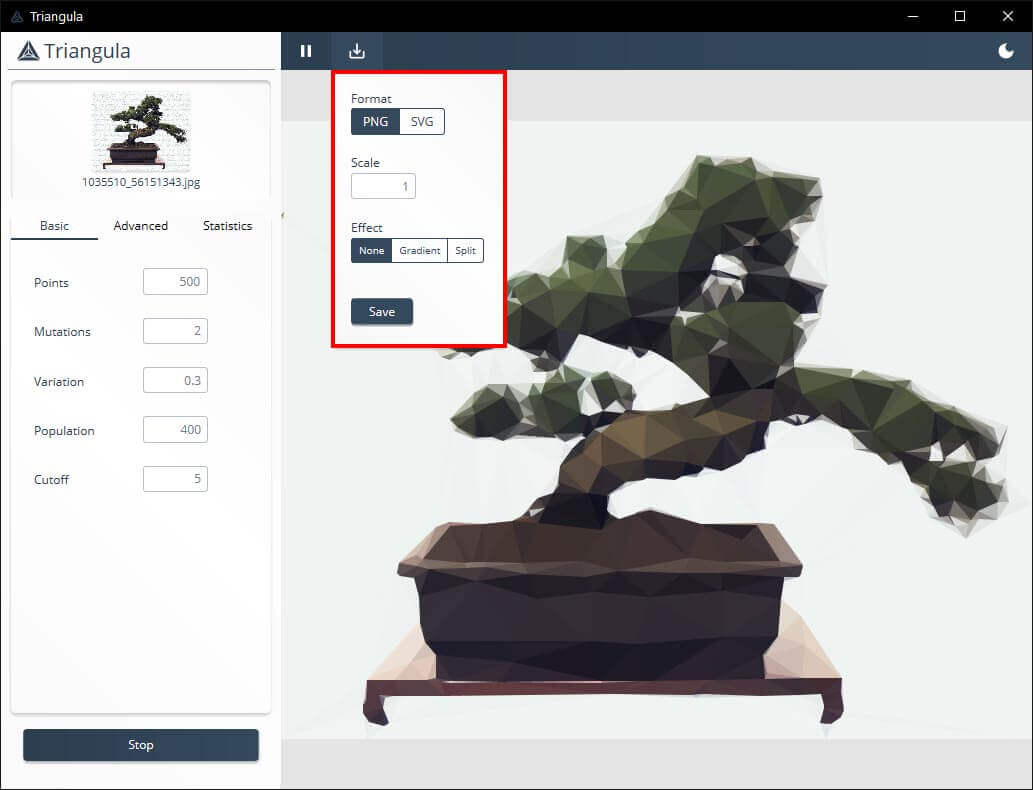
- To save an image click the Download icon at the top of the screen, then select the file format and other parameters that work for you. For some reason the saved images don’t generate thumbnails so don’t be alarmed if you see they are just blank looking files, they still open fine.
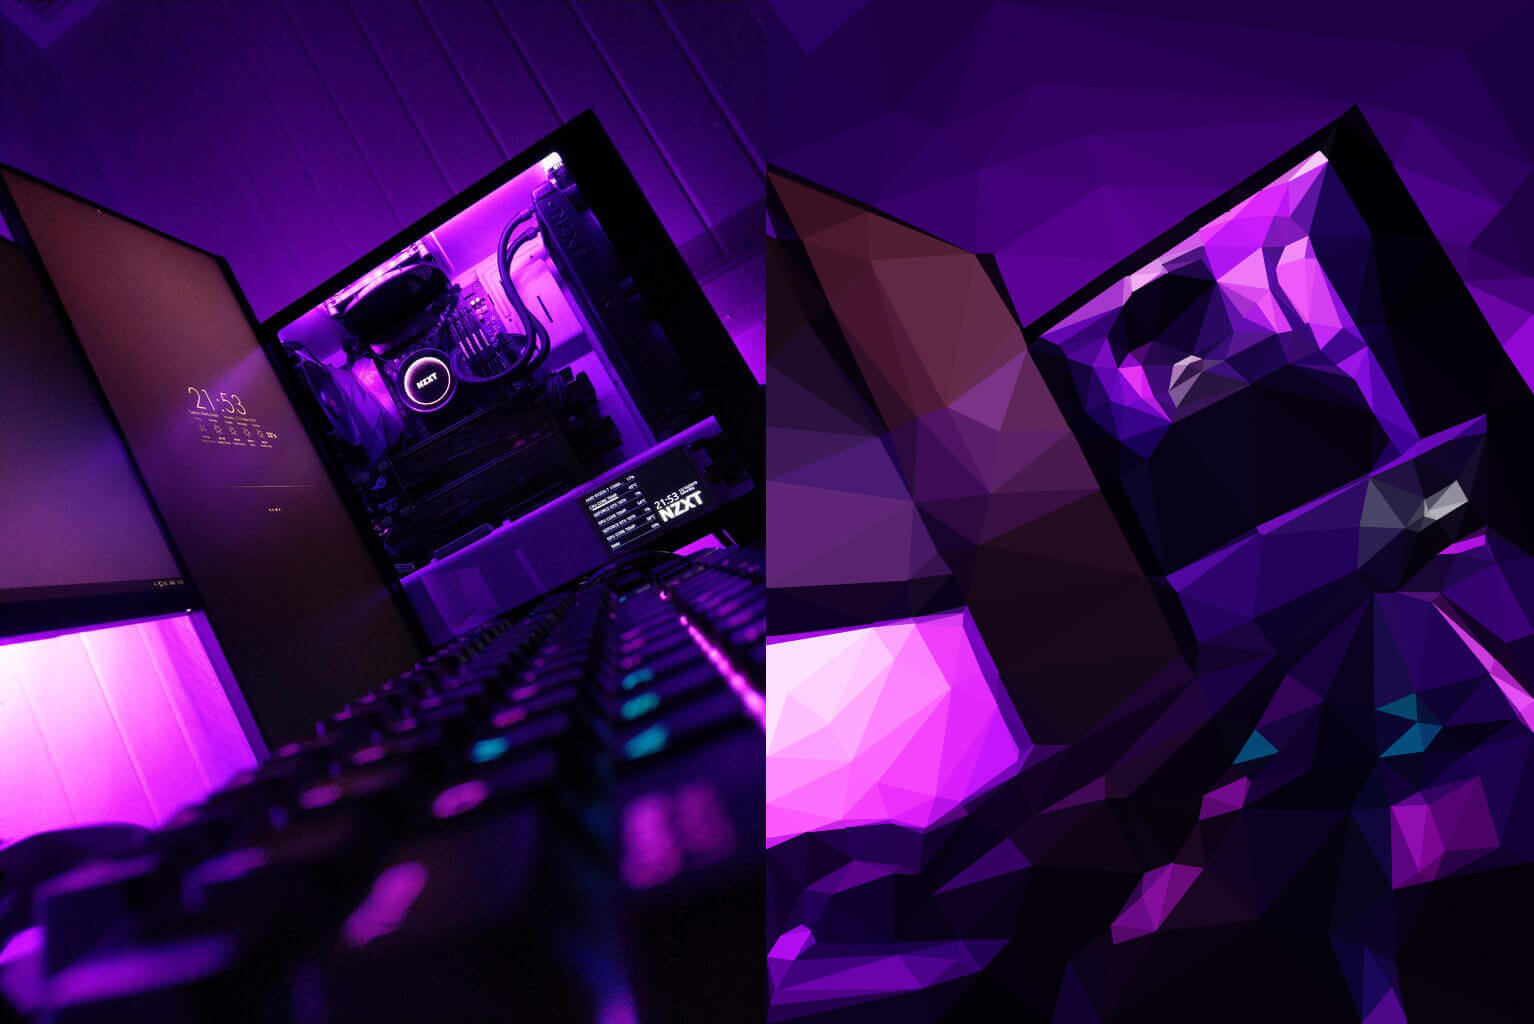
After generating a few images, I’ve found that the more points you add, the more detailed the image will be generated. However, you’ll want to mess around with all of the settings as it changes quite a lot depending on the style and colours of the original image. I find that items and objects seem to look better than landscapes etc as landscapes tend to just turn into a weird mass of coloured shapes. As you can see in the test image comparisons below.