If you are looking for a quick and easy way to add one-word-at-a-time subtitles to your TikTok, Instagram, Facebook, or YouTube, videos using Davinci Resolve. This article will show you how to quickly and easily add them and customise them to get the exact look that you want. The entire process is super quick, easy and highly customisable.

Related: How to Fix Davinci Resolve error: CRITICAL_QUITE: GPU Initialization Failed.
If you use TikTok, Instagram, Facebook, YouTube or another platform you will have undoubtedly seen videos with fast-paced single-worded subtitles playing across the screen. While these used to be super time-consuming to create manually advances in software and AI have made creating and using them super simple. They are also highly customisable, change the font, colour, position, timing, text, etc.
While there are tons of different online tools you can use to create One-Word-at-a-Time Video Subtitles this article is going to show you how to add them to content using Davinci Resolve. You will need the studio version of Davinci Resolve to do this though. However, it’s worth upgrading to if you haven’t already.
How do you make One-Word-at-a-Time Video Subtitles in Davinic Resolve?
To begin, make sure you are using the latest version of Davinci Resolve Studio. At least version 18.5 but newer is always better in this case.
- Next, open Davinci and a project that you want to add one word at a time subtitles too.
- If you haven’t already got an audio track in your project add one.
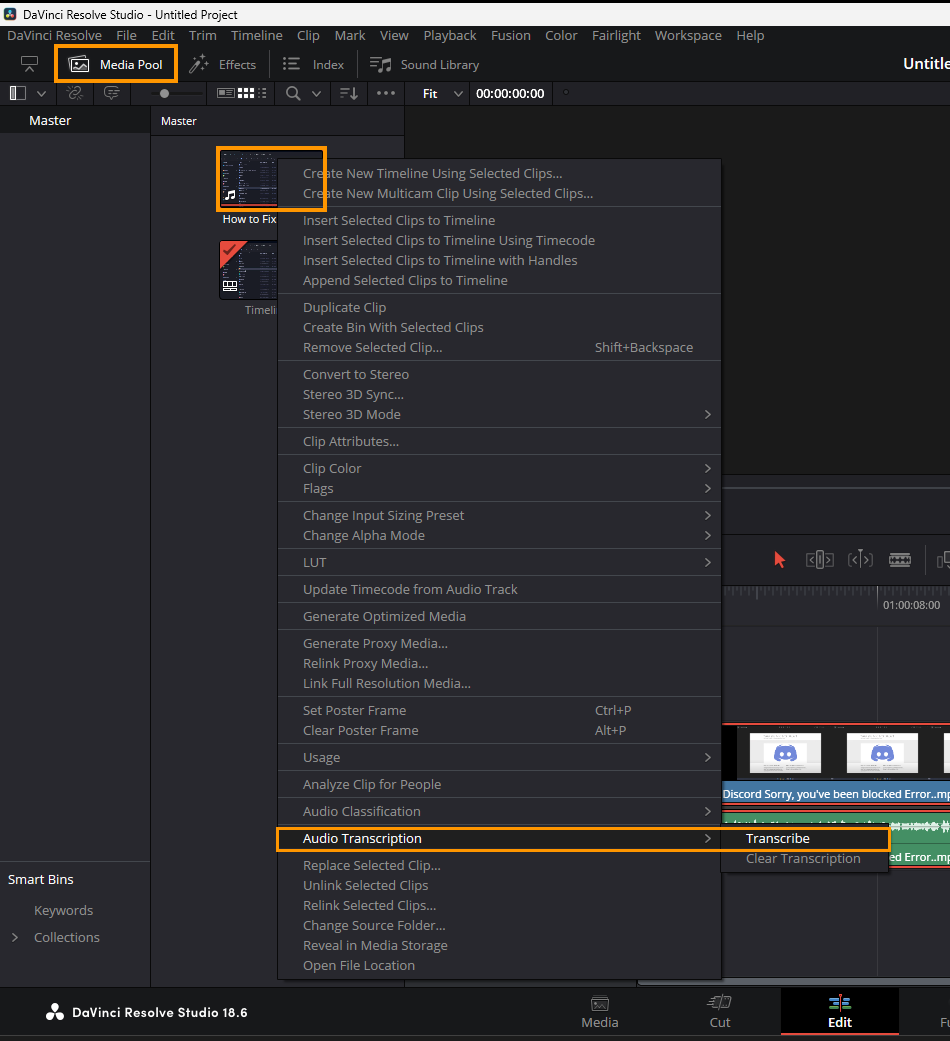
- Now go up to the Media Pool and right-click on the file that contains the audio track you want to add subtitles for. Next, select Audio Transcription.
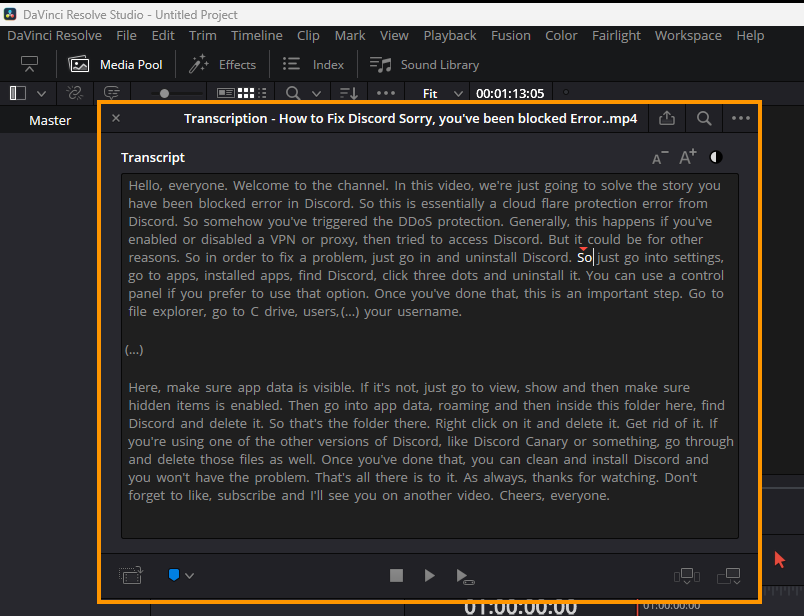
- This will take a little bit of time (depending on your hardware) to generate a full-text script of your audio track. You can close this window using the X in the top left-hand corner. We don't need to use it.
Note: If you want to delete anything simply select it and delete it. This will remove that section of video and audio from your clip.
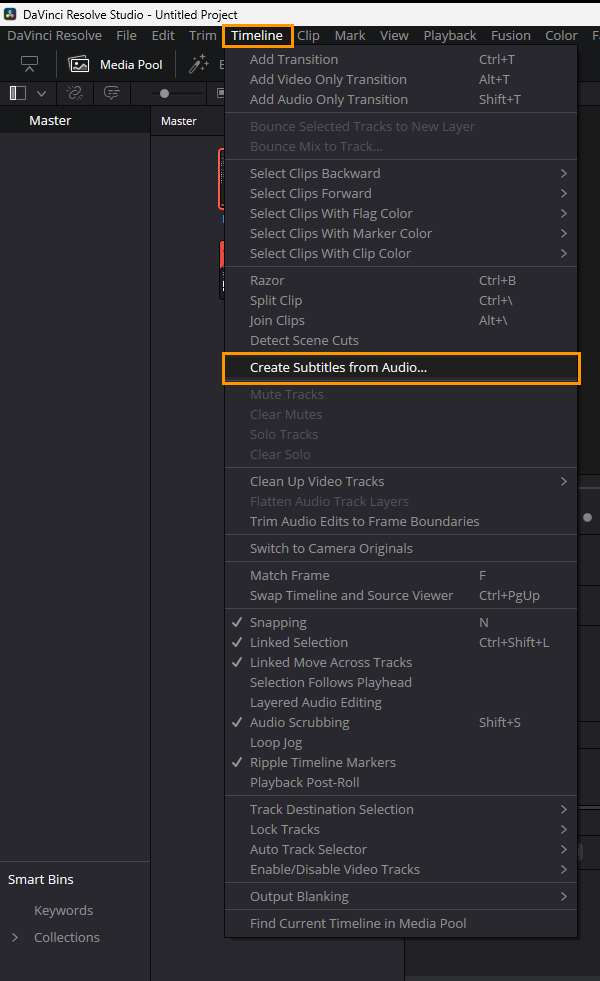
- With the audio track analysed, you can now create a subtitle track for your video. To do this click Timeline > Create Subtitles from audio.
- A small window will now appear with a short list of customisable options. What you choose here is important as it will define how the subtitle track is displayed. For one word at a time subtitles in Davinci Resolve you will need to set Maximum to 1 and Lines to Single.
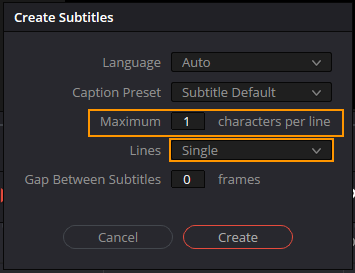
This will force Davinci to create a subtitle track with single-word subtitles. Every so often it will have to show more than one word though, this is unavoidable based on timing. If it doesn’t do this everything will be out of sync.
How do you Customise One-Word-at-a-Time Video Subtitles in Davinic Resolve?
Now that you have a one-word-at-a-time subtitle track it’s time to customise what the track looks like.
- First, select the subtitle track in your Timeline.
- Next, make sure that the Inspector is visible in the top right-hand corner of the interface.
- Now make sure Video is selected and choose Track.
- This will open the subtitle customisation area where you can customise your subtitle track however you like. I won’t explain every single option here as they are pretty straightforward. Just keep in mind that the changes you make will affect the entire subtitle track.

Note: You can also delete the subtitle track from certain parts of the video if you don’t need to show subtitles for a certain section. Simply select the section of the subtitle in the Timeline and press Backspace to remove it.
How do you Export video from Davinci Resolve with a hardcoded Subtitle Track? How to burn subtitles into a video using Davinci Resolve.
To export a project in Davinci Resolve with subtitles burnt into the video you will need to do the following.
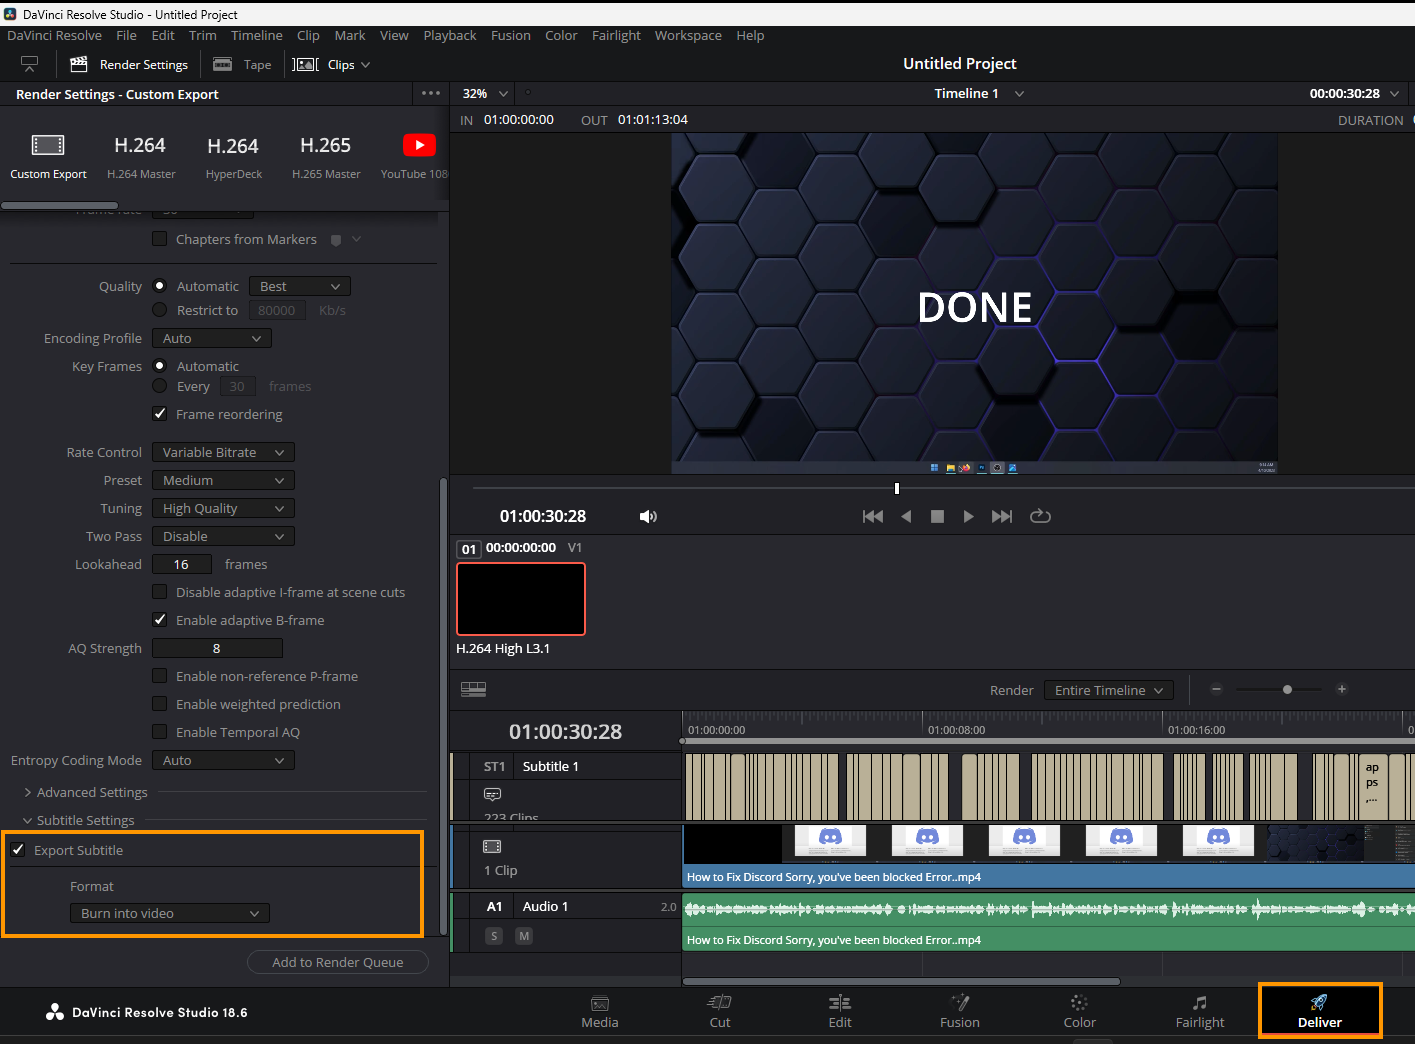
- From the Deliver tab configure your export settings as you normally do, then scroll to the very bottom of the list and expand Subtitle Settings.
- Here choose Export Subtitles and choose Burn into video. Then click Add to Render queue.
- Now simply export your project as you normally would and it will have hardcoded one word at a time subtitles.