By default Windows 10 and Android have pretty decent file-sharing capabilities, however, there are still a lot of lacking aspects to the system. Thankfully it is possible to improve on this system dramatically and enable full cross device file sharing and sync. If you set this system up correctly, you can basically create your own cloud storage system with very little cost. So let’s get started!

Related: How to Backup Google Authenticator. (Backup Google 2FA)
Windows 10 and Android work very well together natively and don’t necessarily require a ton of different programs and apps to enable basic tasks like file sharing and screen mirroring (among lots of others). That said! There are quite a few different ways you can improve on the cross-device and ecosystem environment shared between Android and Window.
In the past, we’ve covered sharing and controlling your Android device from Windows using SCRCPY and streaming audio from your Android device to Windows using SNDCPY which have both proven to be super popular and invaluable. So in keeping with tradition, this guide will be focusing on another really useful and quite important cooperative feature to have enabled between Windows 10 and Android. The ability to share and sync files wirelessly between all your devices. If used correctly, this has the potential to be set up as a personal cloud storage system.
To begin, you’ll need a couple of things. First, you’ll need a Windows 10 PC, an Android device and a tool called Resilio Sync. With these three things, you’ll be able to set up a system that syncs any content you choose between all devices for free. Although this sounds no better than OneDrive, Google Backup and Sync, DropBox, etc. It is entirely free and fully controlled by you.
For instance, if you have an old Android phone in a drawer that you never use with an SD card slot, you can essentially whack an SD card in it and set it up as an always-connected cloud storage device for everything else on your network.
How to set up full Android to Windows file sync using Resilio Sync.
- To start this process download and install the Resilio Sync software on your Windows 10 computer. When you install it just leave the additional options as default. Though you can disable the Start Resilio Sync when Windows starts if you like.
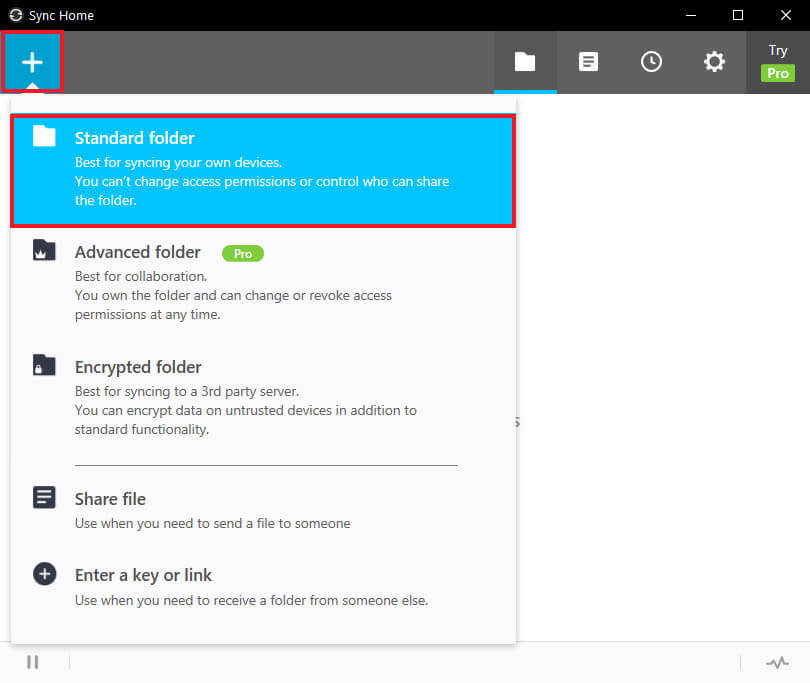
- Once you have installed Resilio Sync, open it and give yourself a name and accept the two agreements at the bottom of the window. Then click Get Started. Next, click the Plus icon in the top left-hand corner of the window and choose one of the following options. For the purpose of this guide, we’ll be using the Standard Folder option.
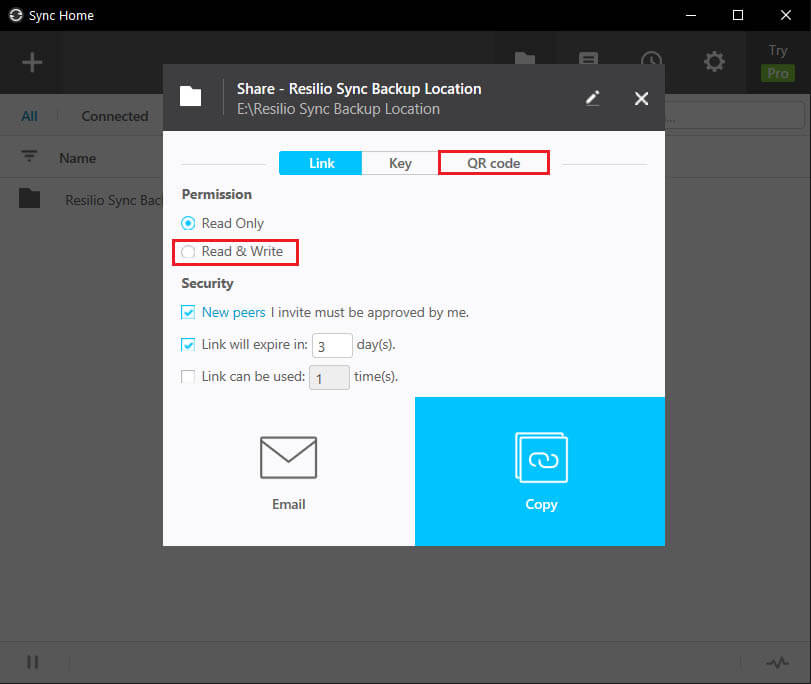
- Once you have selected a folder, configure the access options as you desire. Just make sure you make it Read & Write if you want to be able to add and remove content from it. We'll be using the QR code option shortly, so note where it is.
- At the top of this screen, you will see three options: Link, Key, QR Code. These are how you share access with other devices. If you want to grant other PCs access to your folder/s use Key or Link. For Android devices use the QR code option.
- Now that you have the Windows side of things set up, grab your Android device and install Resilio Sync from the Google Play Store. Once you have installed it, open it and do the following.
- After you’ve watched or skipped the tour (your choice) give your device a name then decide if you are going to allow mobile data sync. This is an important step you don’t want to burn through all your mobile data syncing data constantly. Personally, I’ve said No. After you have decided tap Done in the top right-hand corner.
- Next, allow access to storage items and you’ll be taken to the next screen where you have several different options at your disposal. Create a folder then we'll link it to Windows in the next step. You can link it to another Android device also if you wish.

Note: If you don’t allow access you won’t be able to use the service and you will get a read/write permissions access error.
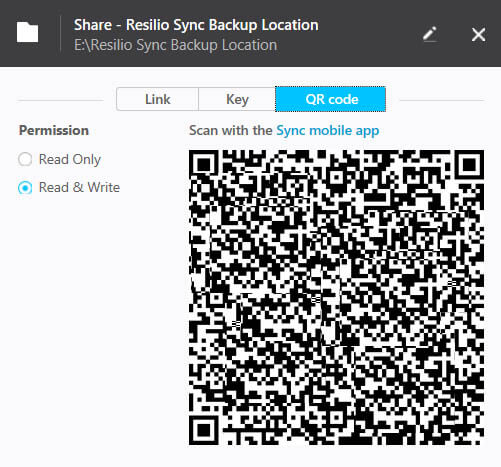
- To link your Windows folder, go back to Resilio on your computer and click QR Code. If you have closed the window already, you can right-click the folder and choose Share to bring it back up. As soon as you have scanned the QR code, you will have to accept a notification within the Resilio Sync app to confirm access.
That’s the final step, you’ve linked your devices to be fully synced with each other. If you have given read and write access you’ll be able to add and remove files from the folders regardless of the device you are using. Now, whenever you place content in the folders you've created on each device, you'll be able to view, edit and add or delete them as you please. Just remember that if you have read/write enabled making a change on one device will make the change across all of them.
How do you fix Resilio read-write permissions error?
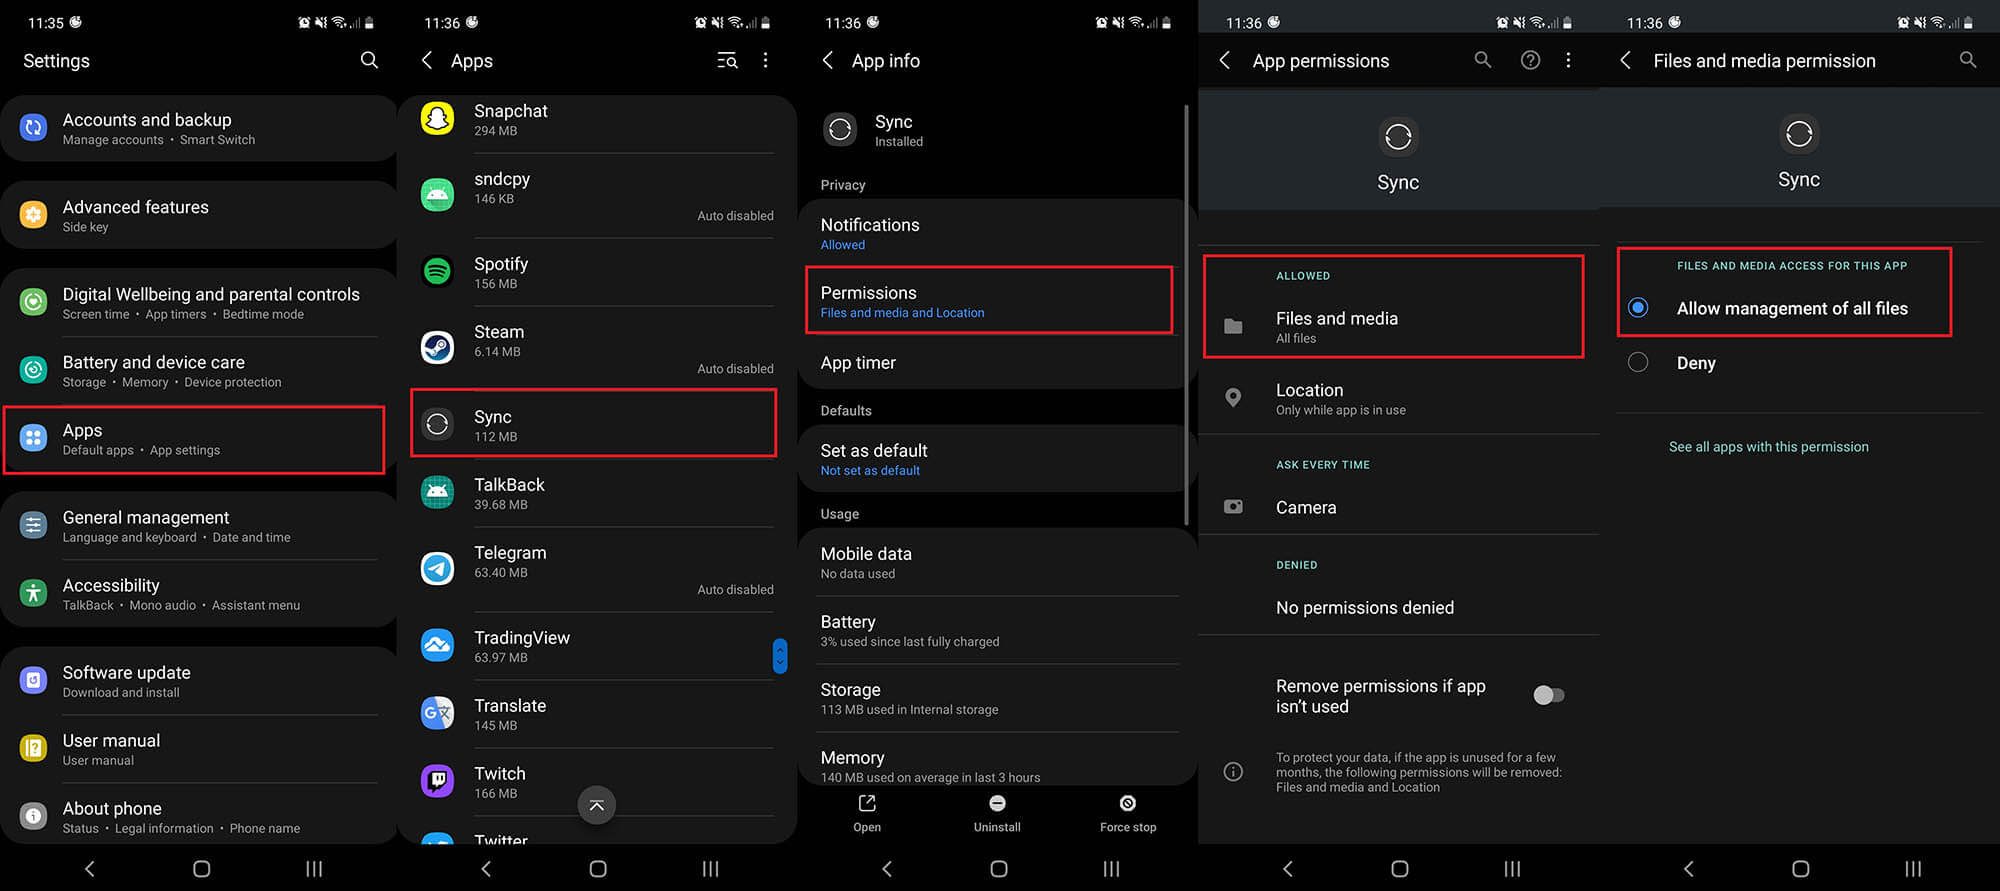
If you are trying to set up Resilio to work between your Android device and another device, either Windows or Android. But keep getting permission write read error, you’ll need to double-check permissions on your device.
- To do this go to Settings > Apps > Sync > Permissions > Files and Media and Allow management of all files. Once you have done this, the permission error in Resilio Sync will go away.
How to Set up your own cloud storage service using an old Android phone and Resilio Sync.
Using the steps shown above you can create your own cloud storage system by doing the following.
- First, get an old Android device, any will do, though the bigger the storage the better. If it has SD card support you can expand the storage size by adding any size SD card you like.
- Once you have your Android device, simply set up Resilio Sync on it and connect all the devices you wish to sync with.
That’s it, all you have to do now is keep the device connected to WiFi and powered on and you’ve got your own cloud storage system.