Table of Contents
If you are someone who likes to monitor the statistical information of your computer, in real time, using programs like MSI Afterburner, NZXT CAM, Rainmeter etc. information such as temps, resource consumption, fan speed and so on. This guide will show you how to easily create your own separate screen for constant live stat monitoring, even when you are in game or hard at work.
How to Lock Your Mouse to a Specific Monitor on Windows.
Installing a statistic monitoring screen on your computer has never been easier. Since raspberry Pi’s surge in popularity, small cheap reliable LCD displays have become very easy to acquire and install. Using one of these HDMI/USB powered screens we will be creating a dedicated screen for statistic monitoring on your desktop computer. Although we will be dedicating this screen to statistic monitoring, you will be able to use it for whatever you choose. You can watch movies on it if you really wish.
How to Install a Custom Statistic Screen in Your Desktop Computer.
First up, there are a few things you will need to make sure you have before installing a dedicated information screen/panel in your desktop computer. You will need to make sure you have one spare HDMI port and one standard USB 2.0 port. If your graphics card has Display ports spare, you can also utilize them with a display port to HDMI adapter.
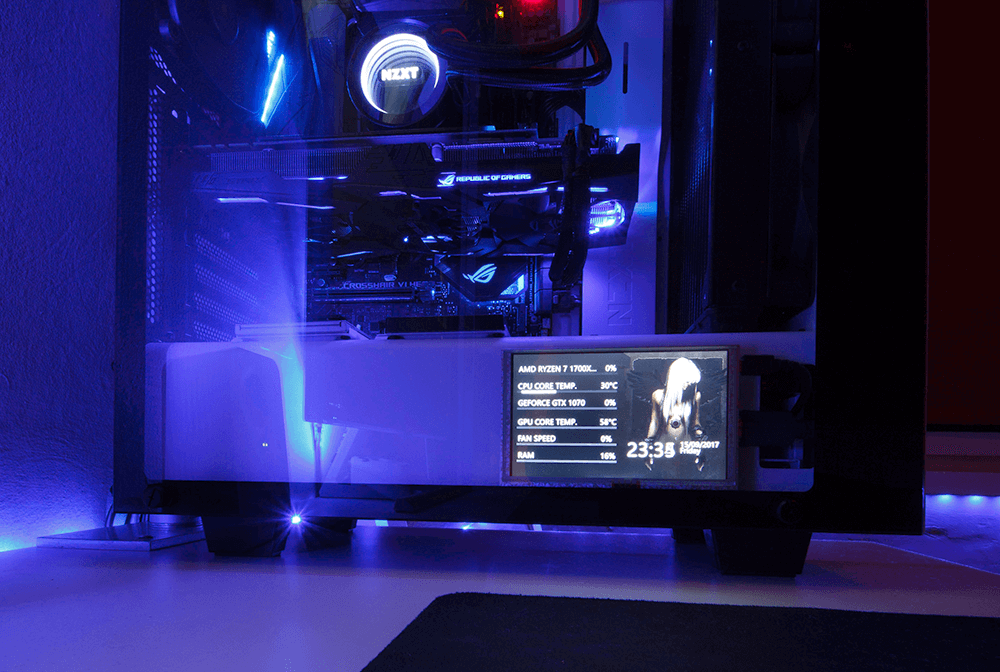
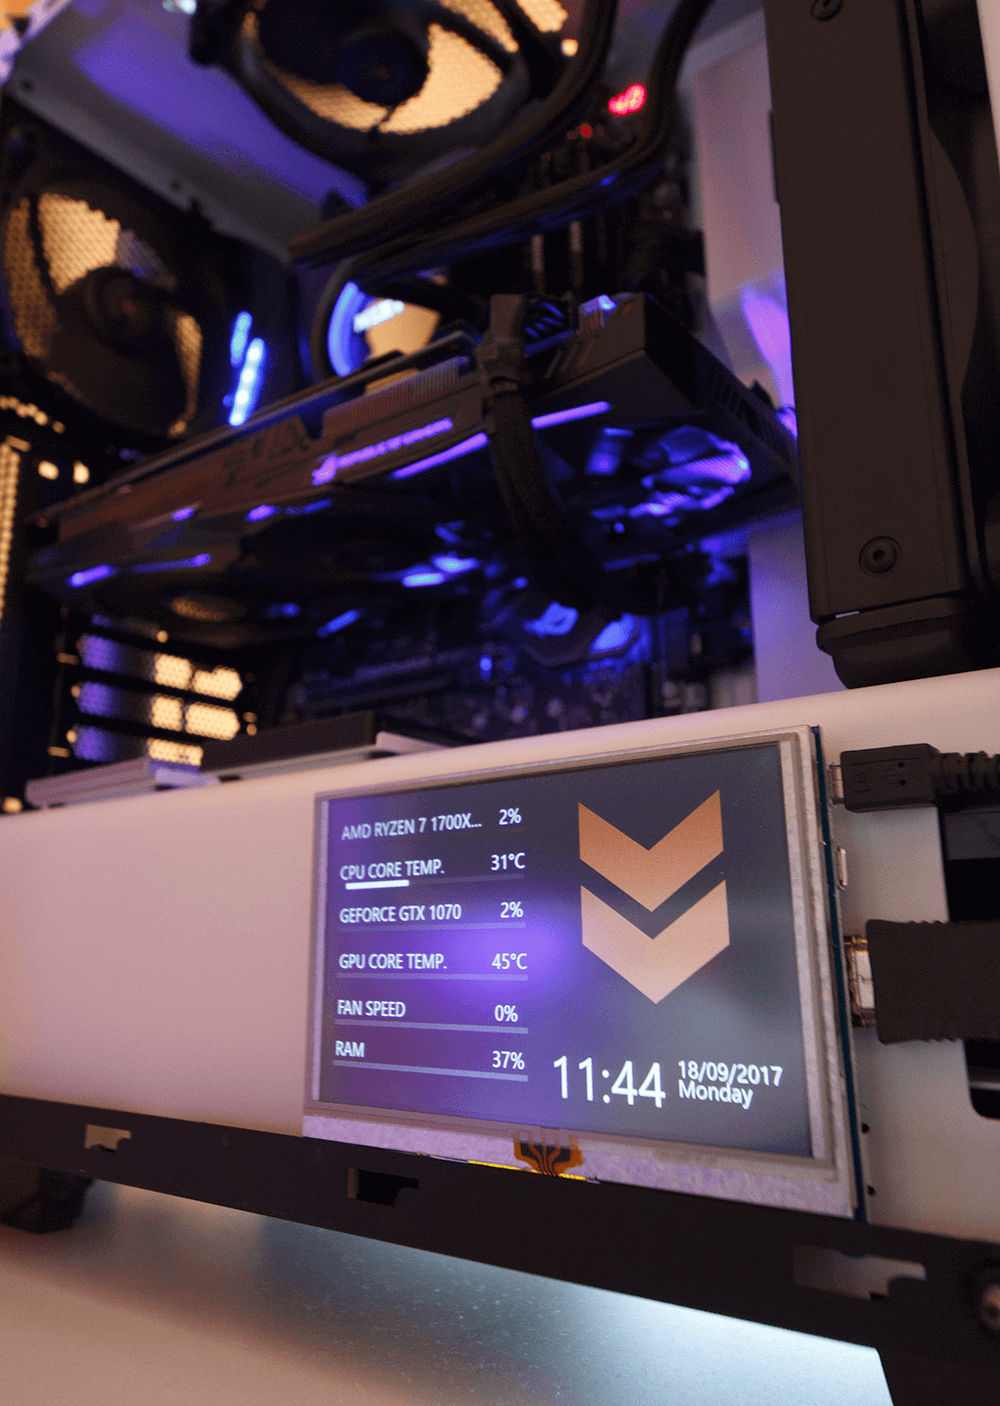
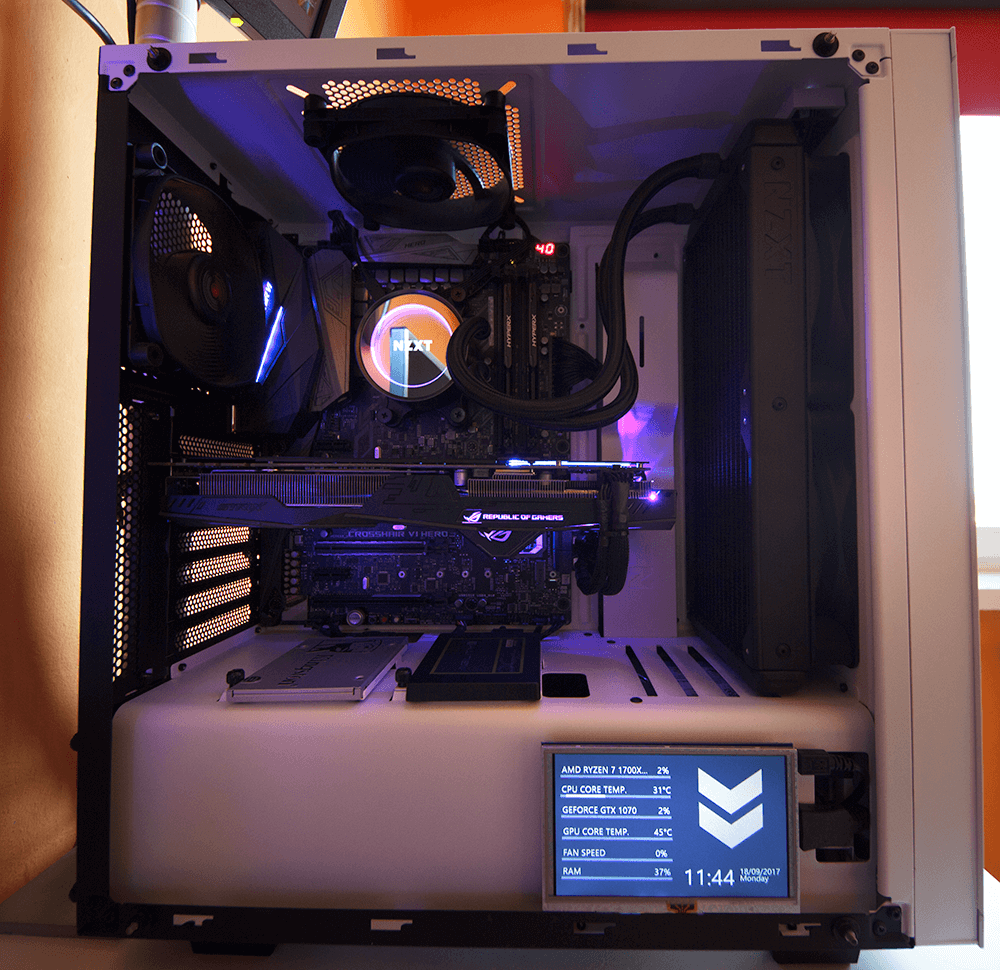
You will also need to make sure you have a place in mind to mount the screen. For this guide, I have installed a 5-inch screen in my NZXT S340 Elite using one of the areas designated for an SSD. Obviously, placement is completely up to you so feel free to mount the screen wherever you think will work best for you.
Once you have the mounting position in or on your case organized, you can pick out a screen to use. This part will also vary somewhat, as there are several sizes available, from 4 inches up to 7-inch models. The way they are powered will also vary, so make sure you read the information properly before making a purchase. Some of these screens are powered fully by the HDMI connection, whilst others are powered by the USB 2.0 connection. The way the screen is powered doesn’t matter so much if you have a spare USB port available to utilize.
Note: Connecting the USB cable to the screen will also give you added touch support if you haven’t mounted the screen behind you cases clear panel.
Where to Purchase the Screens.
Purchasing a screen is quite easy, however depending on whereabouts in the world you live will change which service you use. Amazon has the best range available but shipping locations are a little limited. When searching for a screen at an online store, either of the below search suggestions works best. (just change the size of the screen for your search)
"GeeekPi 5 inch HDMI Monitor LCD Resistive Touch Screen 800x480 LCD Display USB Interface for Raspberry Pi 3 / 2 Model B / B+ & Banana Pi (Plug and Play Free Driver)"
"LCD Raspberry Pi TFT 5'' (B) HDMI"
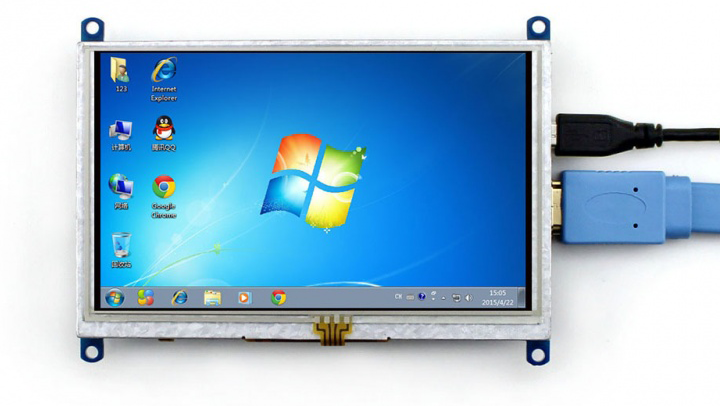
If you are having trouble finding a screen using those search phrases, you can use the below links to go directly to products and refine you searching from there. The screens generally retail around $30USD and include a short HDMI cable, USB cable and touch screen pen.
AliExpress.com
Amazon.com
Allegro.pl
Ebay.com
IMPORTANT: Take note of the position of the HDMI and USB connections before you purchase your screen. (top, side or bottom) If the connections are orientated in the wrong direction it will make installation painful.
Physical Installation.
When you have your screen, installation is going to vary a little depending on your case and internal layout. For anyone using an NZXT S340 Elite, installation is very simple. All you have to do is mount the screen to the SSD slot on the side of your case (remove the tray first), you can do this using double-sided tape or the screws that come with the screen. If you don’t want to use either, you can very easily and stably hold the screen in position using the two cables and the glass panel.
Note: Using a slimline/ribbon HDMI cable will work best if you have tight corners to work with, you can also use a 90-degree adapter for really tight situations. (just make sure you purchase an adapter that faces the right way) Below you can see one of several possible ways to route a standard HDMI Cable without a 90-degree adapter on an NZXT S340 Elite case.
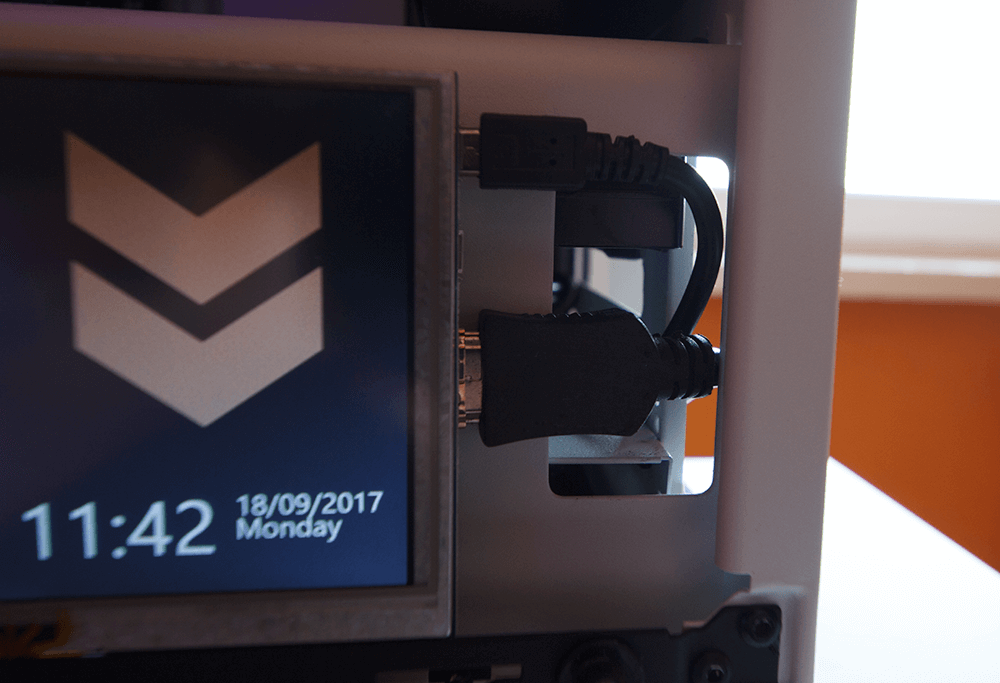
Once you have the screen in position, run the HDMI and USB cables internally to the rear of your computer and connect them. On the S340 Elite, you can use the VR headset pass-through slot to pass the cables through. Now that the screen is connected to your computer we can begin the setup process. As the screens are plug and play they will automatically boot up in windows as a new monitor.
Note: You can quite easily make a custom faceplate for the screen using a 3D printer to cover the basic look. However, you can hide the bottom edge nicely with the glass panel on the s340 case.
Software and Screen Setup.
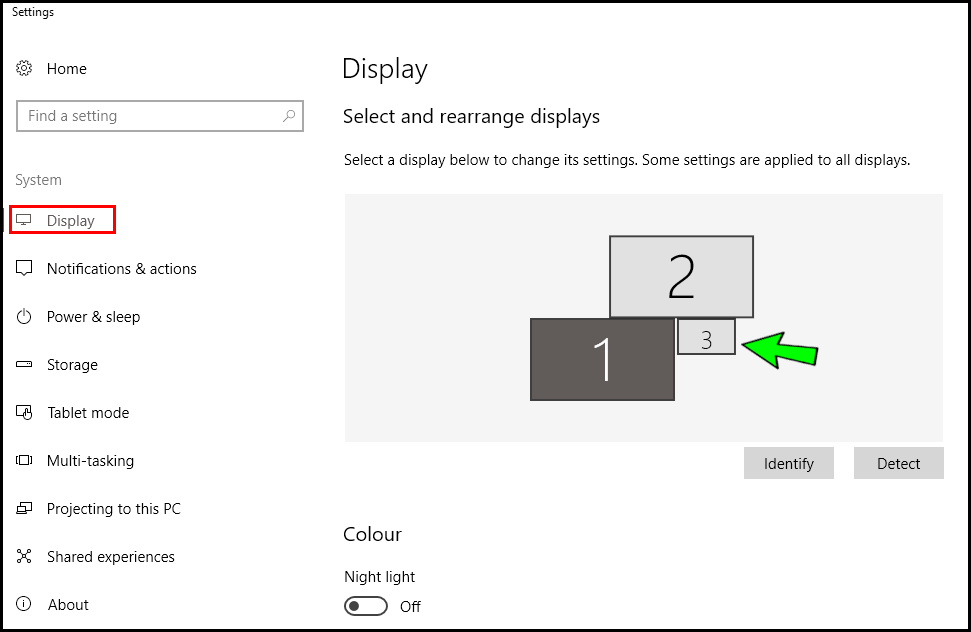
Now that your screen is physically installed, you will need to set it up in Windows. This can be done in the exact same way you would normally set up a monitor. Simply go to display settings and position your screen in the place you would like it to be accessed.
You can also set a custom wallpaper for the screen. If you aren’t sure how to set a different wallpaper for a second monitor from Windows the below guide will show you how.
How to Set Different Wallpapers for Different Monitors in Windows (no third party programs)
Alternatively, you can use Displayfusion for more customization options.
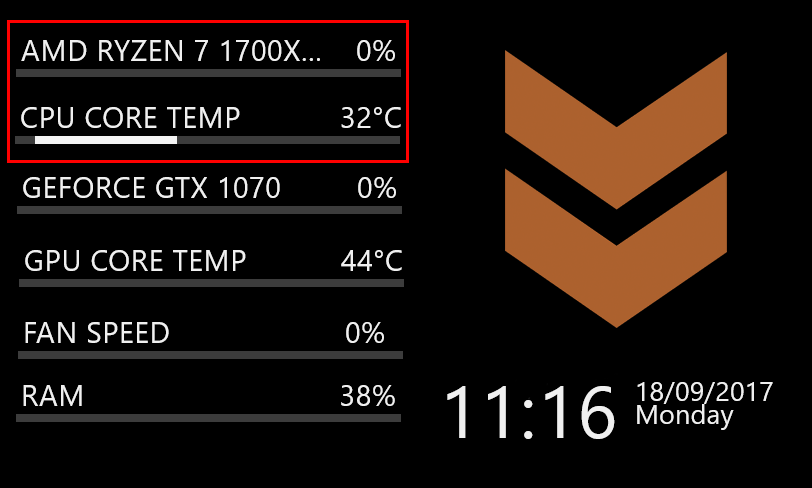
Once that is done, you have several options for displaying statistical information. You can simply move your monitoring programs to the screen or use Rainmeter. Rainmeter is the best option and will display information far more clearly as most skins offer customizable sizing. You also have a huge range of skins available for displaying your information.
Display GPU Information Using Rainmeter.
If you decide to use Rainmeter, you will also need to make sure you have some additional plugins to display things like fan speed and temps for your CPU and Graphics card.
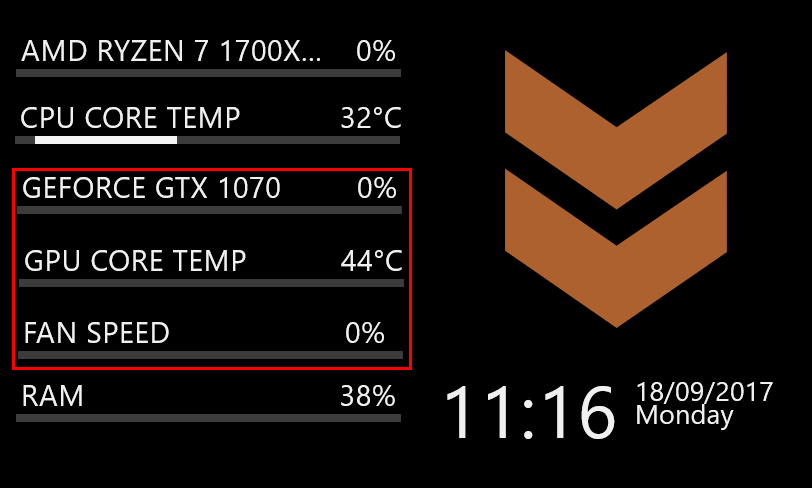
To display information about your graphics card you will need to install MSI Afterburner and the Rainmeter plugin.
Download the appropriate Rainmeter plugin for your system and paste it into:
C:\Program Files\Rainmeter\Plugins
32-bit version of Rainmeter: MSIAfterburner.dll
64-bit version of Rainmeter: MSIAfterburner.dll
Display CPU Information Using Rainmeter.
To display information about your CPU you will need to download and install Core Temp.
Download Core Temp
Finding Rainmeter Skins.
Once you have Rainmeter, Afterburner and Core Temp installed, you can find a Rainmeter skin you would like to use for your display. There are tons of places you can find skins online, Deviant Art, Rainmeter.com, Reddit etc. The skin I am using is called Mii System Skin II and can be downloaded from either of the links below.
Download Mii System Skin II From DeviantArt
Download Mii System Skin II From LinusTechTips
Setting Up Rainmeter.
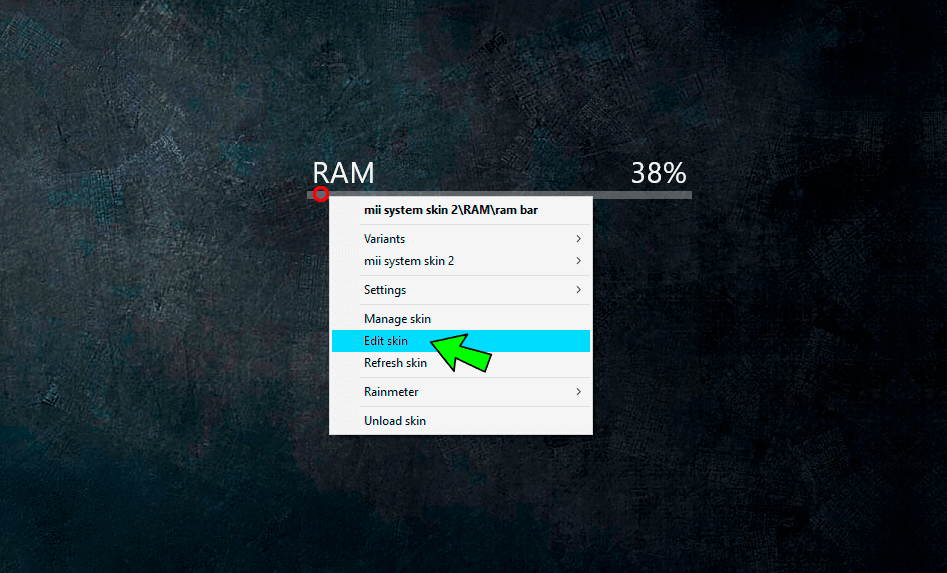
After installing the new skin to Rainmeter, you may need to customize the way it is displayed on your screen. The size, in particular, will need to be adjusted, this can be done by right-clicking on the particular skin you have chosen and selecting Edit Skin.
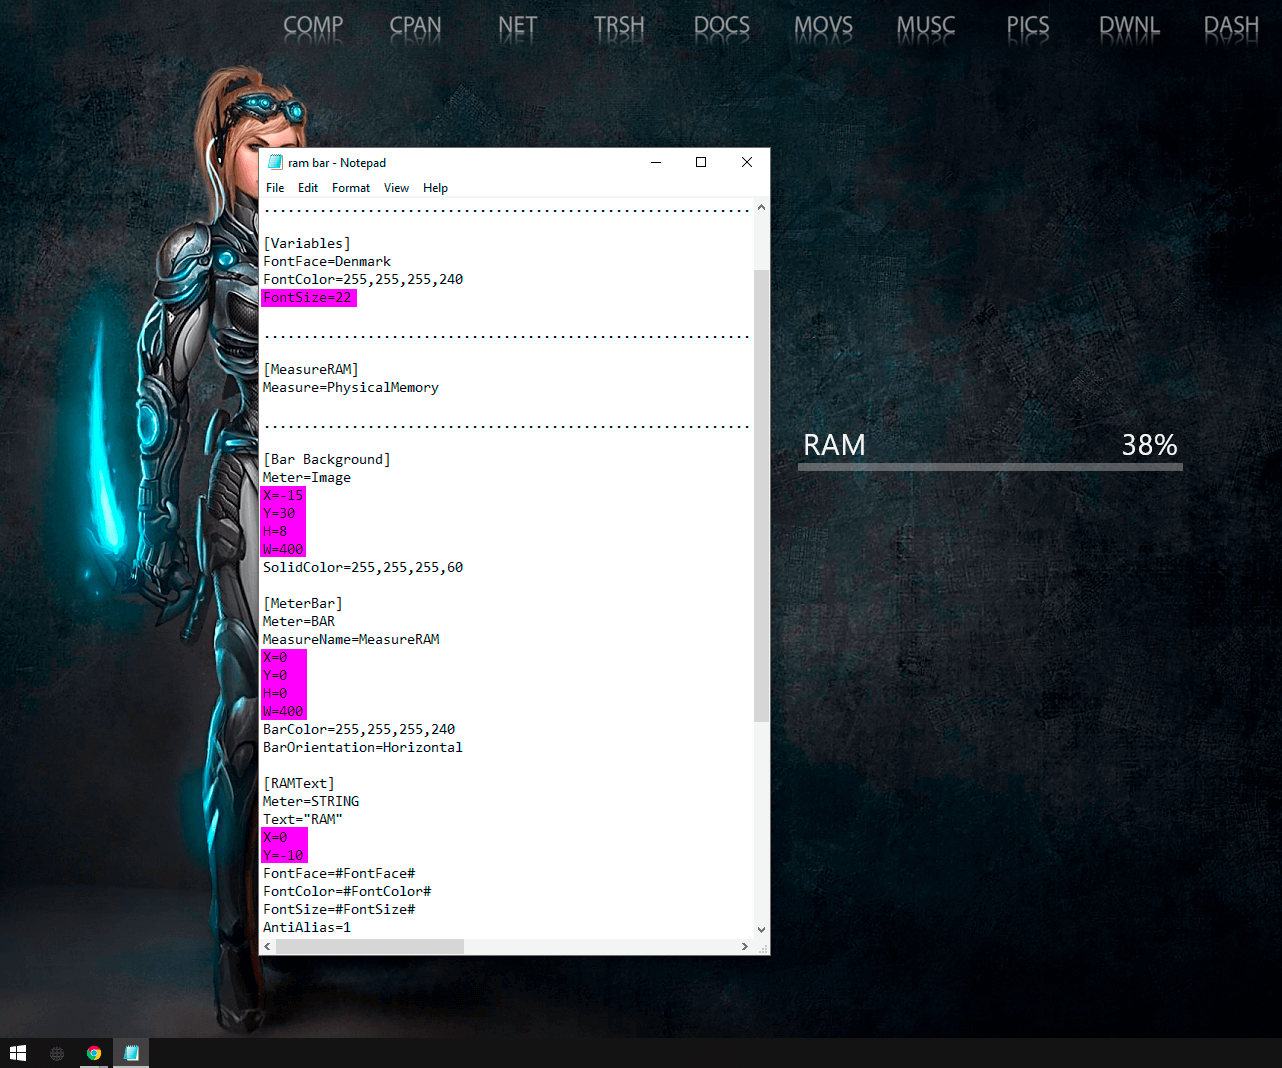
Now using the notepad file, make changes to the criteria you want to change. It might look a little complicated but if you follow the headings it's quite easy.
Simply make a change, save it, then right-click on the Rainmeter icon in the taskbar and select Refresh all.
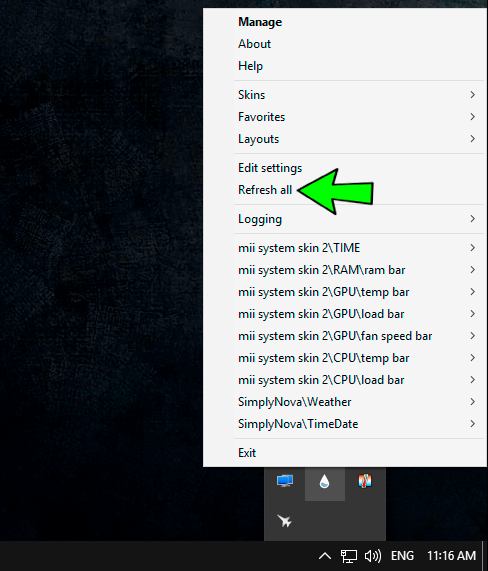
This will update the skin to show the change you made. It may take some trial and error, however, once you have set the parameters for one skin you can basically mimic them across all the others. Front size etc. The good thing about using Rainmeter is that every single time you boot your PC the stats will launch in the same position each time and begin working. The process is completely automated. If you were to use a program like CAM, you may have to move it to your Stat screen each time.
If you have any questions about anything from this guide feel free to ask in the comments on our Facebook page.