Table of Contents
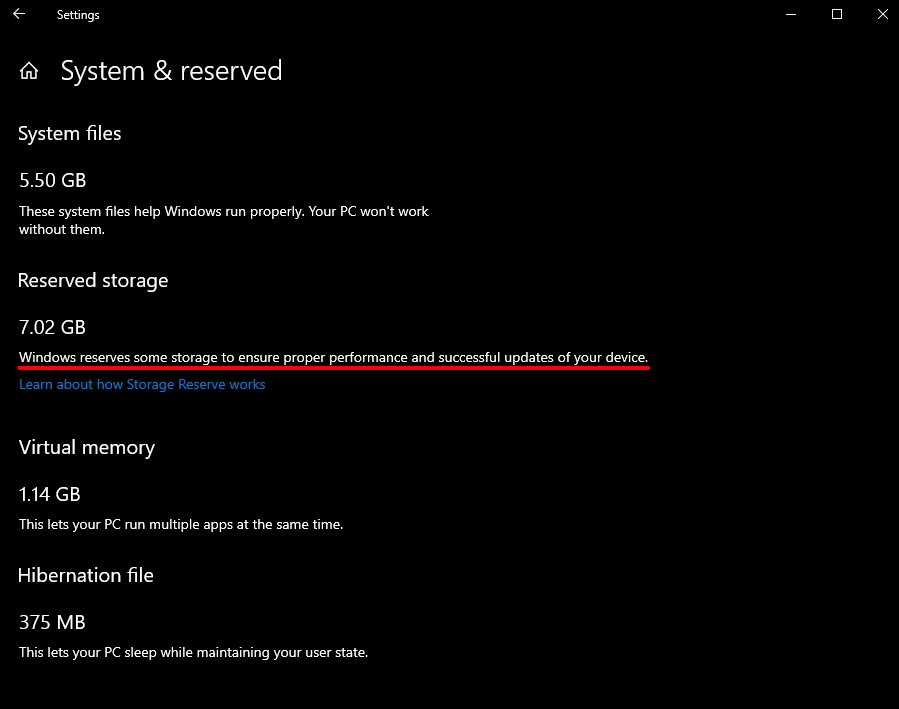
If you are fussy about how your hard drive space is used on Windows 10, you’re probably quite annoyed to find out about Reserved Storage. Although the feature has good intentions, 7gb is a lot of space to sit wasted for the sole purpose of optimizing Windows updates. So follow along as this article shows you how to turn off Reserved Storage on Windows 10.
How to Open, View, and Read Different Ebook Formats on Windows 10, Android, and iOS.
Reserved Storage on Windows 10 is Microsoft’s latest idea for improving how Windows 10 stores, manages, and implements updates. The concept is pretty straight forward and simply reserves a minimum of 7gb storage space on your drive for Windows update content. The main reason for this change is to prevent Windows updates from being stalled or blocked by low storage. Which will ensure that devices stay as up to date as possible at all times.
For the average user this probably won’t seem like a big deal but for those using solid state drives (SSDs), 7gb is a lot of space to sit wasted and predominantly unused. That being said, it isn’t all bad news, as Microsoft has planned to move all temp file storage into this reservation while it isn’t being used for Windows updates. Which ‘should’ significantly reduce the footprint of the reserved space on your drive. However! Microsoft can’t rule out increasing the reservation size in the future as Windows updates becoming larger. What is now 7gb, could easily be 10gb down the track.
Thankfully, at least for now, it’s going to be possible to disable Reserved Storage on Windows 10. unfortunately the procedure for doing so isn’t as simple as flipping a toggle in settings, so follow along as we guide you through the process.
Related: How to Get Classic Windows XP Games on Windows 10. (Solitaire, Mahjong, Hearts, etc)
How Do You Disable Reserved Storage on Windows 10? (Turn Off Reserved Storage)
Even though the Windows update featuring Reserved Storage hasn’t been released yet (version 1903), you can still get in early and learn how to disable it using the Windows Registry Editor. Since the Windows Registry Editor isn’t the most user-friendly Windows tool, you’ll want to make sure you have a system restore point set in case you make a mistake and need to revert back to a working system point.
If you haven’t created a restore point before, open the start menu, type Restore, then select Create a Restore Point when it appears on the list. In the new window that appears on the screen, click Create in the bottom right corner of the screen, then follow the on-screen instructions. When you have a restore point, you can open the Registry Editor.
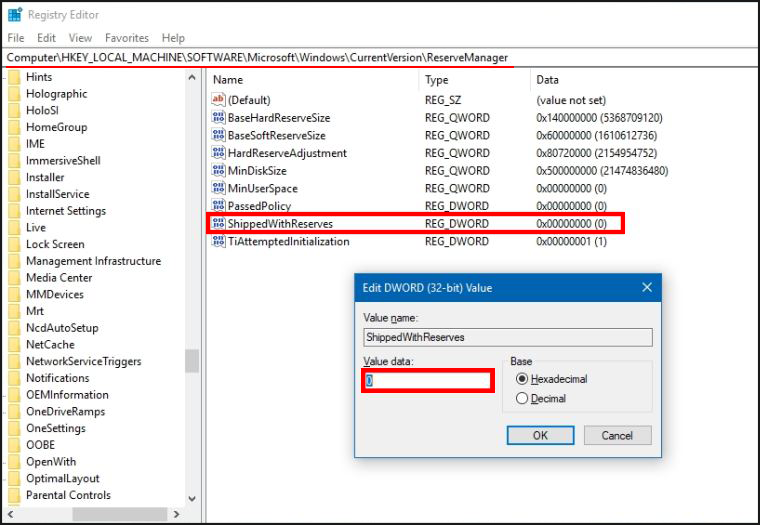
To do this, type regedit into the start menu, then select Registry Editor when it appears. Now use the left-hand pane to navigate to the following location:
HKEY_LOCAL_MACHINE\SOFTWARE\Microsoft\Windows\CurrentVersion\ReserveManager
Note: If you don’t see the ReserveManager key (folder) within CurrentVersion, you don’t yet have Windows version 1903.
Once you have the ReserveManager key (folder) selected in the left-hand pane, find and double click on ShippedWithReserves in the central pane and change its value from 1 to 0. After a system Restart, Reserved Storage will be disabled. If at any stage you wish to re-enable the feature, simply return to the same location and change the value back to 1.