Table of Contents
If you are using a Windows 10 PC and would like to disable Storage Sense, this article will show you two different methods for doing so. One easy via the Settings menu and the other slightly more complicated using the Registry Editor.

How to Set Video Wallpapers on Windows 10. (Live Wallpapers on Windows 10)
Windows 10 has quite a lot of easy to use features that allow you to quickly and easy keep your operating system in tip-top shape, free of junk and old files. Although the main tool for this function has always been the Disk Cleanup tool, it’s also possible to use Storage Sense, Microsoft’s Disk Cleanup Tool replacement. Which is enabled by default on most Windows 10 builds.
Just like the Disk Cleanup tool Storage Sense can be used to remove Windows update system logs, error reporting files, Windows Defender temp files, thumbnails, Internet temp files, driver packages, DirectX shader cache, program files, delivery optimization data, outdated system files, error memory dump data, and most importantly, old Windows updates.
However, if you aren’t a big fan of Windows 10 Storage Sense it is possible to disable it using a couple of different methods. The first is relatively simple and only requires a quick change in the Settings app, the second, however, is a little more complicated and requires some changes in the Windows 10 registry. Either way, both methods are listed below, so follow the one that best suits your Windows 10 knowledge.
Related: How to Clear Files and Junk on Windows 10 if Disk Cleanup isn’t Working.
How to Disable Storage Sense From Settings on Windows 10.
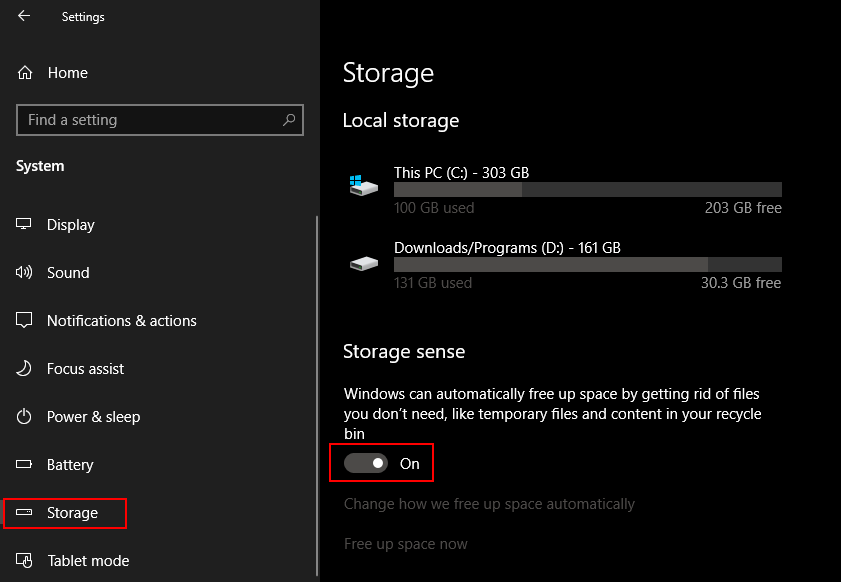
For the quick and easy way to disable Storage Sense on Windows 10, open the Setting app from the start menu, then click System, and finally Storage. On this page make sure you have Storage selected in the left-hand column, then flip the Storage Sense toggle to Off. Once done, you can close the Settings app and proceed to use your computer with Storage Sense disabled.
If you’d like to take the road less travelled, you can use the Registry Editor to disable Storage Sense. The instructions are shown below.
How to Disable Storage Sense From the Registry on Windows 10.
As this process requires some changes within the Windows Registry Editor, it’s important to make sure you have a System Restore Point to revert back to if something goes wrong. If you haven’t created a restore point before, open the start menu, type Restore, then select Create a Restore Point when it appears on the list.
In the new window that appears on the screen, click Create in the bottom right corner of the screen, then follow the on-screen instructions. Once your restore point has been created you can open the Registry Editor. To do this, type regedit into the start menu, then select Registry Editor when it appears. Now use the left-hand pane to navigate to the following location:
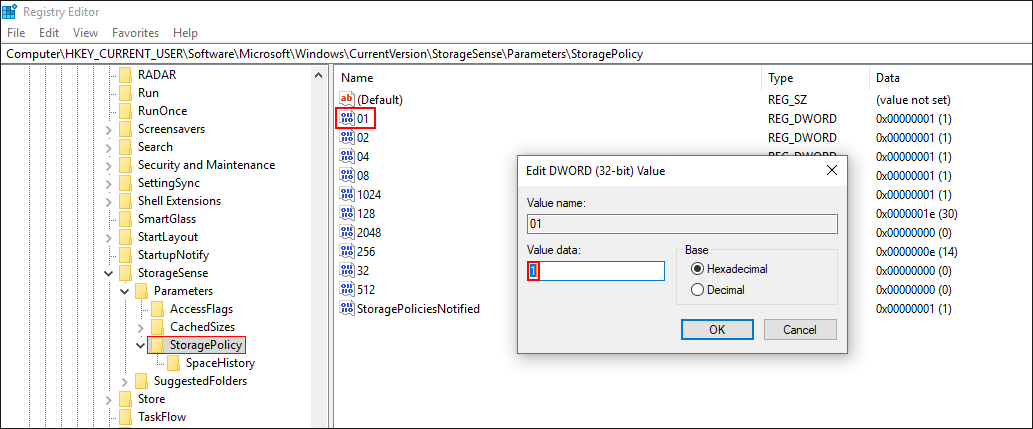
HKEY_CURRENT_USER\Software\Microsoft\Windows\CurrentVersion\StorageSense\Parameters\StoragePolicy
Once you have the StoragePolicy key (folder) selected in the left-hand pane, double-click the DWORD file called 01 in the centre pane and change its value to 0. This will disable Storage Sense. Once you have done so, close the registry editor and Restart your computer. After a restart, Storage Sense will be disabled. If at any stage you wish to enable the feature, simply return to the same location and change the value from 0 to 1.