If you have a laptop or a desktop PC with a web camera built-in or added externally, you may not wish to have it active all the time. If that’s the case, follow along as this guide shows you how to disable the camera on Windows 11, blocking all other apps from having automatic access to it.

Related: How to fix the Xbox Accessories app stuck at 0% when updating a controller.
By default Windows 11 allows apps and other software to access and use your device's camera. While all laptops have built-in cameras, desktop PCs may not. However, this option still remains so if you have recently connected a webcam to your desktop PC you may wish to make some changes to the camera settings on your device.
While the camera will be the focus of this guide the same applies to your device’s Microphone/s and location, so you may also wish to make changes to those as well. Making the change is quick and easy and can also be customised for each individual app so you can allow access to some while blocking access to others or just disabling everything all at once.
How do you Disable your camera in Settings on Windows 11? (Disable the camera from Settings)
The quickest and easiest way to disable your camera on Windows 11 is to use the Settings app.
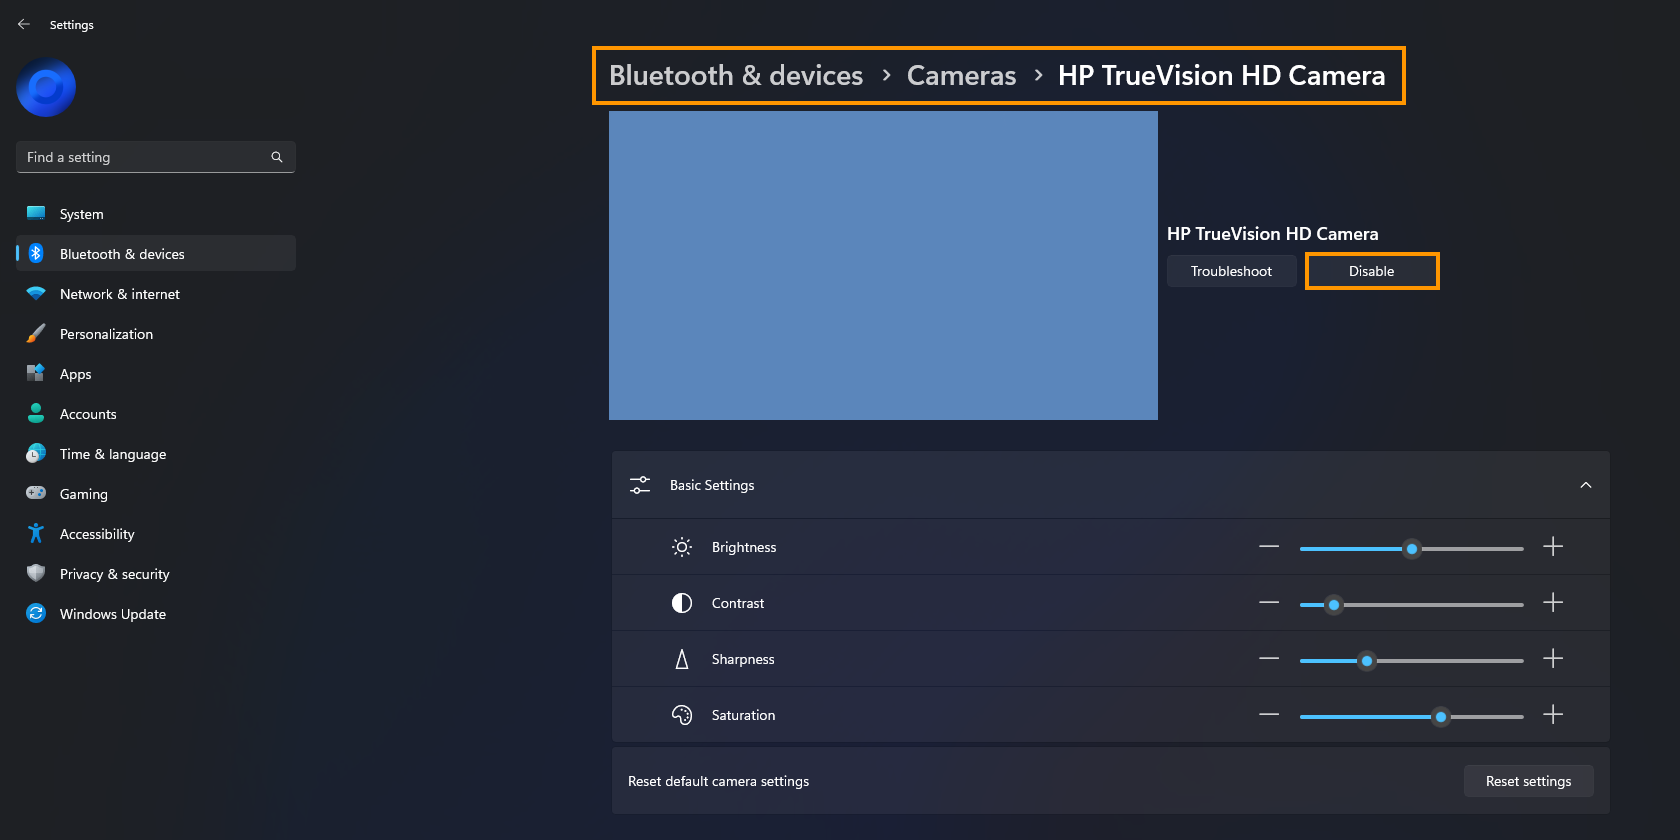
- First press Windows Key + I to open the Settings app, then go to Bluetooth & devices in the left-hand pane.
- On this page scroll down and click Cameras, then click your camera when you see it appear on the list.
- This will take you to a new screen where you will have to click Disable to the right of the image preview.
- Once you have done that your camera will be disabled for use across your entire system.
- If you want to enable it again just come back to the same location and click Enable.
What if you only want to disable the Camera in certain apps on Windows 11?
- If you want to customise the apps and other software that have access to your camera on Windows 11 open Settings then go to Privacy & Security > Camera.
- Now simply adjust the toggles for the apps you want to have access to and the ones you don’t want to have access to.
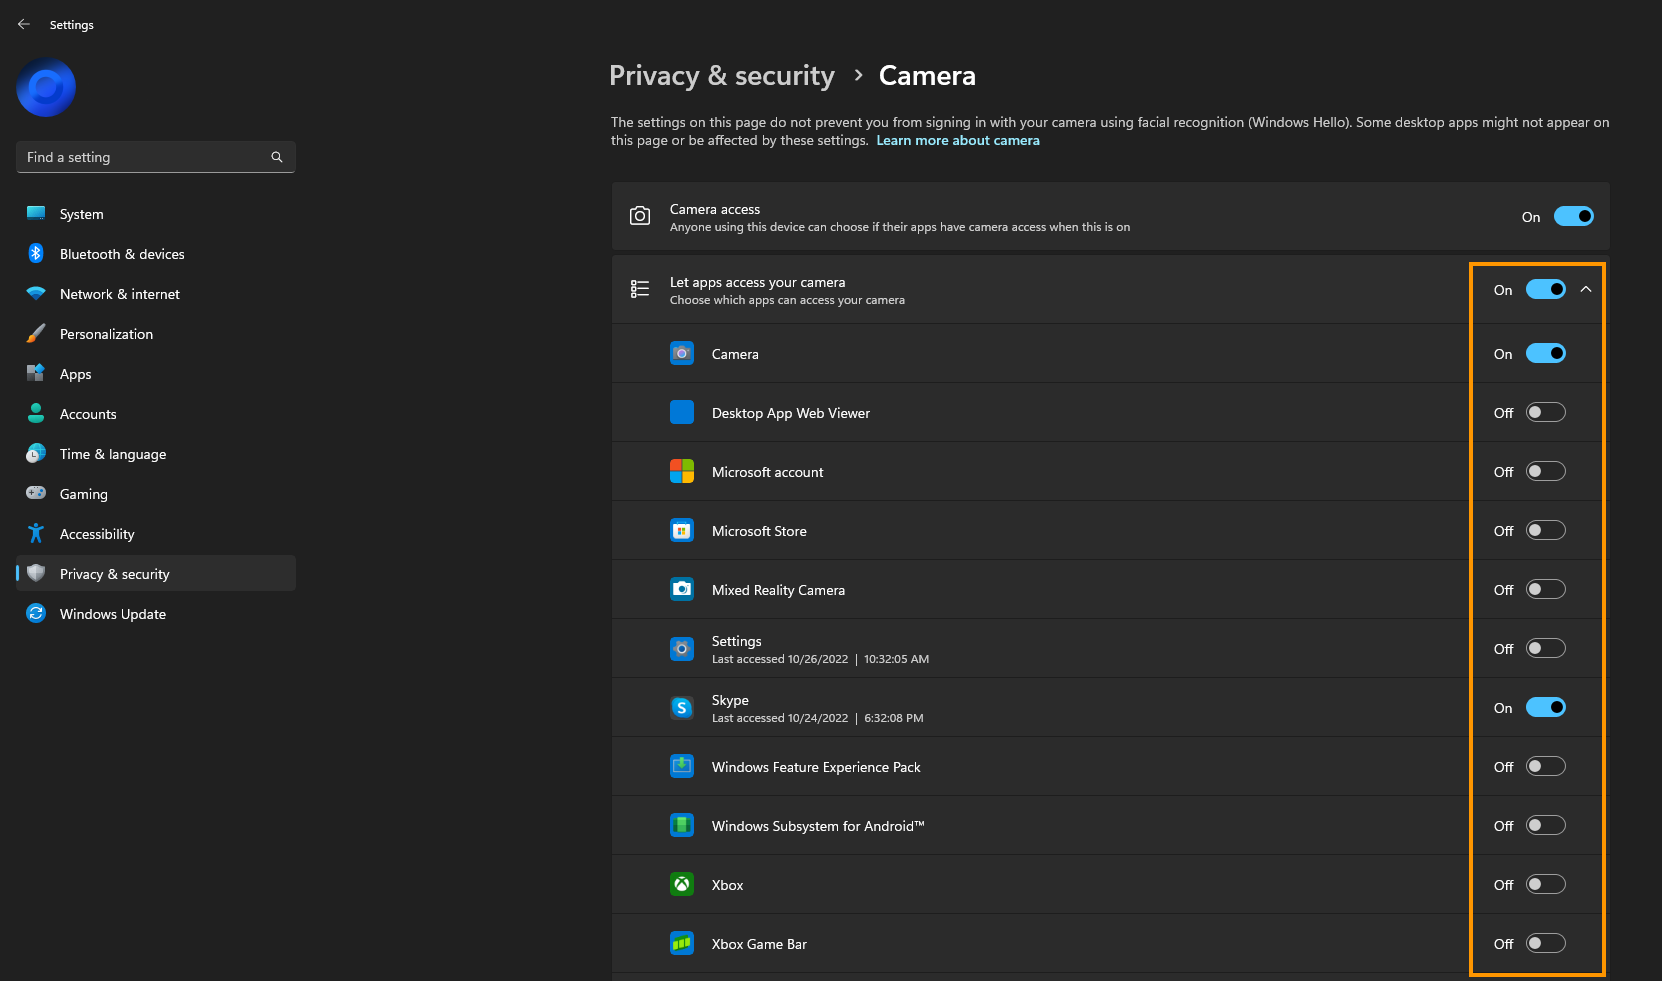
Again if you want to enable something again just come back to the same location and make some changes.
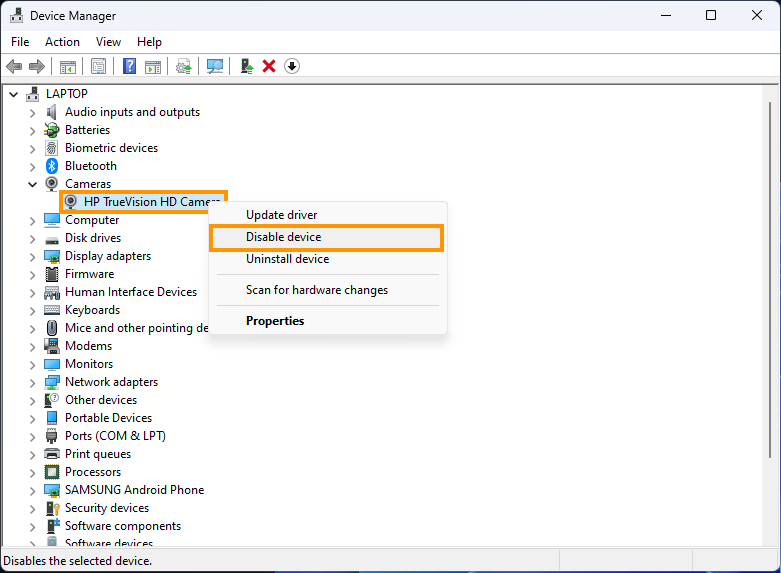
Disable the Camera from Device Manager if you want a more permanent solution.
If you want to use a more permanent solution, you can also make this change from Device Manager. To do this, follow the steps shown below.
- First right-click the start menu and select Device Manager from the list.
- Next, find and expand the Camera section, then right-click on your camera and select Disable device.