Table of Contents
If you have been trying to figure out how to set up automatic BCC for emails sent from Android devices, this article will show you how to do so. Adding auto BCC to emails will allow you to send a hidden copy of emails to others or yourself without anyone from the address or CC field knowing.
How to Recover Passwords Saved in Google Chrome. (Retrieve Passwords From Chrome)
Although not everyone is aware of it there are several very useful options available when sending emails, both business-related and personal. All of which are available from any and all email clients, apps, and web services. Each of the three options allows you to better manage who can view and read emails and how email addresses are displayed when received.
The first method allows you to simply enter one email address into the address field and send it directly to the individual. This is the most commonly used email method and is generally used for personal emails of little to no importance.
The second method uses the CC box and allows you to send a (Carbon Copy/Courtesy Copy) to a large number of other people. This lets multiple users read, view, and reply to emails quickly and easily.
The third option is called BCC (Blind Carbon Copy/Blind Courtesy Copy) and allows you to add other recipients, including yourself to emails without the end-user knowing others have been included in the email. Generally, this method is used to hide email addresses from other users who have been sent the email.
Related: How to Compress WebM Format Files. (Online WebM Compression Tools)
So How Do You Enable Auto BCC on Emails Sent From Android Devices?
Generally speaking, most Android devices allow you to add automatic BCC from the pre-installed Mail app on the device. However, as the default email app on most phones is rarely used, this article will be guiding you through the process for Androids most popular and highly rated email app. If by some chance you aren’t already using it, the app is called BlueMail and is by far the best email app on the market.
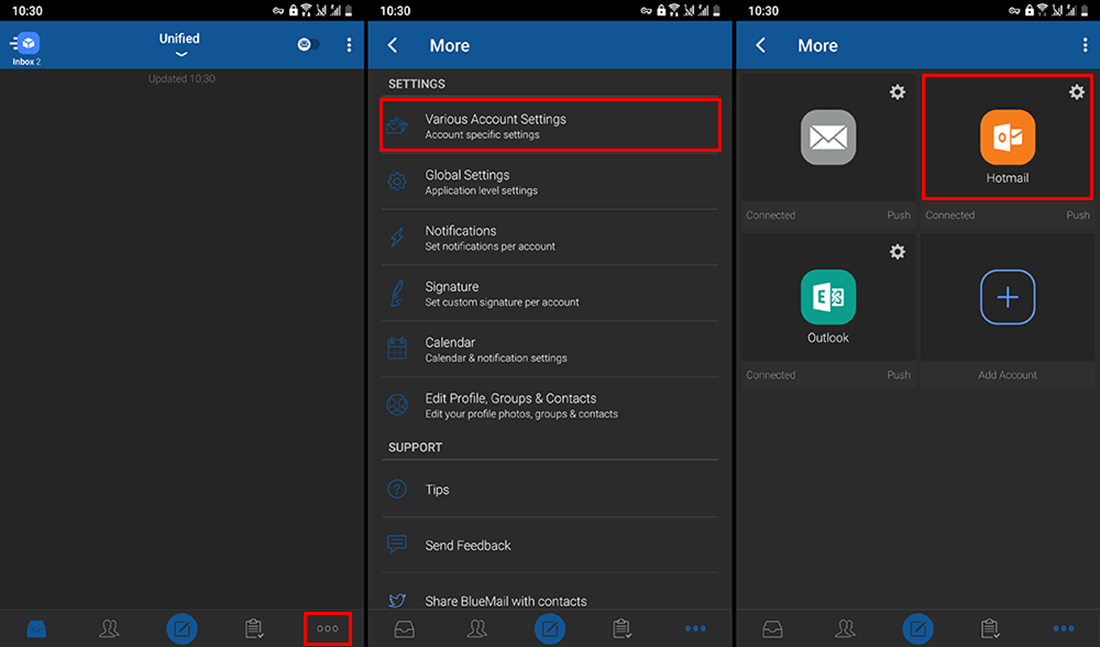
So to add automatic BCC to emails in BlueMail, the first thing you will need to do is open the BlueMail app on your device, then tap the three dots in the bottom right-hand corner. This will bring up the Settings menu where you will need to tap Various Account Settings. On this page, if you have more than one email account listed, select the one you wish to add auto BCC to.
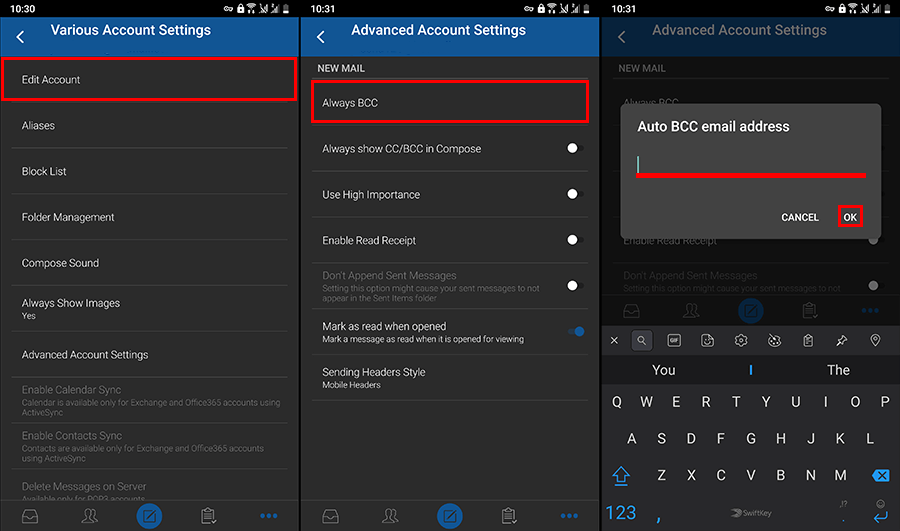
Next tap Advanced Account Settings at the bottom of the page, tap Always BCC, then proceed to add the email address you wish to always be sent a hidden copy of emails. Finally, tap Ok and the email address will be added.
If you wish to add Auto BCC to more than one email account, you will have to go back to the account selection page, select another account, then follow the same steps as before once again. If at any stage you wish to remove any BCC addresses, simply return to the same location, and flip the toggle back to Off. This will reset BlueMails BCC settings for that account to default (none).
On a Side Note…
If you are also a Telegram app user, you may like to double-check that your app settings have been set to hide your phone number. After the most recent update Telegram won’t automatically hide your phone number any more...