Table of Contents
If you quite often use the Windows 10 search tool from the taskbar and would like to try the newly added, yet disabled by default floating search Window. Follow along as this article shows you how to enable it using the Windows 10 Registry Editor.
For a long time, Microsoft was adamant that incorporating Cortana into as many aspects of Windows 10 as possible was something that users wanted. Although Cortana does have a fan base and an active user-base, it isn’t something most users want or need when trying to perform basic tasks like search.
As a result, the latest Windows 10 feature update, 1903 has separated Cortana from Windows search and given search its own platform and priority. If you have recently updated to Windows 10 version 1903 you’ll instantly be able to take advantage of the separation, however, you won’t automatically have access to the new floating search Window. To do this you’ll need to make a few quick changes in the Registry to enable it, so follow along as we get started.
How Do You Get the Floating Search Window on Windows 10?
Since this process requires you to make changes to the Windows 10 Registry, it’s important to make a System Restore Point before continuing. To do this, open the start menu, type Restore, then select Create a Restore Point when it appears on the list. From the new window that appears, click Create in the bottom right section of the screen, then follow the instructions given by Windows. Once you have successfully made a restore point, you can continue.
With a restore point set, it’s safe to begin making some changes. To begin, open the Windows Run tool by pressing Windows Key + R, type regedit into the box, then press Enter. Once you have the registry editor open, navigate to the following location:
HKEY_CURRENT_USER\Software\Microsoft\Windows\CurrentVersion\Search\
When you get to this location right click in the central pane and create a New > 32-bit DWORD value named ImmersiveSearch. Once you’ve created it, double click on it and change its Value to 1.
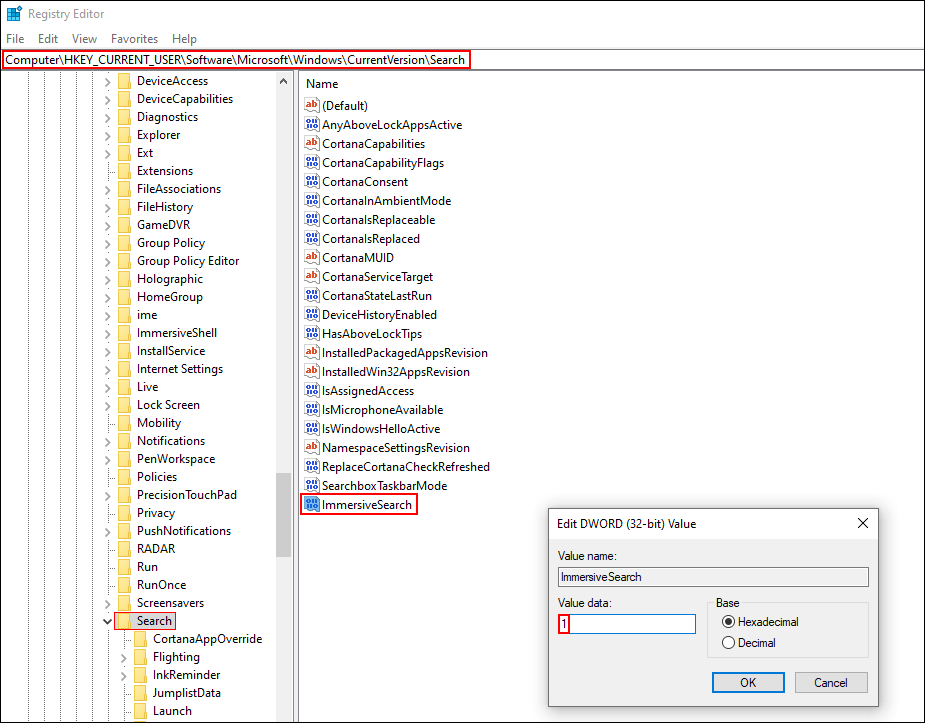
Note: Even if you are running 64-bit Windows you must still create a 32-bit DWORD value.
Next, go to the following location using the left-hand pane.
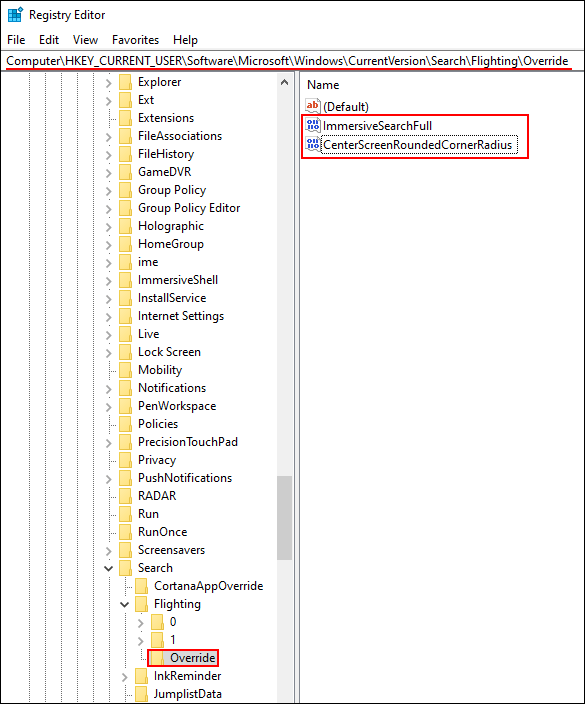
HKEY_CURRENT_USER\Software\Microsoft\Windows\CurrentVersion\Search\Flighting\
And create a new subkey called Override. To do this, right-click on the Flighting key (folder) and select New > Key. Now enter the Override key (folder) and create a 32-bit DWORD Value called ImmersiveSearchFull, then double-click on it and change its Value to 1.
Once that’s done, create another 32-bit DWORD Value called CenterScreenRoundedCornerRadius, then double-click on it and change its Value to 9.
That’s it. Now all you have to do is Restart your computer for the changes to take effect. Once your computer restarts you’ll be able to use it. Simply search from the start menu or use the Windows Key + S shortcut.