If you are using Windows 11 and are slowly getting used to the new interface and would like to enable the new and improved Night Light blue light filtering option. This article will show you how to quickly and easily enable and configure the new Night Light blue light filter on Windows 11.

Now that Windows 11 has officially been released into the beta cycle of the preview build environment, even more people are getting in on all the action. Windows 11 is the most popular Insiders update since the program began which is surprising considering how bad Microsoft’s track record has been with major updates. This time around, however, it seems that they have finally done things right and ticked a lot of boxes.
One of the best new features on Windows 11 is the new Night Light feature which improves on the previous blue light filter in Windows 10. Night Light on Windows 11 allows you to reduce the amount of blue light your screen emits, which is beneficial for a lot of users who struggle with sleep and eye strain.
A little bit of advice before you get started though. If you have a monitor that supports blue light-filtering, and you have it enabled, you may wish to consider using one or the other. As using both Windows blue light filtering (Night Light) and your monitor's blue light filter will give you terrible results. Even if your monitor doesn’t support this feature Windows 11 can handle the task without any issues or quality reduction.
How do you enable Night Light on Windows 11? (From Settings)
- To begin open Settings by pressing Windows Key + I.
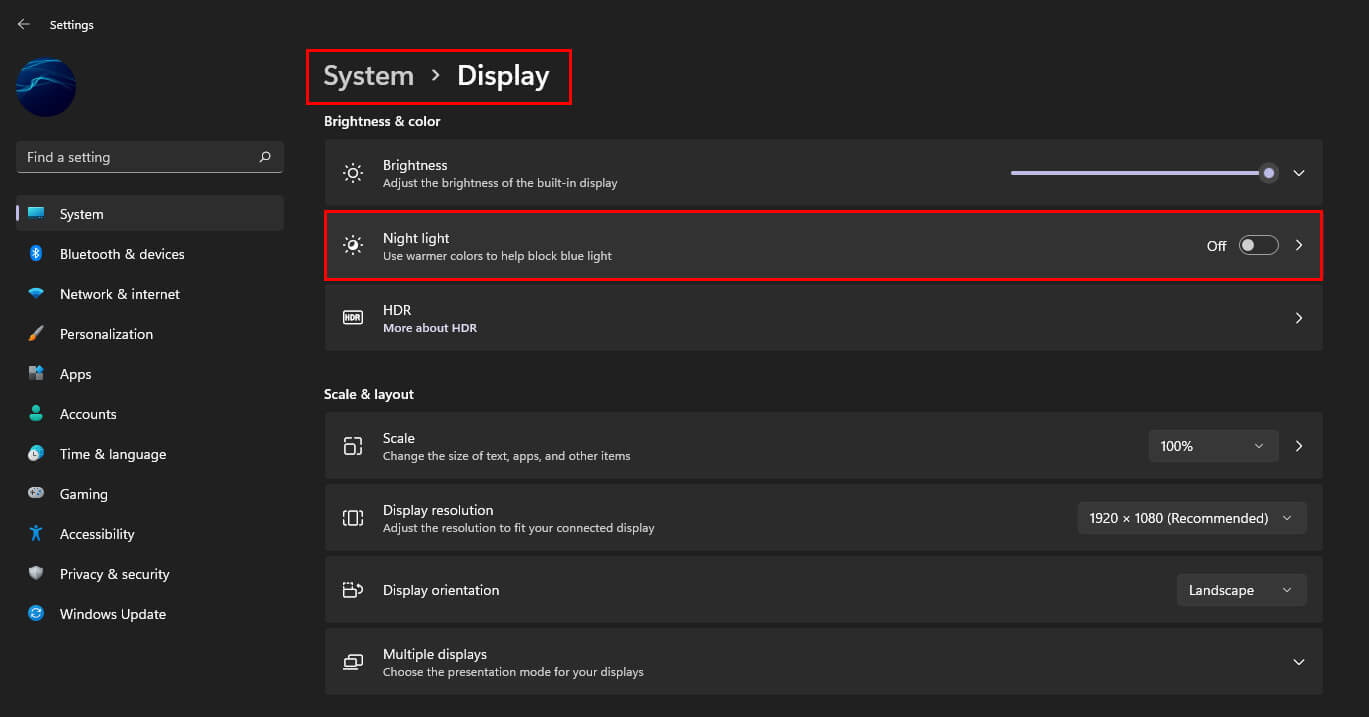
- Next, go to System > Display and click Night Light on the right.
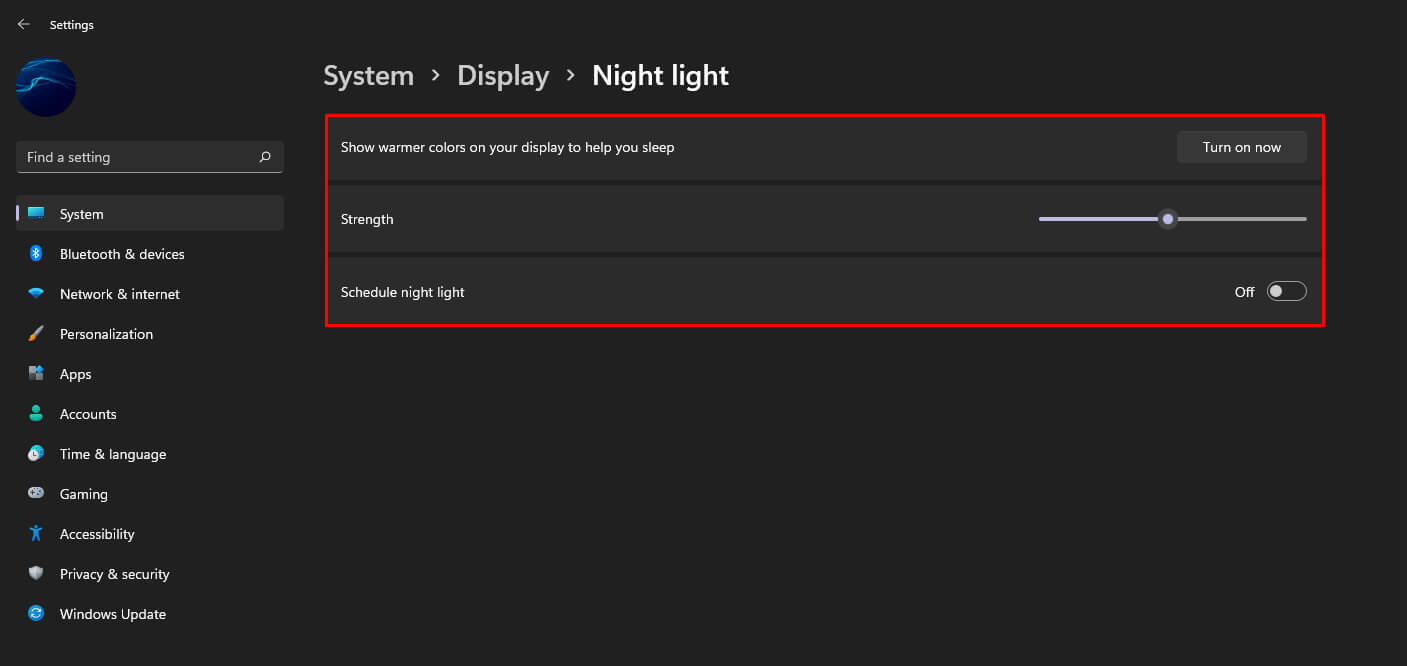
- Now simply make sure the toggle is flipped to On and you’re done.
How do you enable Night Light on Windows 11? (From Quick Settings)
To enable Night Light on Windows 11 from the Taskbars Quick Settings menu you’ll need to do the following.
- Press the Windows Key + A. This will open the Quick Settings menu from the taskbar in Windows 11. Alternatively, you can click the volume/network/battery icon in the notification area.
- Now simply click the Night Light option.
- If you don’t see the Night Light option on the Quick Settings menu, click the Edit icon then click Add and add it to the list.
How do you Schedule Night Light for sunset and sunrise on Windows 11?
Windows 11 has the option to schedule when Night Light is enabled and disabled. You can set specific hours when to turn it on and off to best suit your use case. To do this follow the steps shown below.
- To begin open Settings by pressing Windows Key + I.
- Next, go to System > Display and click Night Light on the right.
- Here Schedule Night Light and choose Set hours.
- Now simply configure the times that work best for you.
- While you are here don’t forget to adjust the strength of the blue light filter as well.
Remember you can change these options and settings as many times as you like whenever you like so if something isn’t working for you anymore. Simply readjust it. I know where I live daylight hours change dramatically so I need to update things every so often.