If you are having major issues exporting content from Adobe Premiere Pro because of the "Error Retrieving Frame" Error. This article will guide you through a ton of troubleshooting steps you can follow to solve the problem. The only problem is that you will have to work your way through multiple solutions until you hit the one that solves the problem on your machine.

Takeaways:
- Fixing Adobe Premiere Pro Error - Error Retrieving Frame on Windows operating systems.
- Solving Premiere Pro export and render issues on Windows 10 and 11.
Table of Contents
How to Fix Adobe Premiere Pro Error Retrieving Frame
Premiere Pro has bucketloads of annoying error messages and performance issues you'll come across while using it. We've got a library of them covered here. But today we'll be covering one of the most annoying Premiere Pro export errors, which prevents an entire project from being exported because of a single frame. But before you do anything! Restart your computer.
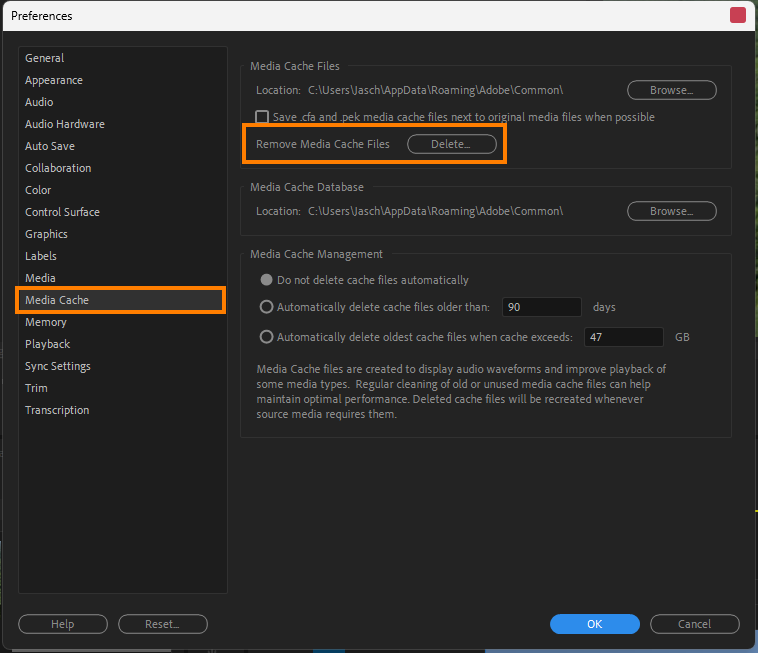
1. Delete the Media Cache
This solution is top of the list because it is the easiest and most effective solution for this problem.
- Restart Premiere Pro and do not open any new projects.
- Next, click on Edit > Preferences > Media Cache, and click on Delete under Media Cache Files. You’ll see two options; choose the last one.
- Since you are getting the error on a project you are working on; the media cache is not “unused.” so choose Delete all media cache, then click Ok and Premiere Pro will restart.
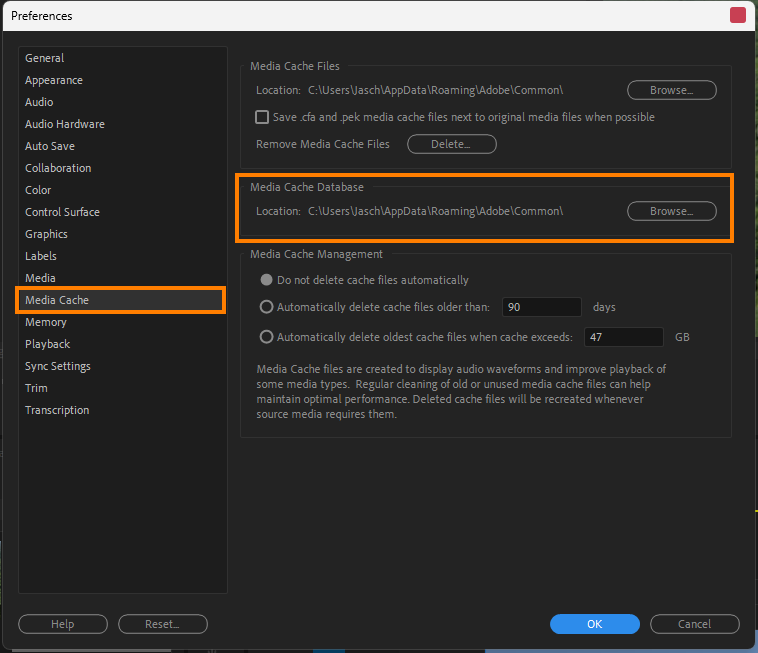
2. Change the Media Cache Location to Dedicated Drive.
If you have the space and another separate drive it's a good idea to try changing the Media Cache location. To do this follow these steps:
- Go to Edit (top left-hand corner) > Preferences > Media Cache.
- Next, click on Browse, navigate to the dedicated drive, and confirm the location. Once that’s done, click on Ok.
3. Move All the Media Files to a Local Drive.
Move all of the media you are working with to a single local drive on your device. Not an external device. This should speed things up and solve the problem.
- Copy all the files and footage on the external drive and paste them into a folder on your computer. Make sure it is an SSD.
- This will break the connection in Premiere Pro so expect to see the Media missing/offline error.
-
Now select all the clips in the Media Browser inside Premiere then right-click one of the clips and select Link Media.
-
Update the path to the new location that you have moved all of the files to.
Now that everything is relinked and updated you should be able to export the project without getting the error. Consider it resolved! Hopefully!
4. Update Premiere Pro
More than likely you are using the latest version anyway but if you aren't or aren't 100% sure you should check and update as soon as possible. To do this, open the Adobe Creative Cloud application, go to Apps > Updates, and click the Update button next to Premiere Pro. If there's nothing there then you are already fully up to date. If something pops up. Update!
5. Transcode Into Another Format
Your file may contain some minor data issues not supported by Premiere Pro so to fix this, you can transcode the footage that's causing problems. You can use Shutter Encoder or HandBrake to do this. Just pick the one that best suits you. They'll essentially do the same thing. When you do transcode, pick MP4 H264. Don't use H265 or another encoder as Premiere hates these formats...
Transcoding: Using Shutter Encoder
-
Import the clip(s) to Shutter Encoder.
-
Under Choose function, select a lossless codec.
-
DNxHD for 1080p and DNxHR for 4k
-
-
Click on Start function to transcode.
When it finishes you can find the file in the same folder as the original.
Converting A Variable Frame Rate Video to a Constant Frame Rate
Convert footage recorded at variable refresh rates to a stable frame rate. This usually happens with footage from OBS.
To check if your video has a variable frame rate
-
Import the clip(s) to Premiere Pro.
-
Right-click the clip in the Media Browser and select Properties.
-
Check if it says “Variable Frame Rate Detected.”
Convert Variable Frame Rate to Constant Frame Rate
-
Download HandBrake.
-
Import the clip(s) to Handbrake.
-
Go to the Video tab, and enable Constant Framerate.
-
Set the location and click on Transcode.
-
Import the clip to Premiere Pro.
6. Update Graphics Card Drivers
As these two problems are almost always caused by bad, outdated, or corrupted GPU drivers, clean installing your drivers with DDU will usually fix this problem.
-
Download the latest GPU driver you want to use.
-
Now Disable your Internet connection.
-
Run DDU and select the option to remove GeForce Experience (GFE) if prompted. You will get a similar message if you are using AMD Graphics.
-
When the process completes accept the restart request and let your computer restart.
-
Install the driver software and re-establish your internet connection. This prevents Windows from installing generic drivers automatically.
7. Create and Use Proxies
If you are using an older or low-end device you should be using proxies to make the resource load on your PC a little lighter.
- To do this, select all the clips inside the Media Browser, then right-click them and click on Proxy > Create Proxies.
- In the window that appears, set the Format against QuickTime and the Preset against ProRes Medium Resolution Proxy. Then, click on Ok to start creating proxies.
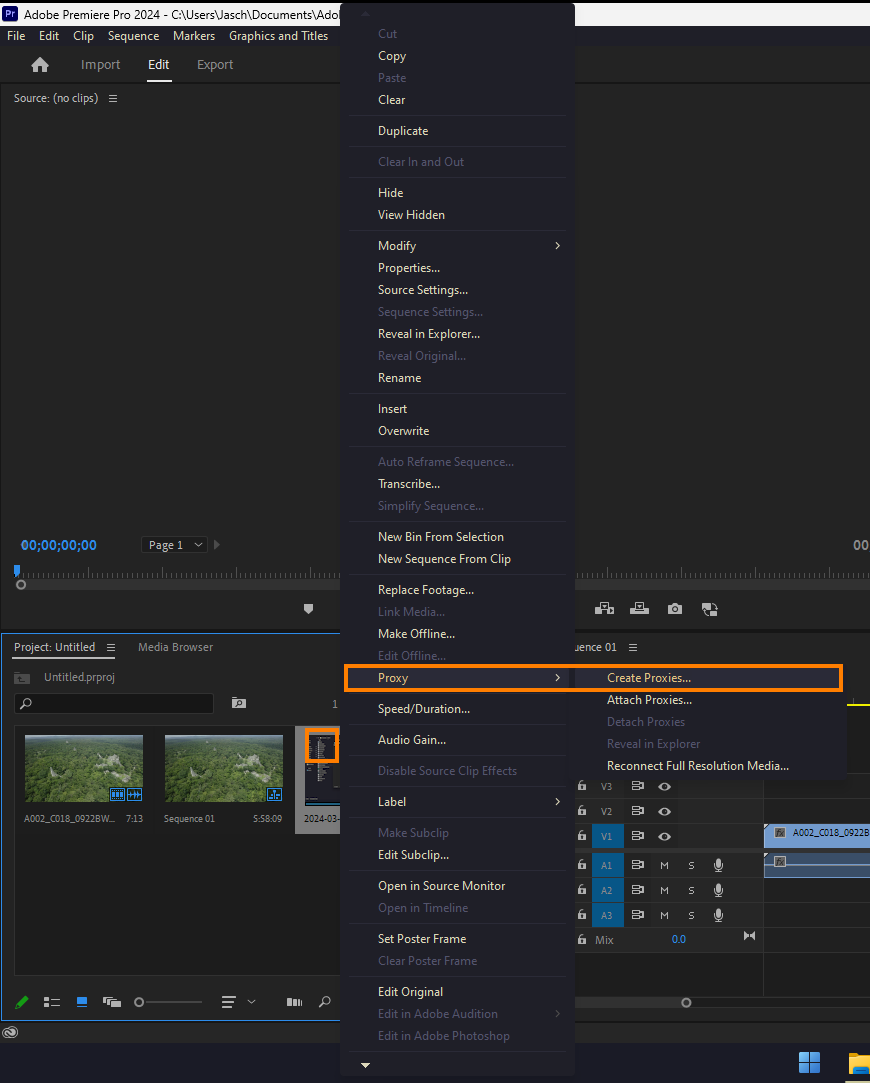
When they have been created, a new button called Toggle Proxies will be available when hovered over beneath the program monitor. When it’s blue, the proxies are active.
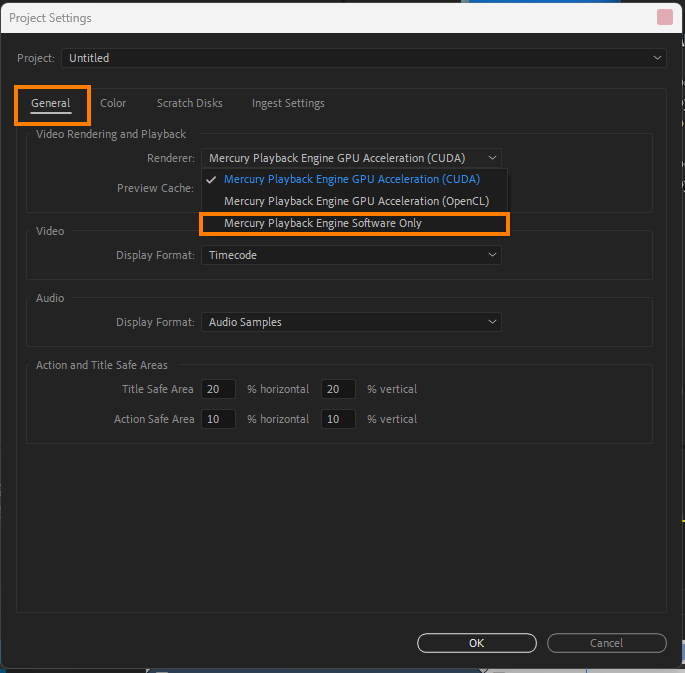
8. Use Software Encoding/Decoding
This method will use software to export the project. Just be aware that this is super slow so a big project may take days not minutes.
-
Click on File > Project Settings > General.
-
Set Renderer to Mercury Playback Engine Software Only.
-
Click on OK.
If that didn’t work. Try this.
-
Click on Edit > Preferences > Media.
-
Uncheck H.264/HEVC hardware accelerated decoding.
-
Click OK.
-
Restart Premiere Pro.
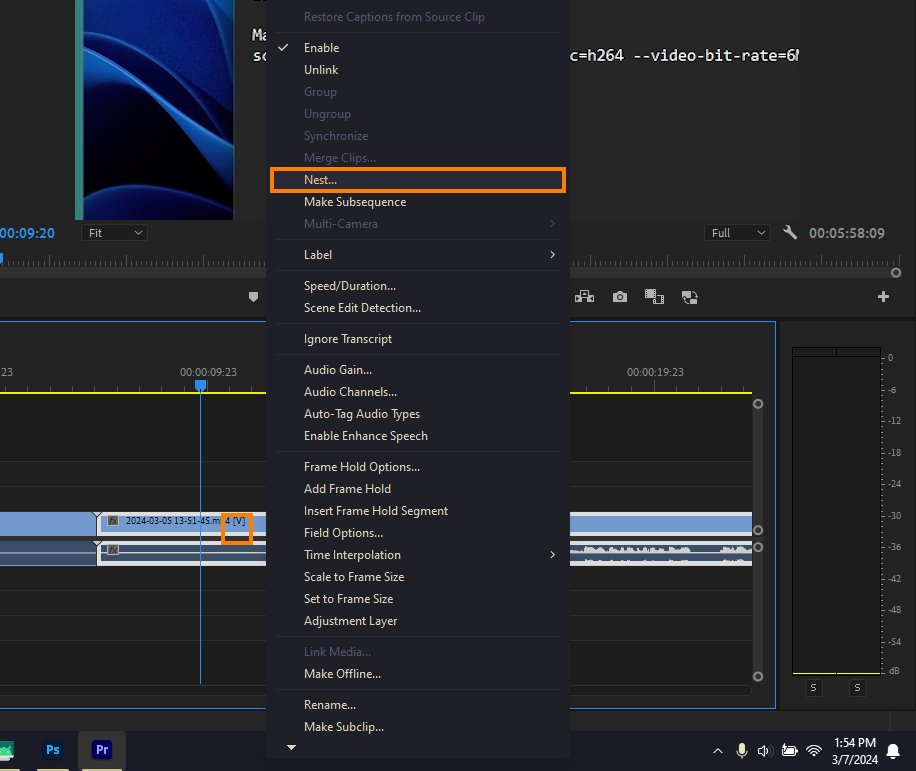
9. Nest Clips
-
Select the clips in your sequence.
-
Right-click and select Nest.
-
Click on OK.
-
Apply the effect to nested clips.
10. Render & Export Video Previews (Smart Rendering)
Try rendering the sequence and creating video previews. Then export using the previews as well.
-
Select the Timeline panel.
-
Click on Markers > Clear In and Out.
-
Click on Sequence > Render Effects Into Out.
If you are getting the error while exporting, try exporting using the previews:
-
Open the Export tab.
-
Set Preset against Match sequence preview settings.
-
Enable Use Previews under General.
11. Change File Name Extension
Another quick and easy fix is to change the file name extension name.
Show file name extensions in Windows:
-
Open the folder with your clips.
-
Click on View > Show > File name extensions.
Change file name extension:
-
Right-click the file, and select Show more options > Rename.
-
Change the current filename extension to either “.MTS” or “.m4v”
Note: You’ll need to re-link the clips if you have already started editing. Go back up to Option 3 to see the relinking process you need to follow.
-
If not, select the missing clips in the Media Browser, right-click, and select Link Media.
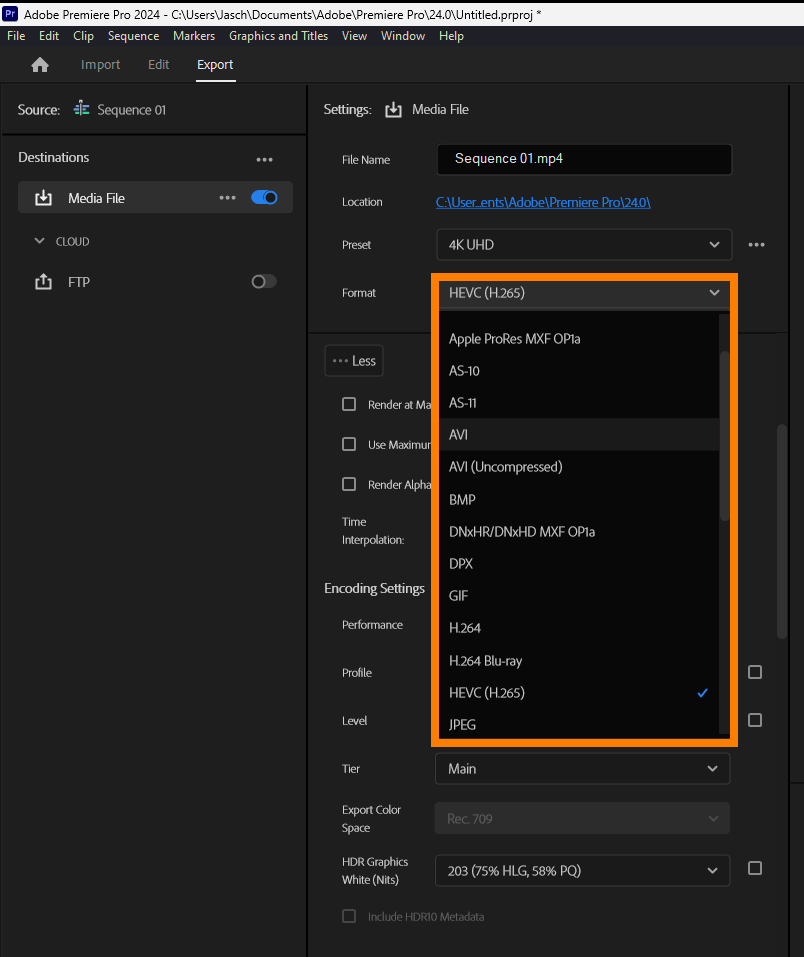
12. Export To Another Format
Try exporting your project with a different format. For example, if you are exporting ProRes 442 HQ with Match Source, try setting the Preset against ProRes 4444. Experiment with a few different options and see if you can export the project.
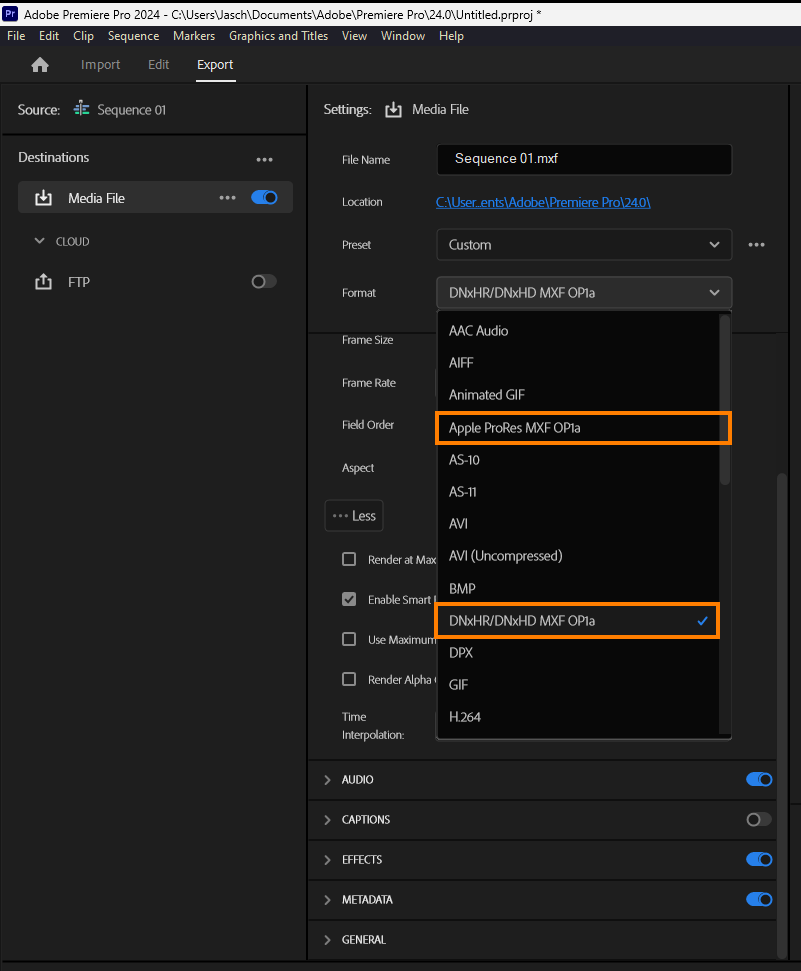
13. Clean Export, then Import Again
If you are getting the error because of image files in your project PNGs, JPGs, effects, graphics, etc export the project without them. Then add them in a second pass.
-
Remove the effects and graphics from your sequence.
-
Export the sequence with only the base video and audio track. Make sure you use a lossless format the first time to avoid double compression. DNxHx, ProRes 4444, etc., are lossless formats that are good options to use.
-
Now reimport the exported file and re-add the images and graphics you removed, then export again.
14. Move your Project to Davinci Resolve. It's better in Every Way.
Honestly, since moving over to Davinci Resolve I've had way fewer problems in general and can't remember the last time I had a major export issue. It's also a lot easier to move from Premiere Pro to Davinci than you might expect. It's a big change but at least you won't get an "error retrieving frame in Adobe Premiere Pro" again.