If you have updated to Windows 11 and are disappointed to find out that the Snipping Tool is no longer working as expected displaying error: This app can’t open – A problem with Windows is preventing Screen Snipping from opening. Refreshing your PC might help fix it. This article will guide you through several different steps you can take to solve the problem.

Table of Contents
Related: How to fix Microsoft Game Pass sign up changing back to US website constantly.
The snipping Tool app on Windows 11 is a handy little piece of software that a lot of people use on a daily basis to capture snippets of content for a range of different purposes. Unfortunately, it doesn’t seem to be working all that well on Windows 11 with a constant onslaught of bugs plaguing the basic tool. The most common error message to date is: This app can’t open – A problem with Windows is preventing Screen Snipping from opening. Refreshing your PC might help fix it. However, there are plenty of other problems that don’t display error messages.
For the most part, this issue is linked directly to a bad Windows update so if you’ve only just updated (within the last 9 days) you can still uninstall the update and go back to a working version. If you’re unsure how to do this, you can check out our guide here. If it’s too late to roll back to an older version of Windows 11, you can try updating to a newer version. To do this simply open Settings > Windows Updates > Windows Update and wait for Windows to download and install any available updates.
Fixing the Snipping Tool on Windows 11.
Microsoft has officially updated the Windows 11 health dashboard website and explains that the problem with the Snipping Tool app is due to an issue with a Microsoft digital certificate, which expired October 31, 2021. This problem is not only affecting the Snipping Tool app but also other elements in Windows 11, including Touch Keyboard, Voice Typing, Emoji Panel, Input Method Editor user interface (IME UI), Getting started and Tips apps.
The official fix for the problem is to make sure you have updated to build KB5006746 (build 22000.282) or newer. Depending on when you read this, this update may still be an optional update, which means you’ll have to manually start the download process. To manually download an optional update on Windows 11 do the following.
To fix the Snipping Tool and all the other elements that aren’t working on Windows 11, you’ll need to do the following.
- First, open Settings by pressing Windows Key + I.
- Next click Windows Update at the bottom of the list on the left-hand side of the screen.
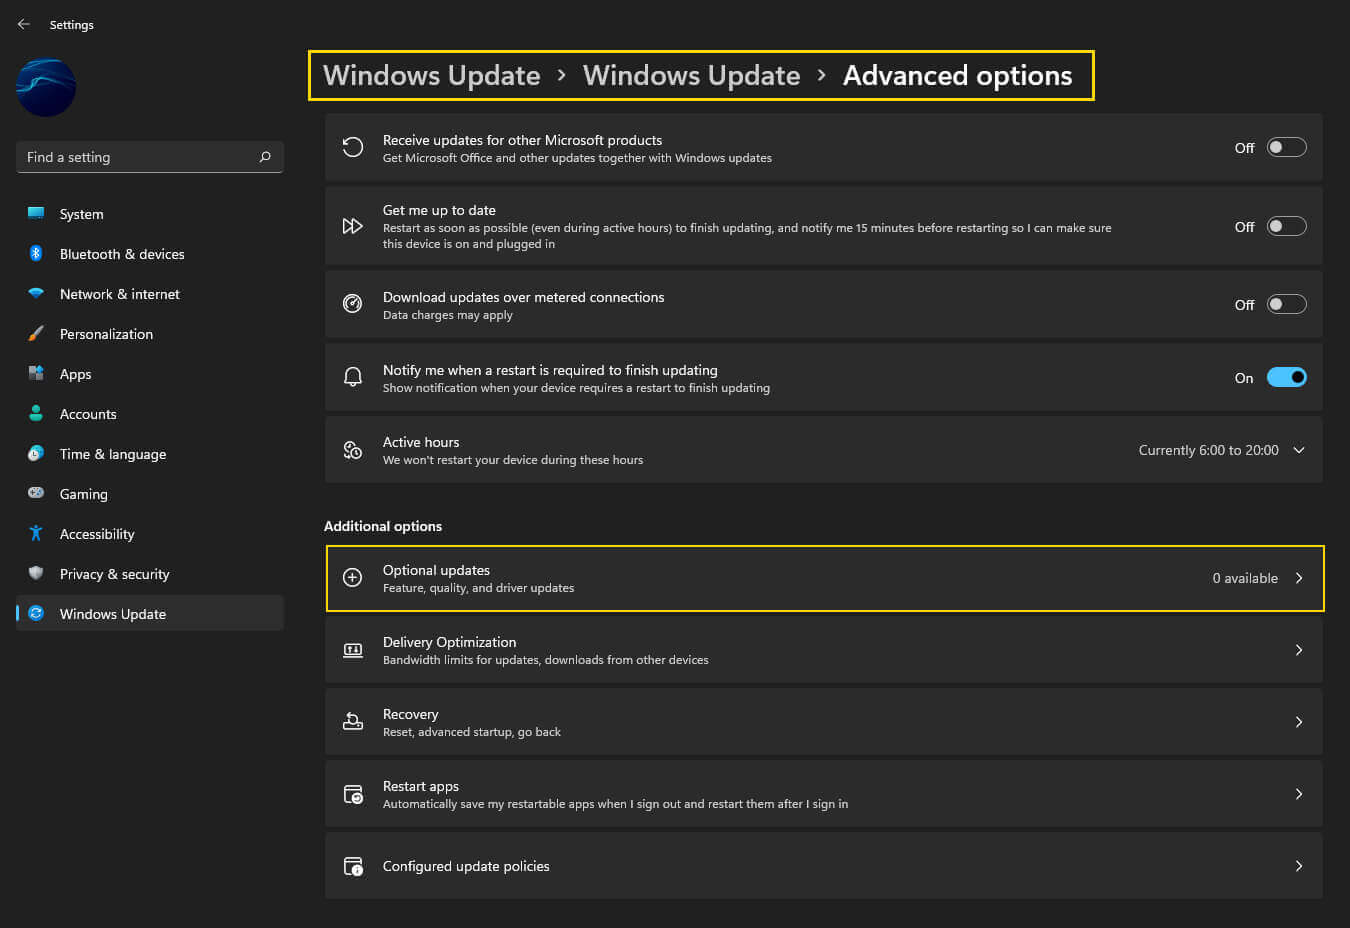
- Now in the central pane click Advanced options.
- You should now see the Optional updates section, expand this drop-down and you will see all the optional updates available for your system. Click Download & Install and install all of them. Yes all of them!
- After you have done this Restart your computer.
After a system Restart, you should be able to start using the Windows Snipping Tool again without any error messages or missing functions. All the other elements that were broken should also be fixed. As with everything on Windows 11, there is a good chance that this will happen again at a later date so if you are reading this and there is a newer version available in Optional updates, download and install it.
Other Windows 11 guides?
While you are here make sure you check out some of our other comprehensive Windows 11 guides. Windows 11 has a lot of fancy new features to explore and just as many changes to relearn. You can check out all of our Windows 11 guides below.