If you have upgraded to Windows 11 and just recently noticed an update has caused some stability issues or introduced a new bug. This article will show you how to check your Windows 11 update history and how to uninstall any updates that may be the cause of all your current problems. This process is also known as rolling back an update.

Table of Contents
Related: How to fix Windows 11 can’t connect to VPN. Windows 11 Built-in VPN tool not connecting.
Everyone who has used a Windows device for long enough knows that any update has the potential to introduce new stability issues and bugs into the operating system. Although a lot of these issues are usually minor annoyances, like taskbar icons not holding a central position. Some updates can introduce major problems that prevent basic and important system functions from working.
For example, a recent Windows 11 update completely destroyed the way VPN connections work, reducing connection speed to around 100kbps, regardless of the server you connect to. Thankfully, issues like these can usually be fixed by simply rolling back the latest update, which is now quite an easy to perform process on Windows 11.
Before you get started, however, check out the following guide: How to check your Windows 11 update history so you know which update/s you need to uninstall. If you aren’t happy with Windows 11 and have only just updated from Windows 10, check out our guide on rolling back to Windows 10 from Windows 11 here.
Quick steps for uninstalling Windows 11 updates.
- First, open the Settings App.
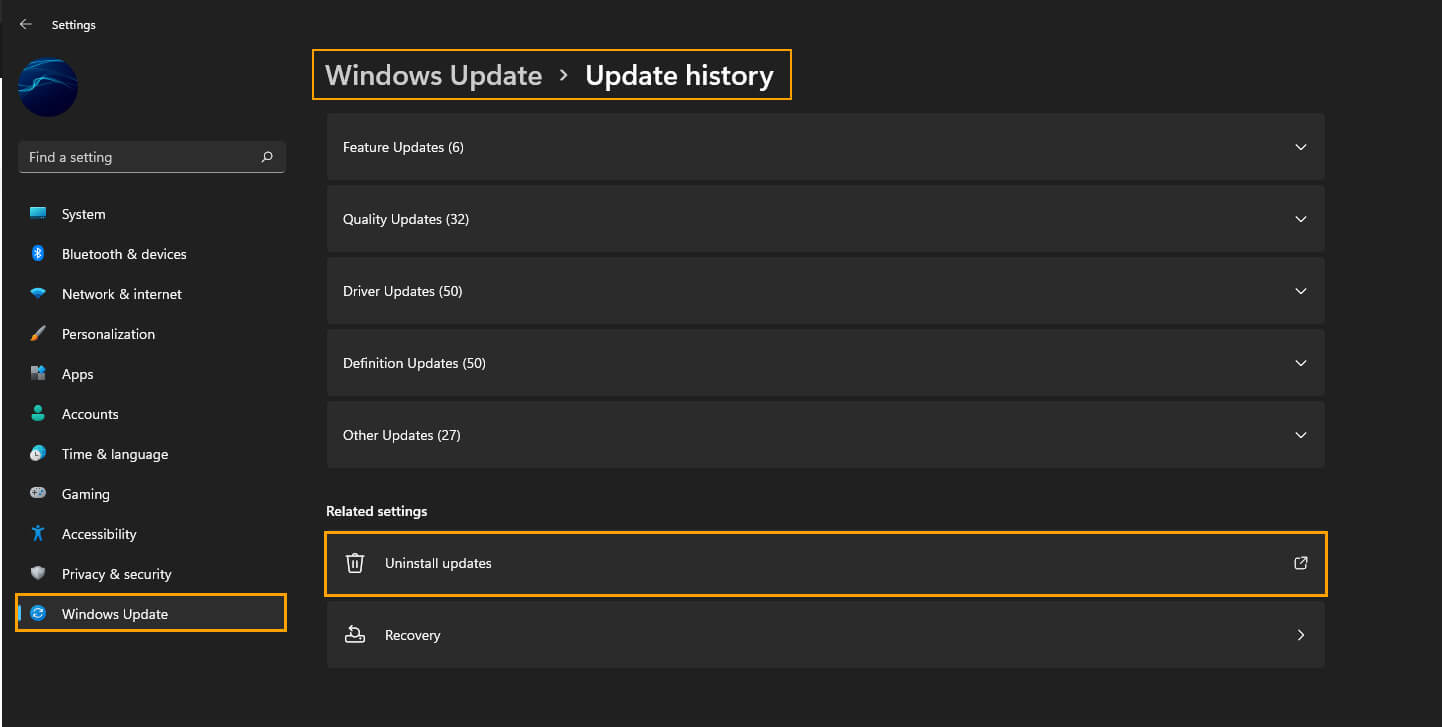
- Next, click Windows update.
- Click Update history.
- Now scroll down the page until you see Uninstall update.
- In the Control Panel window that appears, right-click the update you want to remove and select Uninstall.
- Now simply follow the steps shown by Windows and the process will complete.
How do you uninstall bad updates on Windows 11? Remove a bad Windows 11 update.
To start the process of uninstalling updates on Windows 11, you’ll need to do the following.
- First, open the Settings app by pressing the Windows Key + I on your keyboard or by searching Settings from the Start menu.
- Next, click Windows Update in the left-hand pane of the main Settings screen. This will take you to a new page where you will need to click Update history.
- Once you have clicked Update history, scroll down to the bottom of the page and click Uninstall updates.
- This will open the Control Panel and show you a list of updates that can be uninstalled. Simply right-click on an update and select Uninstall, then follow the semi-automated process shown by Windows.
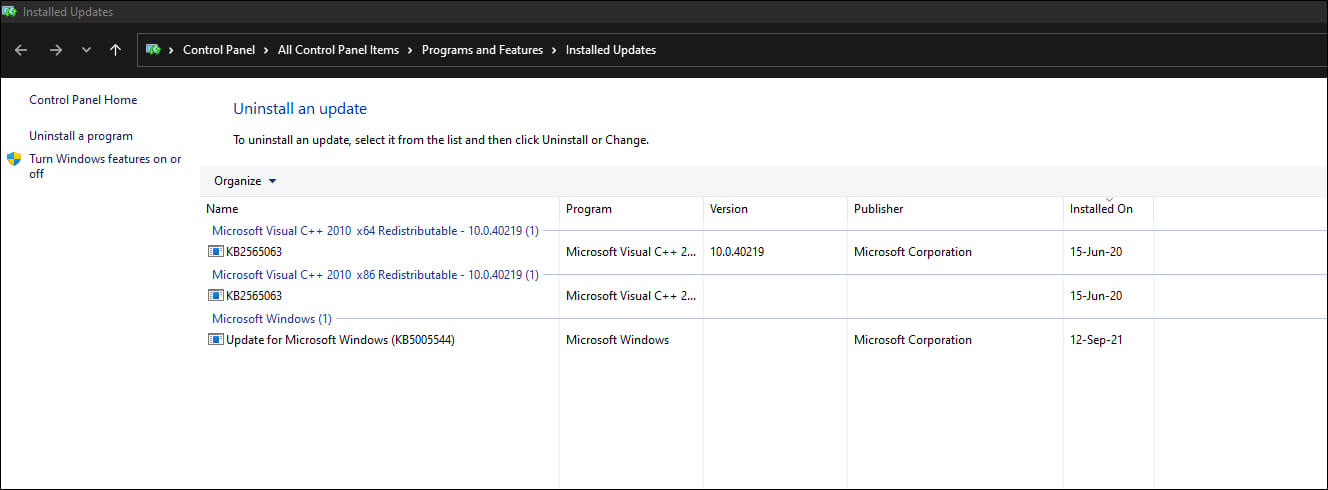
Note: When selecting an update to uninstall, it’s usually best to remove the most recent update first then work your way back until you see the issue you are having solved.
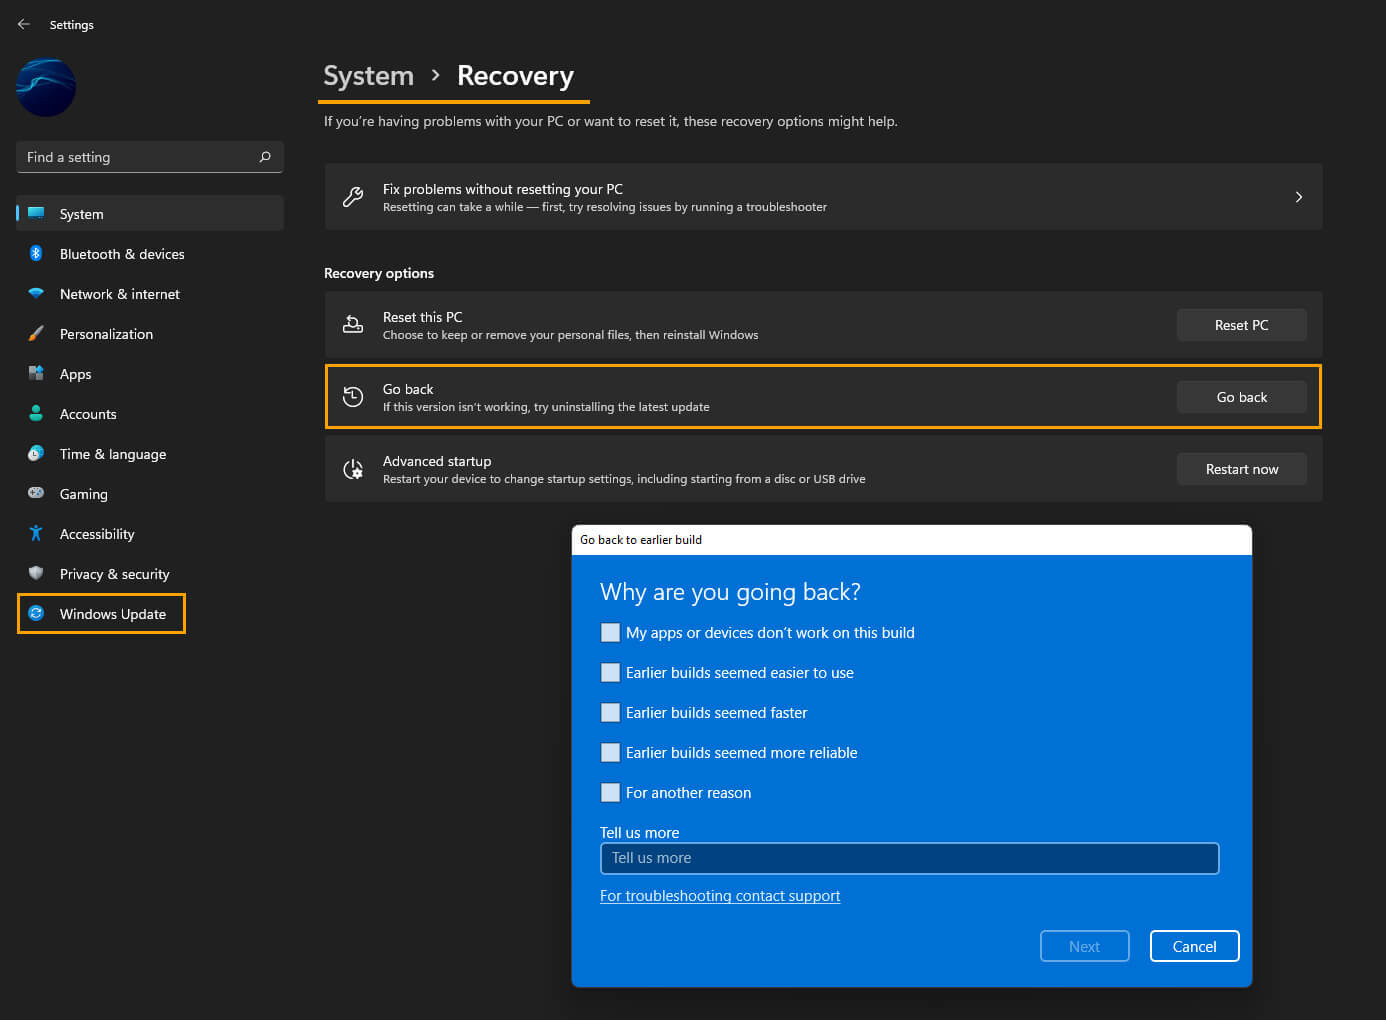
How do you roll back an entire Windows 11 build? Uninstall the latest Windows 11 build.
Alternatively, you can go to Settings > Windows Update > Update History > Recovery > Go back. This will allow you to roll back an entire Windows 11 build. This method works well, however does take a lot longer to complete, so make sure you have some extra time to wait.