Table of Contents
If you have recently noticed that your Windows 10 PC no longer automatically connects to your chosen WiFi network on boot. This article will guide you through several different troubleshooting steps you can take to fix the issue. Restoring normal WiFi connections at Windows 10 startup.
How to Enable or Disable Exploit Protection For Apps and Programs on Windows 10.
Windows 10 has a knack for having the most frustrating and annoying bugs, errors, and system glitches of all the operating systems on the market. What’s worse, is that they always seem to happen at the inconvenient possible times.
Thankfully, there are usually a lot of different fixes available for most problems, including the one preventing Windows 10 from connecting to WiFi networks at startup. Luckily almost all of these possible fixes, don’t require extensive Windows 10 knowledge, so let’s get started.
Related: Microsoft Store Apps Opening the Microsoft Store to Launch Instead of Launching.
How Do You Fix Windows 10 Not Automatically Connecting to WiFi When Starting?
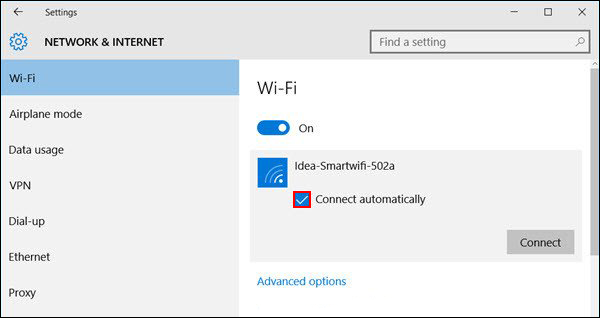
To begin, the first thing you need to check is if your computer is still set to connect to the Internet automatically. To do this, click on the WiFi Connection/Internet connection icon in the System tray, then click on the network you wish to connect to and make sure the Connect Automatically option has been ticked. Although this is usually the default option, it’s best to double-check as Windows will occasionally reset this setting from time to time. Usually after major updates.
Disable Power Saver For the WiFi Adapter to Fix Windows 10 Not Connecting to WiFi Networks at System Boot.
If the above solution didn’t work and you are having this issue from a laptop (or any Windows 10 device with a battery) you can try making sure that your wireless network adaptor isn’t configured to use Power Saving Mode. To do this double click on the Battery Icon in System tray, then click the Battery Settings link. This will take you to a new screen where you will need to click Power and sleep settings.
Here locate Additional power settings in the right-hand pane and Power Options will open. Now for any selected plan click Change plan settings > Change advanced Power settings. Next, find and expand Wireless Adapter settings and make sure Maximum Performance is set for all situations. This will prevent your Wireless connection disconnecting to save power on your device.
Adjust Wifi Adapter Power Management Settings to Fix Windows 10 Not Connecting to WiFi Networks at System Boot.
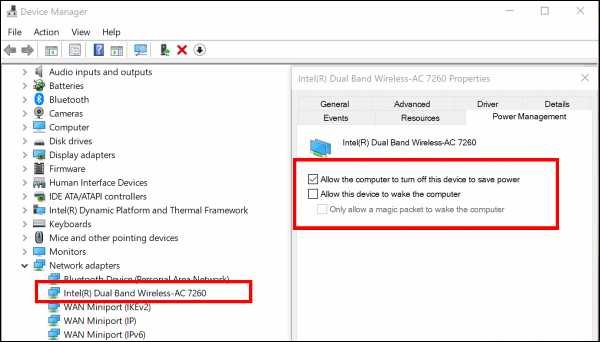
To do this right-click the start menu and select Device Manager. Next, expand the Network Adapters list and right-click on your Wireless Network Adapter, then select Properties. Under Power Management uncheck the box next to, allow the computer to turn off this device to save power.
Delete Wlansvc Files to Fix Windows 10 Not Connecting to WiFi Networks at System Boot.
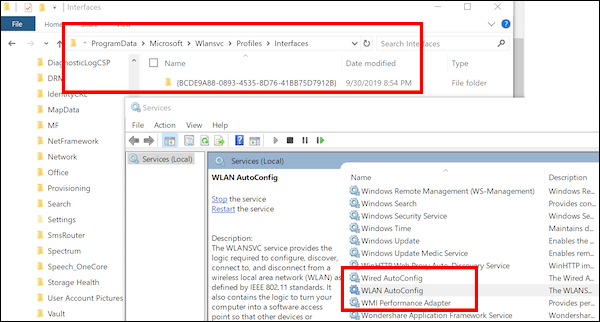
Deleting your computers Wlansvc files will remove any and all wireless network configurations. Which should restore Windows 10’s ability to connect to WiFi networks at startup. To do this press the Windows Key + R to open the Run tool, then type services.msc into the text box and press Enter. On this screen, find WLAN AutoConfig, right-click on it and choose Stop to stop the service. Now open File Explorer and navigate to the following location:
C:\ProgramData\Microsoft\Wlansvc\Profiles\Interfaces
When you get to the location, delete all of the folder contents and Restart your computer. After your computer reboots, reconnect to your wireless network and you shouldn’t have any more issues.