Table of Contents
The ability to manually assign CPU power to programs and apps isn’t something that is widely known about in Windows 10. Although it isn’t very common, it can be a useful way to increase the performance of specific programs whilst running multiple tasks simultaneously on your computer.

How to Set Specific Websites to Mute By Default in Google Chrome.
By default, Windows 10 automatically assigns CPU cores/power to specific applications, both physical and virtual. A good percentage of the time though, the power assigned to certain apps or programs far exceeds what is required for them to run efficiently. If you are running multiple programs and would like to divert more power to a specific function, you can do so quite easily following the steps below.
It’s important to know that setting CPU core limits for specific apps and programs will only last while the program is open. As soon as you close the program or restart your computer, Windows will once again take over CPU allocation. It's also important to note that some programs and apps may require a minimum number of cores to function correctly, so if an app freezes or crashes after setting the number of cores, you may need to increase how much power you are allocating.
How to Manually Allocate CPU Cores to Programs and Apps in Windows 10.
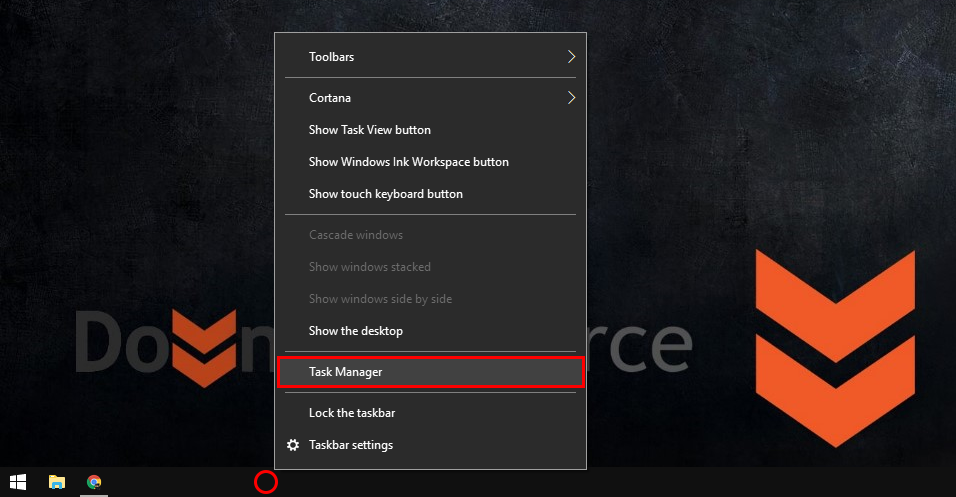
To start manually adjusting how many CPU cores a program or app uses in Windows 10 you won’t need to download any specific programs or tools. Everything you need is already available in Windows, so let’s get started. First, make sure you have the programs you wish to manage open and running on your computer. Next, open the Task Manager, there are several ways to this but the easiest are as follows: Press Ctrl+Shift+Esc, Ctrl+Shift+Delete, or just right-click on the taskbar and select Task Manager.
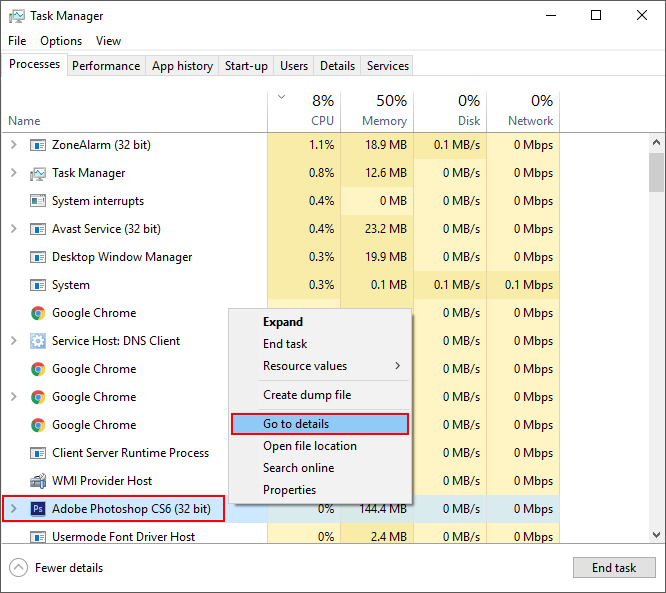
Once you have the Task Manager open, stay on the Processes tab and find the program you would like to change the CPU core usage for. As soon as you have found it, right-click on the application/program, then select Go to details from the options.
Here in the details tab, right-click on the highlighted application/program and select Set affinity.
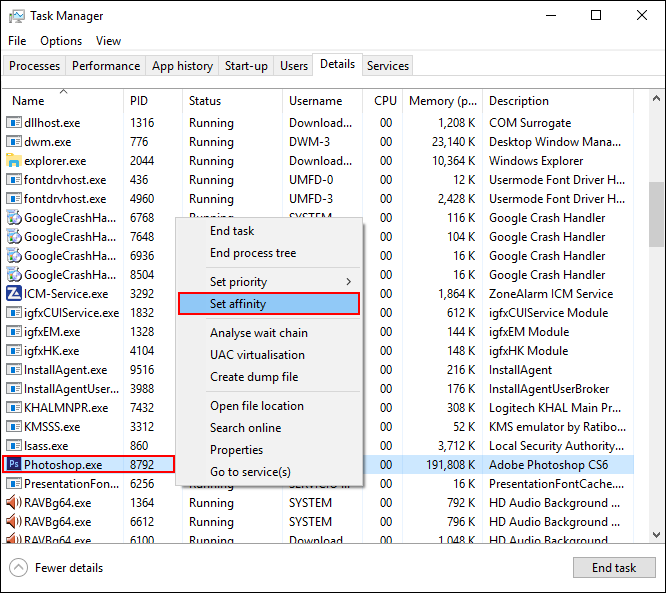
A small new window will now appear showing you all the CPU’s being used by the program/app. (virtual and physical CPUs) All you need to do is uncheck the CPU’s you don’t want to use and save your changes by clicking Ok. Just remember that if you close the program or restart your computer at any stage, windows will automatically reassign all cores to the program or application. If you have any issues with apps and programs crashing when limiting how many CPU cores you have allocated. Try increasing the number of CPU cores by one each time until you find a stable minimum to use.
