If you have a Windows 11 computer you probably don’t even know that you can use it as a Mobile Hotspot to share your WiFi, Ethernet, and Mobile connections. Just like Android and iOS devices Windows 11 allows you to share your Internet connection with other devices.

Table of Contents
Related: How to change to a Passwordless Microsoft account.
Creating a Mobile Hotspot is one of the handiest ways to share an Internet connection between devices that don’t have native Internet access or have lost the ability to get a mobile connection. For example, if your friend’s phone loses signal and Mobile Internet, but your network provider is unaffected, you can share your Internet connection with their device using a Mobile Hotspot.
What a lot of people don’t know, however, is that Windows 11 also has this feature and it works in pretty much the same way. What’s even better is that you can share an Ethernet, Mobile, or WiFi connection using a Mobile Hotspot on Windows 11. It’s also super easy to set up and secure so let’s start working through the process.
Quick steps to create/enable a Mobile Hotspot on Windows 11.
- Open Settings.
- Go to Network & Internet.
- Click the Mobile Hotspot entry. (Not the toggle)
- Now flip the Toggle to On.
- If you have more than one connection type select the one you want to share.
- Choose to share it over Wi-Fi or Bluetooth.
- Pick your Power-saving setting (Optional)
- Click the Edit option under Properties.
- Finally, customise your Hotspot settings, then click Save.
- Your settings will be remembered until you change them.
How do you create a Mobile Hotspot using your Windows 11 computer? Create a Mobile Hotspot on Windows 11.
In order to create a mobile Hotspot on a Windows 11 device, you’ll need to do the following.
- To begin, open the Settings app on Windows 11, then click the Network & Internet option in the left-hand pane.
- On this page click the Mobile hotspot option (not the toggle it’s bugged at the moment)
- This will take you to a new page where you have several different options to choose from. First, Enable the Mobile Hotspot toggle at the top of the page.
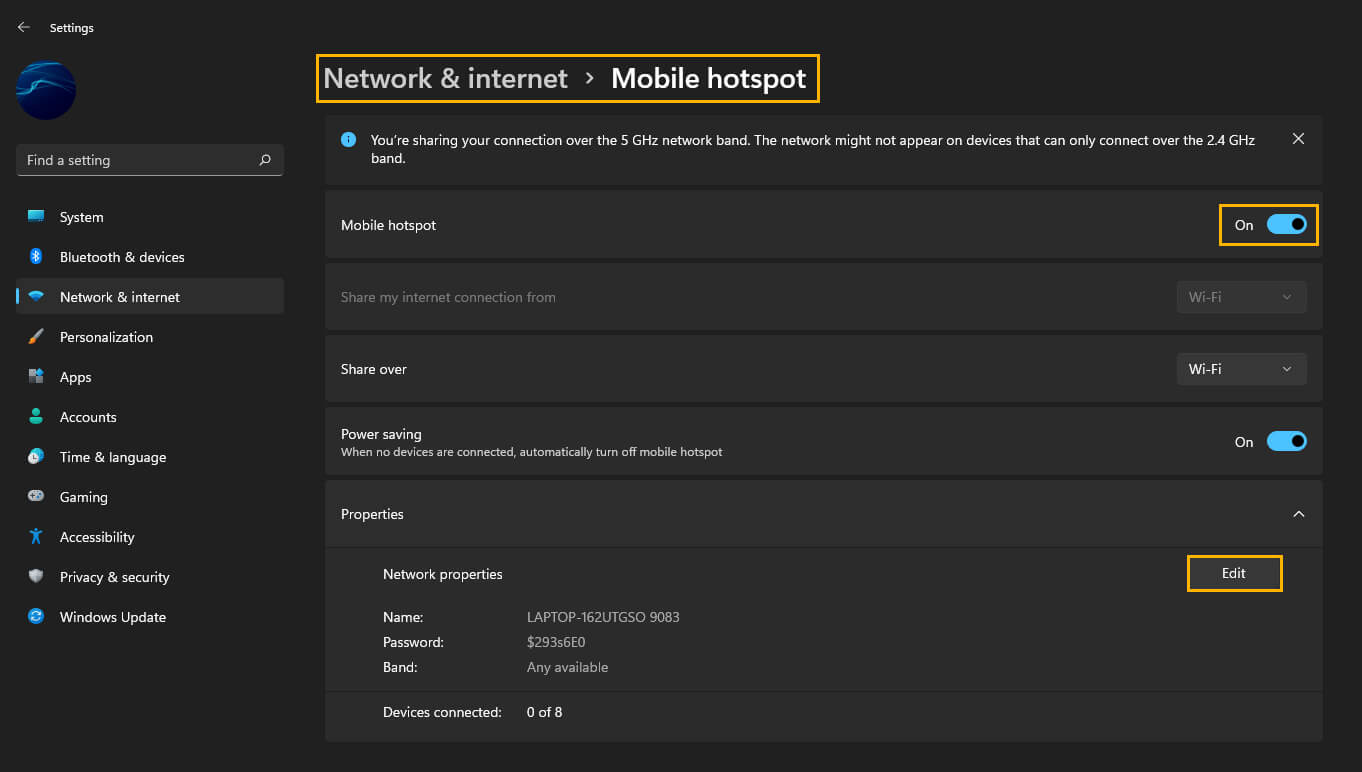
- Next, choose which Internet connection to share (WiFi, Ethernet, Mobile) This will be greyed out if you only have one connection type.
- Choose how you wish to share your connection. Either over Wi-Fi or Bluetooth.
Optional: Enable or disable Power saving. This will disable the Hotspot whenever there are no connected devices. (Personally, I’d leave this on but it’s your choice) Mobile Hotspots are known for increasing battery usage so you probably don’t want them running if you aren’t connected to a power source.
- Finally, click the Edit option under Properties and give your Hotspot a custom name, password, and select the Network band type: Any, 2.4Ghz, 5Ghz.
- Click Save to update your settings and enable the Windows 11 Mobile Hotspot.
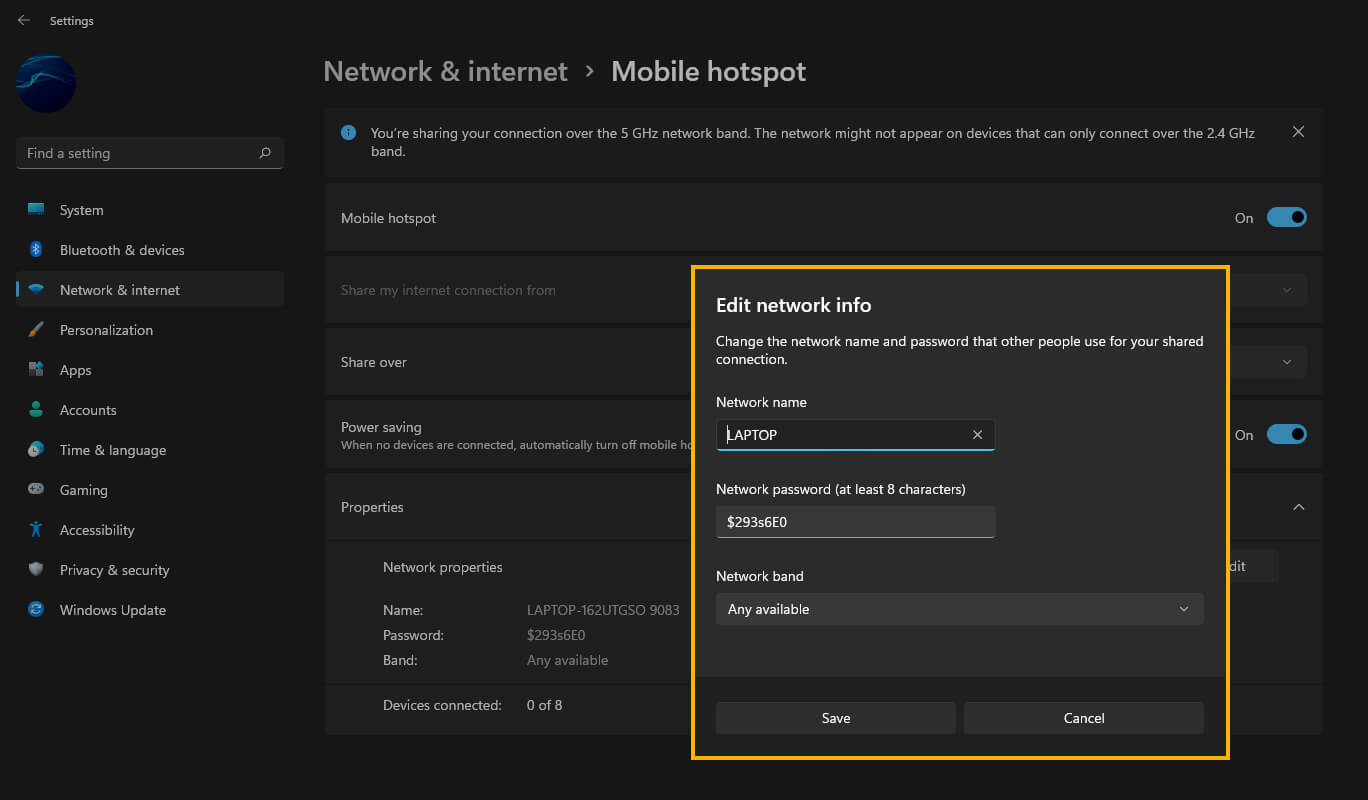
You can edit this information as often as you like, however, you will have to manually reconnect devices after each change you make to your Windows 11 Mobile Hotspot. While you’re here make sure you check out some of our other Windows 11 guides especially our guide on adding a quick connect VPN option to the taskbar.