Table of Contents
Restore points allow you to revert your Windows operating systems back to a previous working state if you have recently caused an error or installed a bad program. Having Windows restore points can be a very valuable asset, having recent ones is even better. By default, Windows only creates a system restore once per week or before major events like program, app or driver installation, this guide will show you how to force Windows to make a new restore point each and every time your system reboots.

How to Customise the Look and Feel of Your Android Smartphone or Tablet.
Making changes to restore points requires two steps, the first one is using the Windows Registry to change the frequency which Windows will trigger restore points. The second step is using the Task Scheduler to set up a startup task that will create a new restore point, each and every time your computer boots. If you are worried about how much space all these extra restore points will use, don’t worry as it is also possible to set a limit, although Windows is very good at removing old restore points anyway.
Ironically, before getting started with creating automatic restore points, it’s best to make a manual restore point just in case something goes wrong. To do this follow the steps below.
- Search Create a Restore Point from the Windows search box or start menu, then select it from the list of results.
- On the System Protection tab in System Properties select Create.
- Next, enter a description for the restore point, then select Create > OK and you are done.
The First Step in Creating Restore Points on Startup. How to Change Windows the Restore Point Frequency.
Now that you have made a manual restore point, you can begin the process of making automatic ones. On your keyboard press the shortcut Windows Key + R, this will display a small window at the bottom left of the desktop, this tool is the Run tool. In the Run tool, you will need to type the following command, then press Enter: regedit
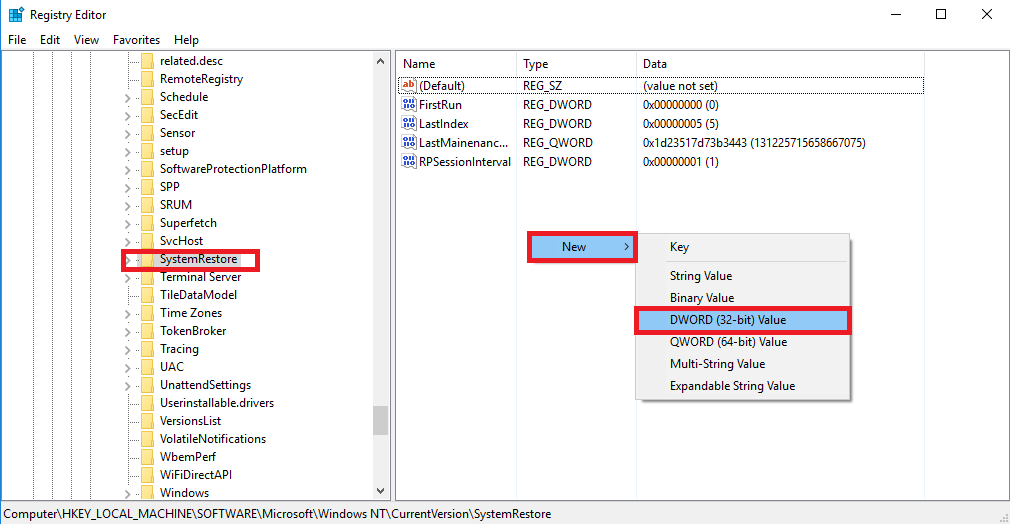
On the left-hand side of the Registry Editor there is a tree menu displaying assorted folders on your computer. Follow the path below to get to the desired location.
HKEY_LOCAL_MACHINE\SOFTWARE\Microsoft\Windows NT\CurrentVersion\SystemRestore
Next, you will need to create a new value inside the System Restore key (folder). Right-click System Restore and choose New > DWORD (32-bit) Value. Name the new value SystemRestorePointFrequency. Once created, double-click on that key to open a small window, in this window make sure the Value field is set to 0.
Step Two: Schedule a Startup Task to Create a New Restore Point
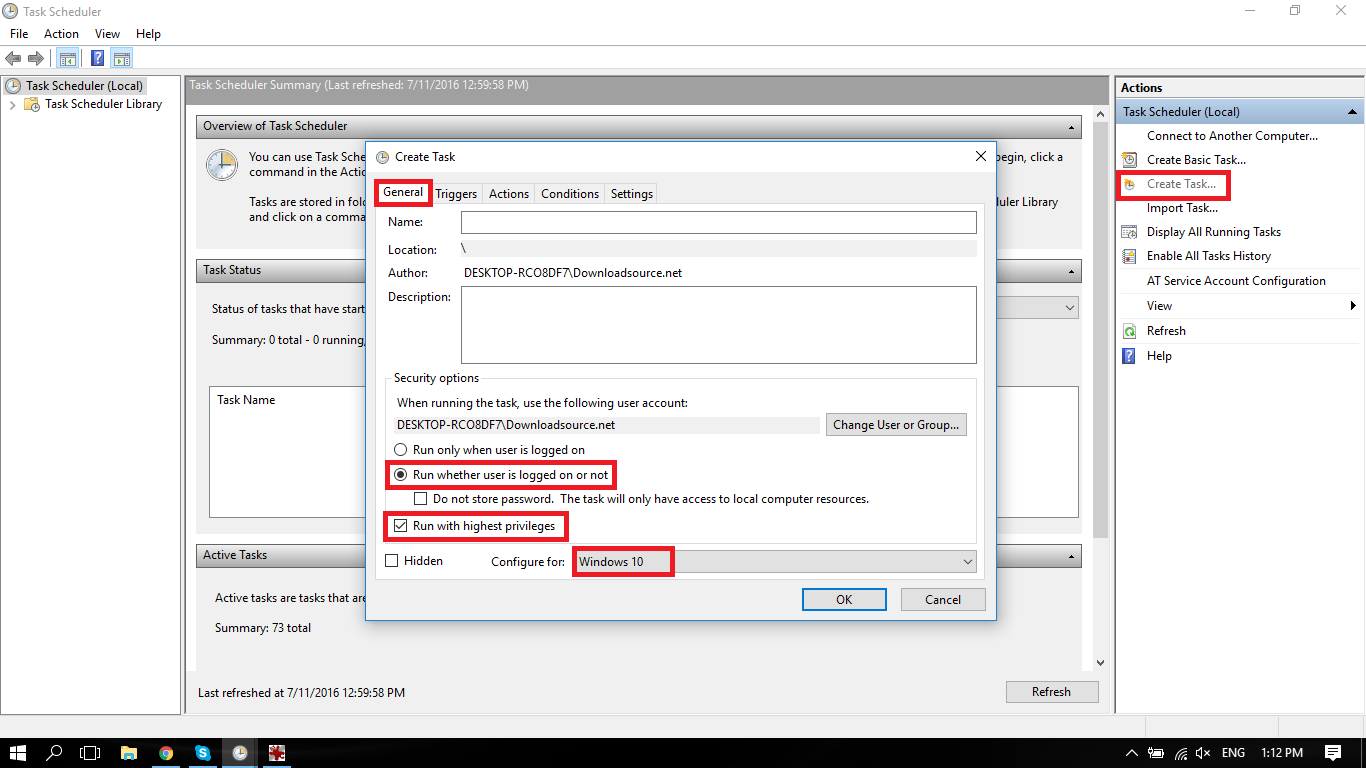
The next step is to use the Windows Task Scheduler to create a task that will run when Windows starts, making a new Restore Point. To do this open the start menu, type Task Scheduler, then click on it when it appears. Alternatively, you can use the search tab on your taskbar and type the same. With Task Scheduler open click Create Task, on the right side, this will open a new window. From the General tab set the following options: Run whether the user logs on or not. In the next box, select Run with highest privileges. Lastly, in this window, you will have to select Windows 10. (if you are using Windows 10)
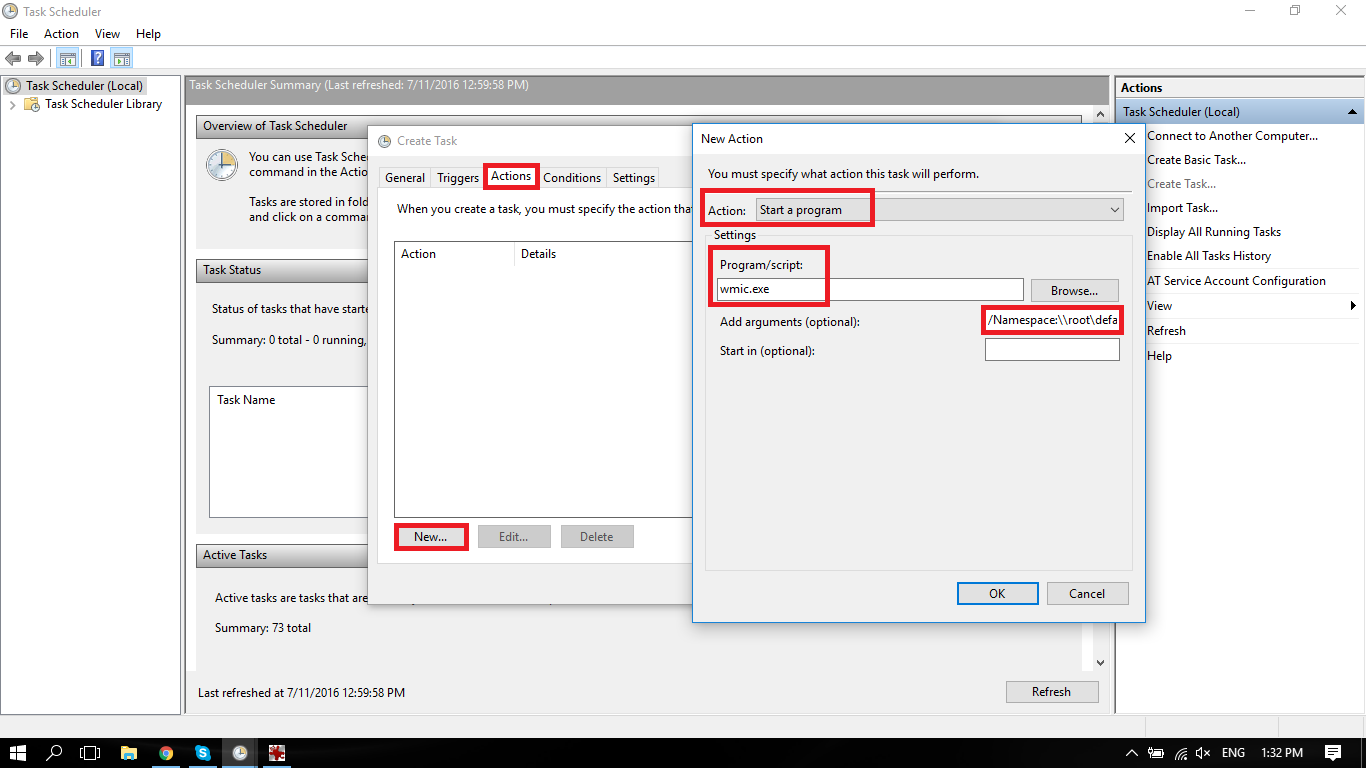
Now go to the tab Triggers and click New, this will open a new window, here select Begin Task: At startup, then confirm with Ok. After clicking ok, you’ll be sent back to the previous window. Now go to Actions and click Create New, here make sure the action is set to Start Program, in the Program/script box enter the following: wmic.exe. You will need to add:
/Namespace:\\root\default Path SystemRestore Call CreateRestorePoint "Startup Restore Point", 100, 7
To the Add arguments (optional) box as well, then confirm with Ok.
If you’re running Windows on a laptop and want the task to start when you are using either battery or AC power, go to the Conditionals tab next to actions at the top and turn the start the task only if the computer is on AC power option to off. When you’re done, click the Ok and you will be prompted for your login password. Enter that and you are done.
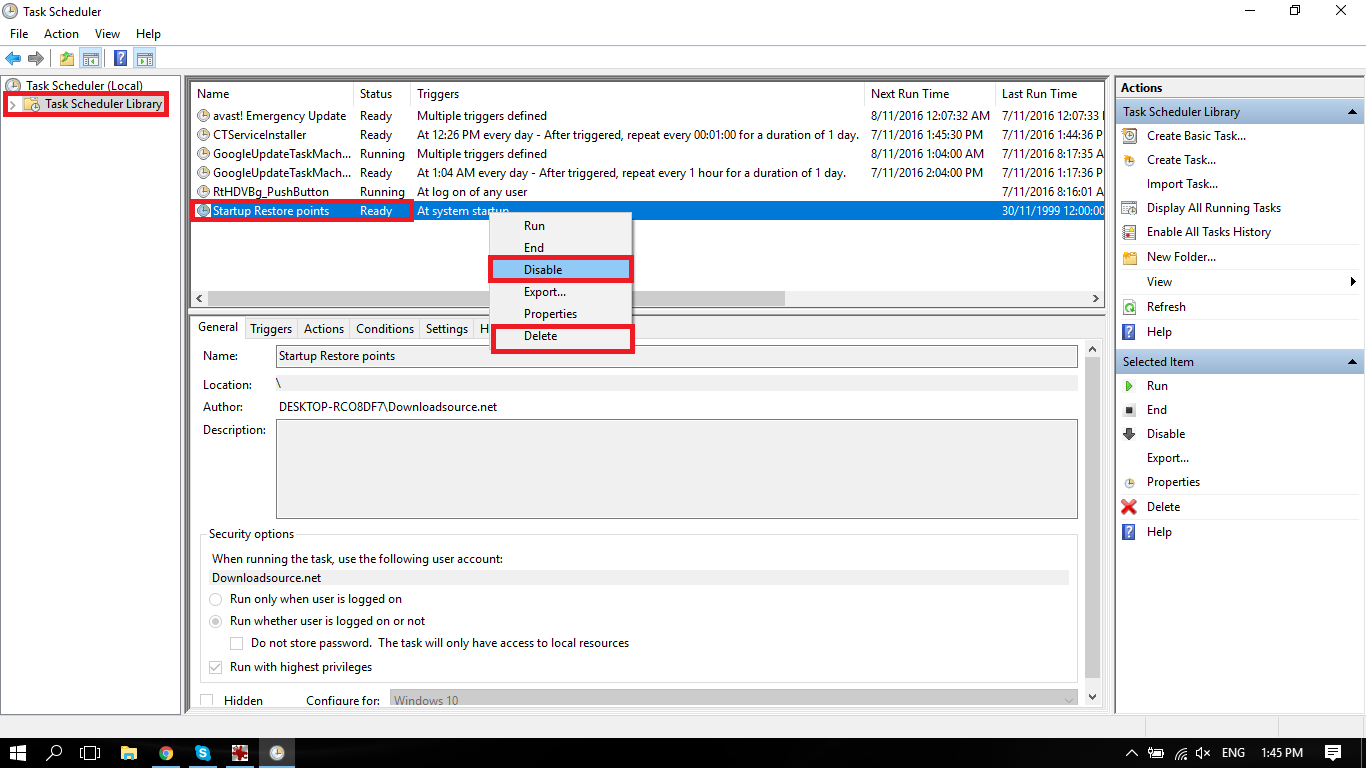
If you ever wish to turn the task off, open Task Scheduler, pick your task from the menu in the center, right-click and either Disable or Delete. To remove the Registry entry you created, go back to the SystemRestore key path of:
HKEY_LOCAL_MACHINE\SOFTWARE\Microsoft\Windows NT\CurrentVersion\SystemRestore
and delete the file.