Table of Contents
In a recent guide, we showed you how to remove the ‘Share’ option from the Windows 10 context menu, AKA the right-click menu. In this guide, you will learn how to remove the new ‘Give Access to’ option from the same context menu.
How to Pin Website Links to the Windows 10 Start Menu or Taskbar. (Chrome, Firefox, Edge)
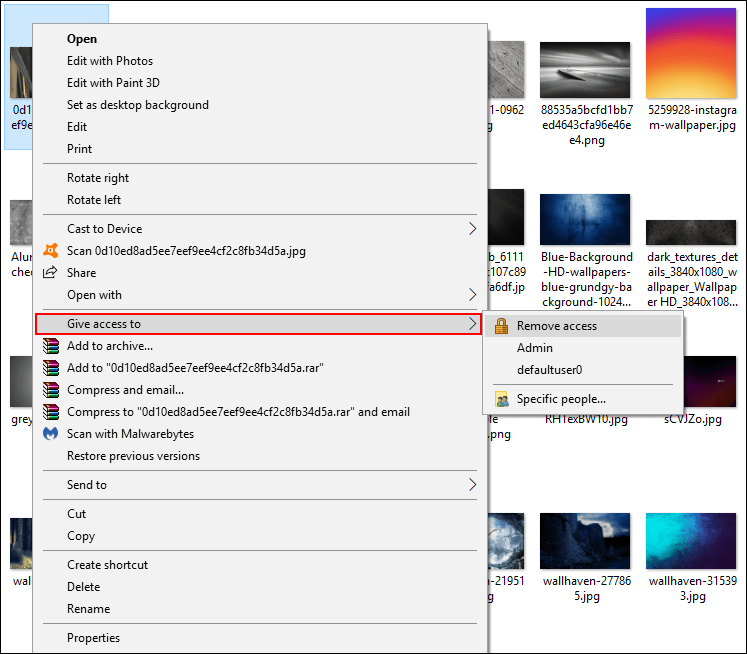
If you haven’t yet noticed the ‘Give Access to’ option, open the Windows File Explorer, find a file, right-click on it and you’ll see the option about halfway down the list. Give Access to is pretty straightforward and does exactly what its name says, it allows you (as an admin) to open up access to specific files for other users. If you don’t have any other users on your PC you probably won’t use the service, so you might as well disable it. If you do have other users, disabling it is a good way to make sure they don’t start sharing files all over your system.
How to Remove ‘Give access to’ From the Windows Right-Click Menu.
As this process will require you to make changes to the Windows 10 registry, it’s important that you make a system restore point before continuing. To do this, open the start menu, type Restore, then select Create a Restore Point when it shows on the list. From the new window that appears, click Create in the bottom right section of the screen, then follow the instructions given by Windows. Once you have successfully made a restore point, you can continue.
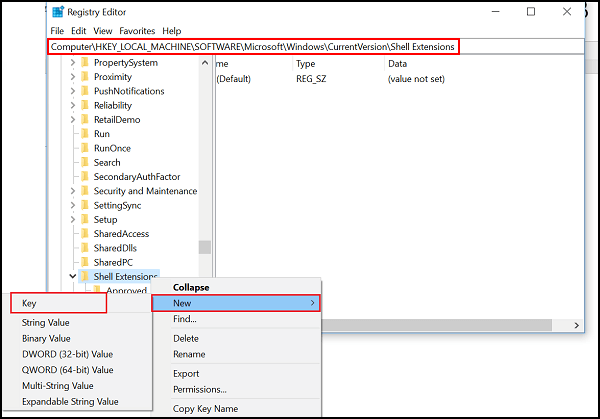
With a restore point set, press the Windows Key + R to open the Run tool, then type: regedit into the box and press Enter. Once the registry tool is open, navigate to the following address
HKEY_LOCAL_MACHINE\SOFTWARE\Microsoft\Windows\CurrentVersion\Shell Extensions
When you are in this location, right-click the Shell Extensions folder, choose New, select Key and name the new key Blocked.
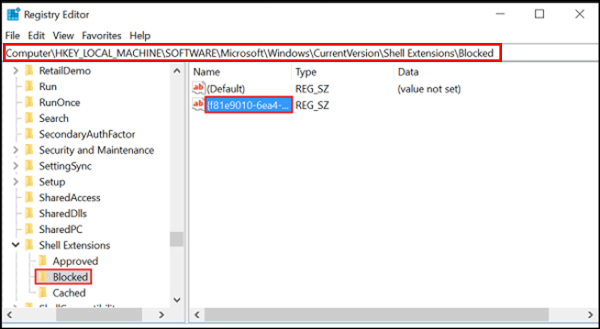
Next, select the newly created Blocked key, right-click anywhere in the empty space on the right side of the screen, select New > String Value, assign the following value then press Enter:
{f81e9010-6ea4-11ce-a7ff-00aa003ca9f6}
Note: Unlike most other Registry tweaks, you are not required to change the Value of the newly created string.
Now all you have to do to make the change take effect is sign out of your account or restart your machine. When you sign back in, right-click on a file and double check the ‘Give Access to’ option is gone. If at any stage you wish to restore the ‘Give Access to’ option simply go back to the same location:
HKEY_LOCAL_MACHINE\SOFTWARE\Microsoft\Windows\CurrentVersion\Shell Extensions
And delete the Blocked Key that contains the following string value.
{f81e9010-6ea4-11ce-a7ff-00aa003ca9f6}
Once removed, you will again have to sign out from your computer or restart your machine to see the change take effect. Alternatively, if it hasn’t been long since you made the change, you can simply use the restore point we created at the very beginning of this guide. If you’d like to remove the Share option from the context menu as well, check out the guide below.
How to Remove the ‘Share’ Option From the Windows 10 Context Menu.