If you have updated to Windows 11 or simply installed a fresh copy of Windows 11, you may want to change the default name of drives and volumes (partitions) on the operating system. This will let you give drive personalised names and specific drive letters. Although this isn’t something that you need to do, it is a nice way to personalise your Windows 11 OS a little bit.

Table of Contents
Related: How to add a VPN quick connect option to the Taskbar on Windows 11.
Although Windows 11 hasn’t been out all that long and is still officially in the preview build phase, it’s proving to be a very popular operating system. Record numbers of users have signed up for the Windows 11 insiders program to get a head start on using the new OS from Microsoft. I’ve personally been using Windows 11 since the initial release and have found it to be on par with or slightly better than Windows 10 in quite a few areas. Though I’m only using it for basic tasks that don’t include gaming.
Functionally Windows 11 is very similar to Windows 10 though does see a lot of options and features re-arranged or moved into different locations. As a result, there are quite a few things you may need to re-learn how to do after you have updated to Windows 11. We’ve covered dozens of these processes already so make sure you check them out here. For this guide, we’ll be covering how to rename drives and change volume labels on Windows 11. Thankfully the process isn’t too complicated and hasn’t changed dramatically from Windows 10.
How do you Rename a Drive on Windows 11 using Settings? Renaming drives on Windows 11 from the Settings app.
On Windows 11, you can use up to 32 alphanumerical characters for NTFS drives and up to 11 alphanumerical characters for FAT drives. You can also use spaces, dashes, underscores, and other symbols in your name. So keep this in mind when coming up with a drive name.
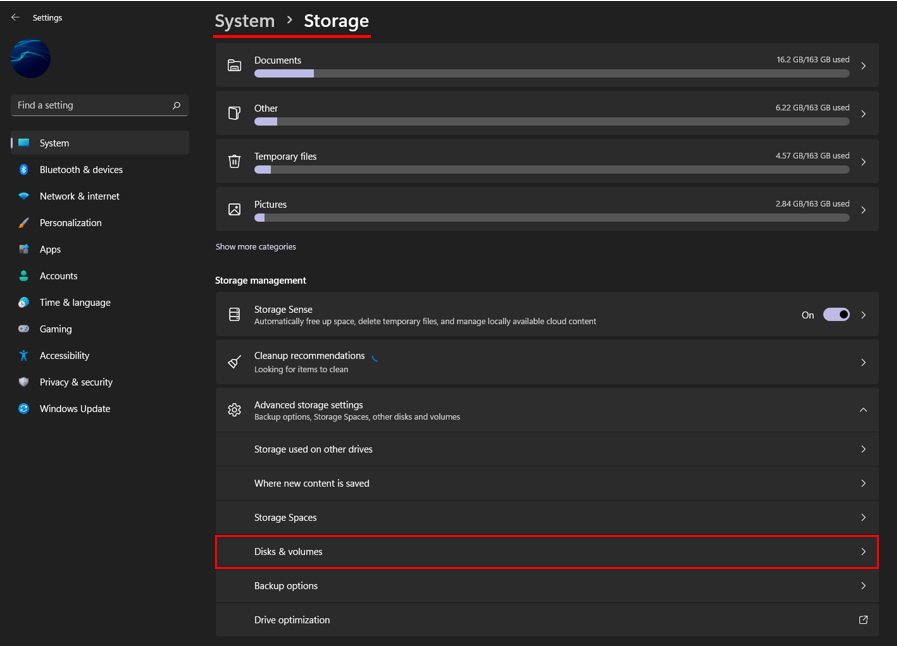
- To begin, open Settings by pressing Windows Key + I on your keyboard.
- Next, go to System > Storage and click Advanced Storage Settings.
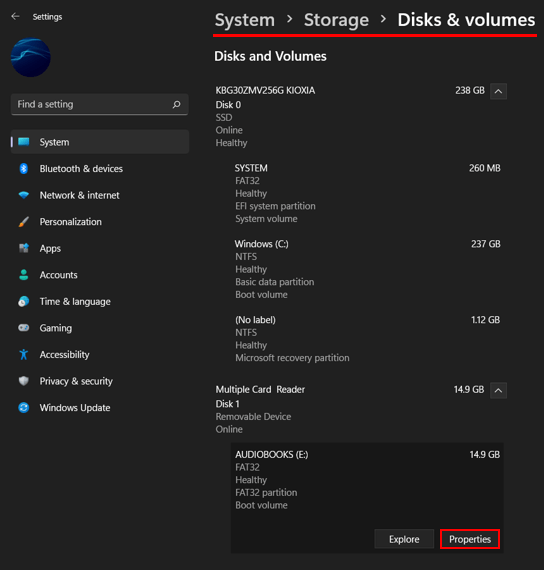
- Here select Disk & Volumes then click the arrow-down button next to the drive that contains the partition you want to rename on Windows 11.
- Select the volume, click Properties.
- Finally, click Change Label, enter a new name, then click Apply to save changes.
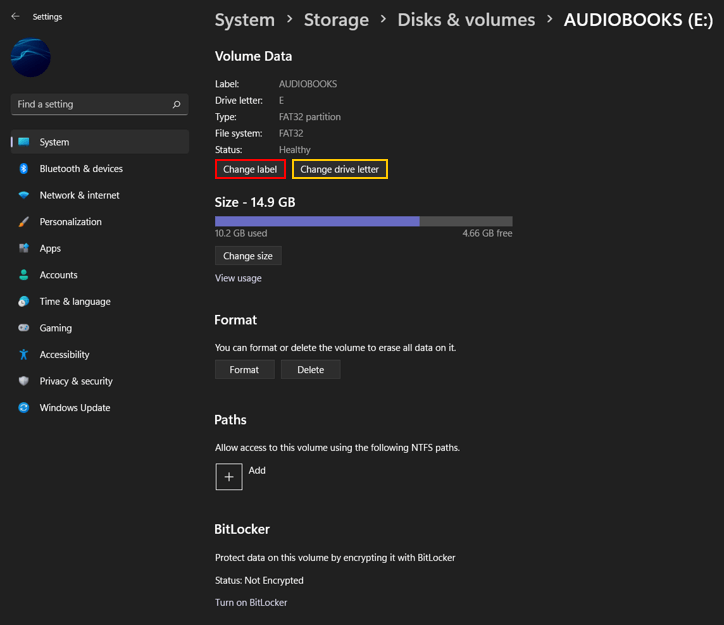
Note: You can also change the drive letter from this location, however changing a drive letter can cause issues with everything else on the system the directs to that current drive path. So keep that in mind.
This is an entirely new process for Windows 11 and comes as Microsoft continues to migrate options from Control Panel into Windows 11 Settings.
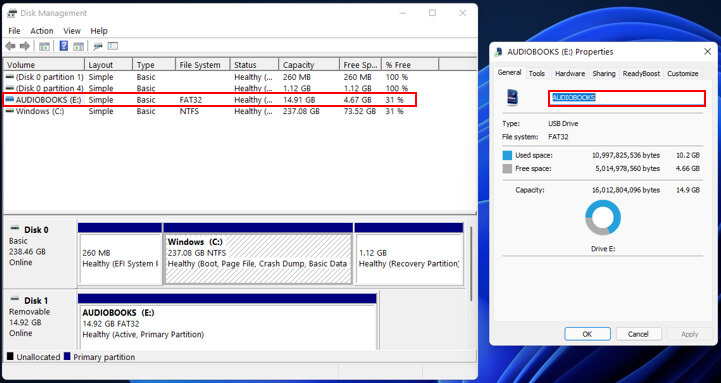
How to Change a volume label in Windows 11 using Disk Management.
- Right-click the Start menu and select Disk Management.
- In the new window that appears, find the volume you want to rename then right-click on it and select Properties.
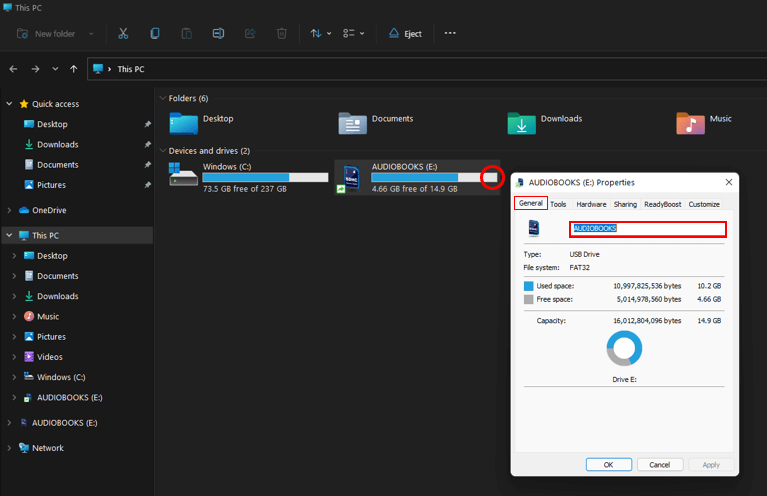
- Stay on the General tab and use the top text box to give the drive/volume a new name. There are a couple of volumes that you won’t be able to rename however these are usually hidden so it doesn’t matter anyway. Finally, click Apply then Ok.
How to Rename a drive in Windows 11 using File Explorer.
- Open File Explorer and right-click the drive/partition you want to rename, then press Rename.
- Now simply rename the drive to whatever you lick then click Apply, then Ok.