If you have a USB drive that keeps showing random error messages when you connect it to your computer, there are several different things you can do to solve the problem and get it working normally. Windows 11 has a couple of built-in tools that will let you repair a USB drive without much hassle.

Table of Contents
Related: How to fix error 0xc000012f WINWORD.EXE - Bad image error on Windows 11.
Everyone who owns a computer or some other kind of tech device has probably got a stack of USB sticks they use to store data or transfer content from one device to another. Sometimes these devices can become corrupted or damaged and require fixing in order to get them to work properly again. For instance, if you keep getting an error message when you connect your USB device to your computer, you’ll need to run the repair tool.
Before you begin, make sure you have copied the data of your USB drive (if you can). Once you have done this you’ll be able to start the steps shown below. If you happen to have a USB drive that doesn’t do anything when you connect it to your Windows 11 computer, you can check out our guide on that here. That is an entirely different issue with an entirely different fix. So without further adieu let’s get starting on the USB repair process for Windows 11.
How do you repair a USB drive on Windows 11? Fix USB Drive errors on Windows 11.
To repair a USB drive that keeps showing an error message on Windows 11, you’ll need to use the PowerShell tool. Just remember that this process will wipe the drive clean, so if you can remove the data make sure you do it.
- To begin, open the Start menu on Windows 11, then search for PowerShell. When it appears in the list right-click on it and select Run as administrator.
- Now that you have the PowerShell tool open, type the following command to identify the USB flash drive and press Enter:
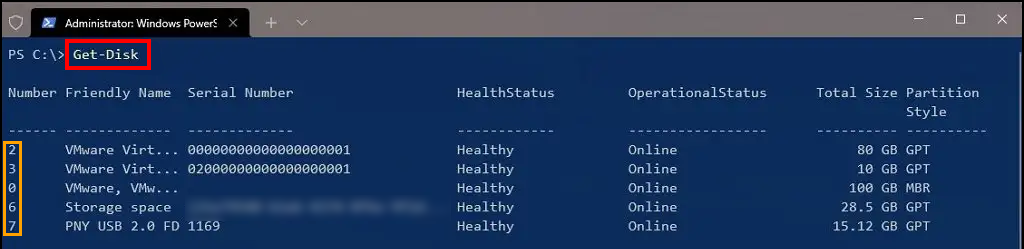
Get-Disk
- Type the following command and press Enter. It will wipe the drive.
IMPORTANT: Make sure you replace the 7 with the number of the USB drive you want to wipe and repair. If you enter the wrong number you will wipe the data from the wrong drive. Once you enter the Get-Disk command, you will see a list of devices with their number listed to the left of their name. (highlighted in orange below)
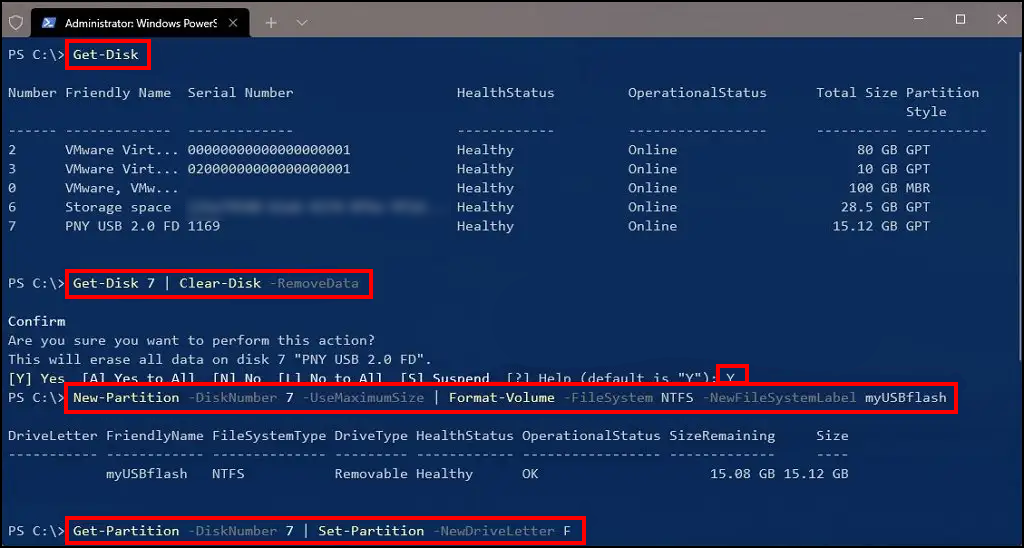
Get-Disk 7 | Clear-Disk -RemoveData
- After the command has run, type Y to confirm that you want to wipe the specified drive and press Enter.
- Now type the following command to create a partition using the NTFS file system and assign a name for the USB drive, and press Enter.
IMPORTANT: Change the 7 with the disk number of the USB drive you want to repair and change “myUSBdrive” with the name you want to use for the storage.
New-Partition -DiskNumber 7 -UseMaximumSize | Format-Volume -FileSystem NTFS -NewFileSystemLabel myUSBdrive
- Now type the following command to assign a drive letter to the drive and press Enter.
Get-Partition -DiskNumber 7 | Set-Partition -NewDriveLetter F
IMPORTANT: Change the 7 with the disk number of the USB drive you want to repair and change the F to the drive letter you want to use (make sure you pick one that isn’t being used already)
That is the final command. After it has run your drive should be working properly without any issues. If you still have issues moving forward, there may be something physically wrong with the drive.