If you are editing and creating content in Davinci Resolve you've more than likely made a mistake in your Timeline that you didn't catch and now can't go back and undo it because you've already done too much work. Thankfully there is a way to Restore a timeline backup in Davinci Resolve with Timeline Recovery. It's a handy little feature that doesn't get much attention.

Table of Contents
Related: How to Fix Mono Audio in Davinci Resolve - Fix Left Ear Only Audio in Davinci Resolve.
One of the most stressful parts of creating content is the fear of losing everything you've worked hard to create. Sometimes it's the footage itself, while other times it's all the hours of editing that you've put into the project. You've probably even had the dreaded experience of destroying something in your timeline while working on a different section, only to find yourself without the option to undo the damage whilst saving all the new changes you've made.
What you probably aren't aware of though is that Resolve secretly backs up your timelines in a well-organised database. It's basically a project backup of Timelines. So if you accidentally delete or overwrite something and can't go back to undo it using the History tool this is your next best option. Tracking down the exact point you made the error is the only complicated part. But it can potentially save you a lot of work and heartache. If you have Resolve 18.5 or 18.6 it’s enabled by default and below you'll find out exactly how to use it. If you're using an older version we'll show you how to enable it. Keep in mind it is kind of new so don't expect Davinci Resolve 3 to have it.
The tool means you won't have to go searching folders and archives for older versions of the project to import. Everything is done in app and really easily.
How to Enable Timeline Recovery If you're not on 18.5 or newer.
For this, we'll assume you already have Dainci Resolve open
- First click Davinci Resolve in the top left-hand corner, then select Preferences.
- In the Preferences window change to the User tab and then Project Save and Load on the left side.
- Now make sure Live Saves and Timeline backups are ticked.
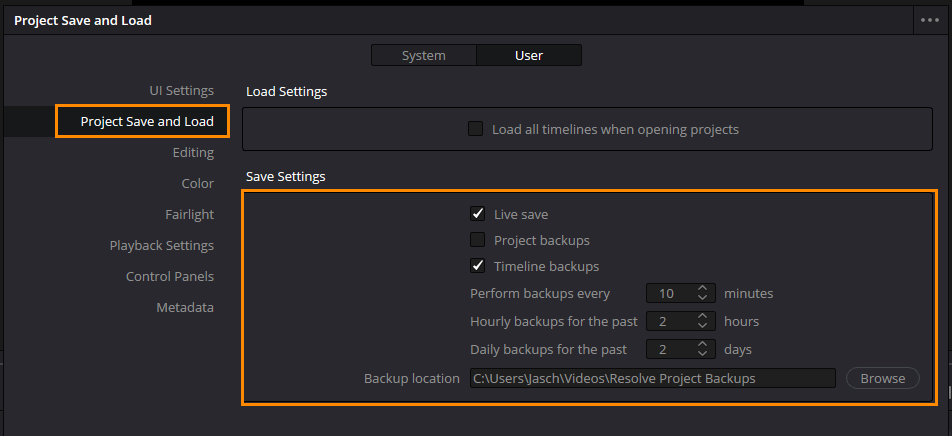
You can also choose other backup option settings here. While the default hourly backup options are good you may want to shorten some of the times. Either was though it's also a good idea to have manual backups just in case. There's nothing worse than needing to export your project and it's lost in a data corruption error or something just as trivial.
How to use Timeline Recovery in Davinci Resolve.
To use Timeline Recovery you'll need to make sure you have your project open.
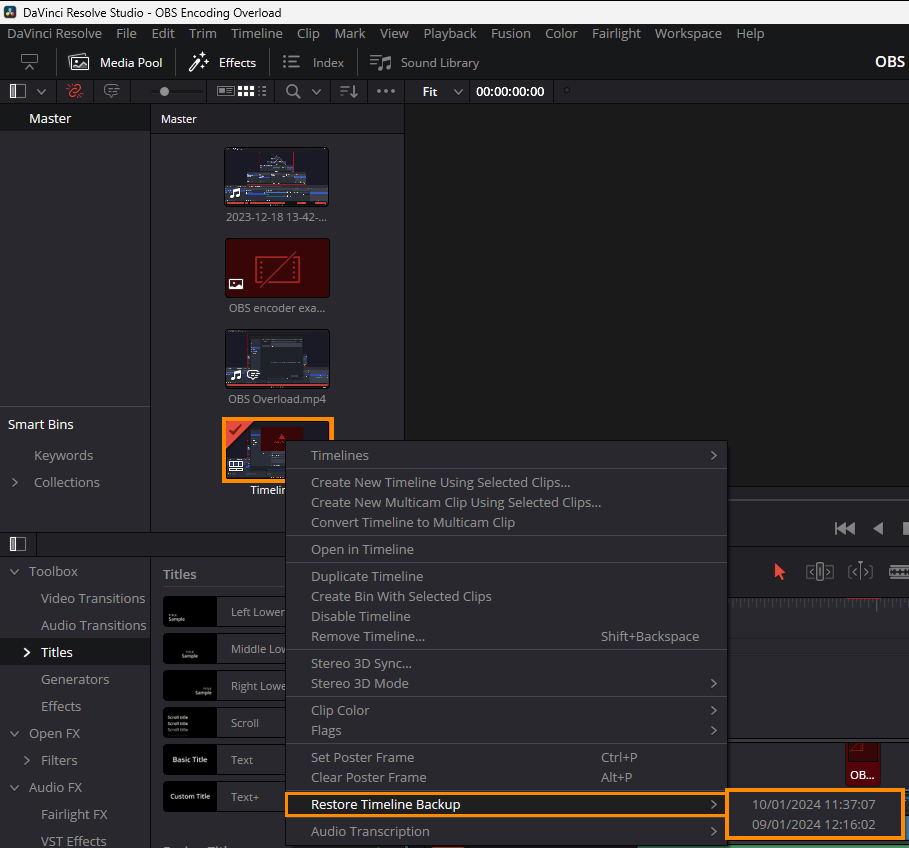
- Now right-click on your Timeline in the media pool and select Timeline Recovery.
- This will bring up a long list of points you can recover from.
- Simply select one and Resolve will open a new timeline of that exact point in history. Which restores timeline backups for the project file.
- This will allow you to compare your historic timeline and the current one so that you can merge the content that you want to save. You can do this as many times as you like until you find the exact spot where you made a mistake.