If you are using Windows 11 and would like to set up a VPN n the operating system that doesn’t require you to use a third-party VPN client. This article will show you how to set up a VPN on Windows 11 using the built-in tools provided by Windows, allowing you to stop using third-party software.

Table of Contents
Related: How to enable volume levelling on Windows 11. (Loudness Equalization)
Setting up a VPN on Windows operating systems used to be a complicated process, however, it is no longer the case. Especially on Windows 10 and 11, which follow very similar processes. While VPNs aren’t strictly necessary for everyday Internet use, there are a lot of situations where you may want to use one or may need to use one. For instance, if your country has blocked content you want access too or if you need to access content from your home country but can’t do so from abroad.
While most VPN providers have clients you can download that allow you to sign in and use VPNs quickly and easily, they do consume system resources and are required to run in the background constantly. Which is why switching to the built-in Windows options is far better. This allows you to set up as many VPN servers as you like and connect to them from the network icon on the taskbar at any time, without having to open another program. So how exactly do you set it up?
How do you set up VPNs on Windows 11? Adding VPNs to Windows 11.
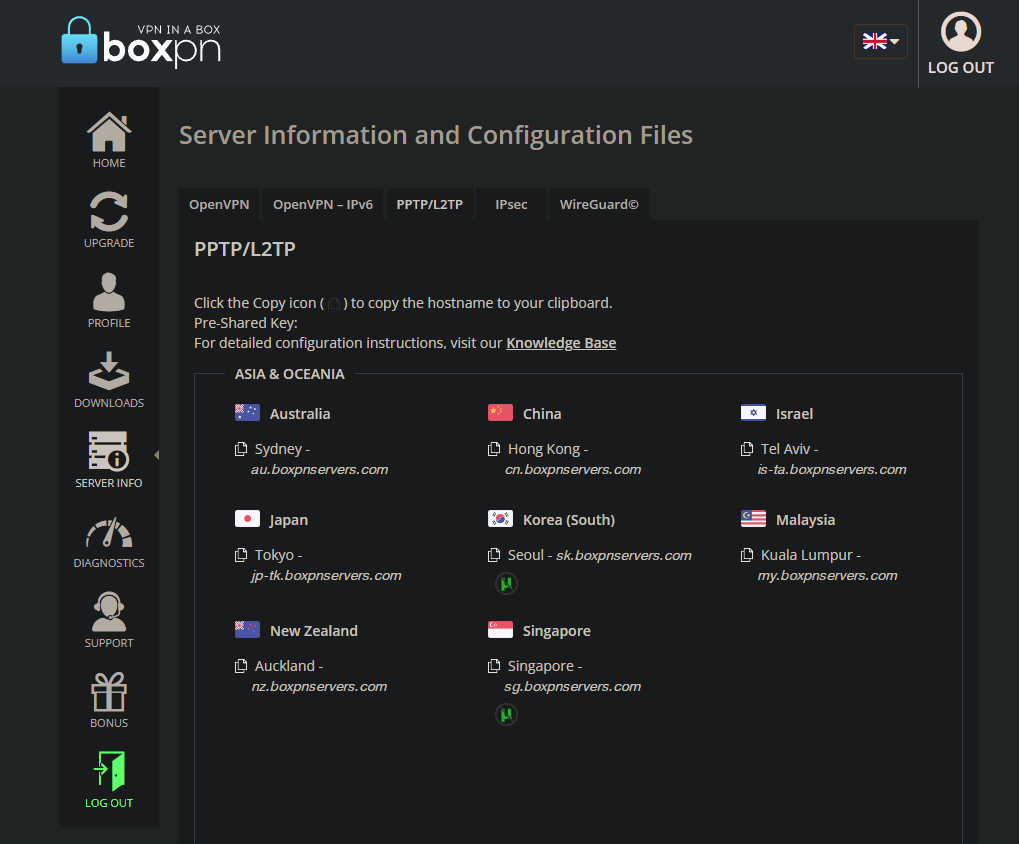
To begin, the first thing you’ll need to do is get all the information that will be required to configure your VPN in Windows. This means you’ll have to log into your VPN provider's website and locate all the information. It’s usually under Server information or something similar.
Once you have found the information you need to choose which type of VPN you wish to use. For this guide, we’ll be setting up L2TP connections which are the most common. However, the process is similar for most other connections.
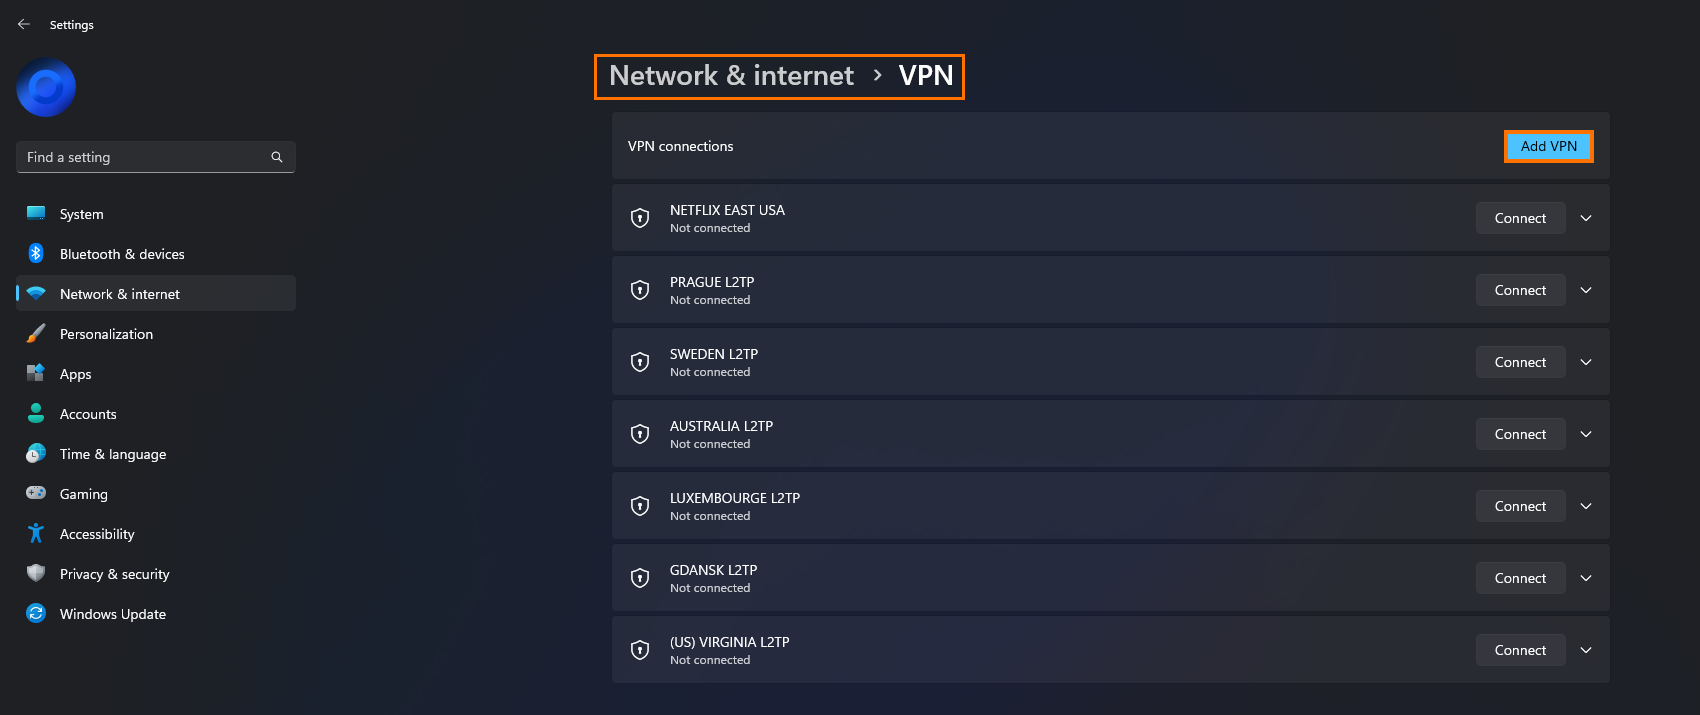
- Now that you have all the info you require open Settings on Windows 11 by pressing Windows Key + I, then navigate to Network & Internet > VPN.
- On this screen, click Add VPN.
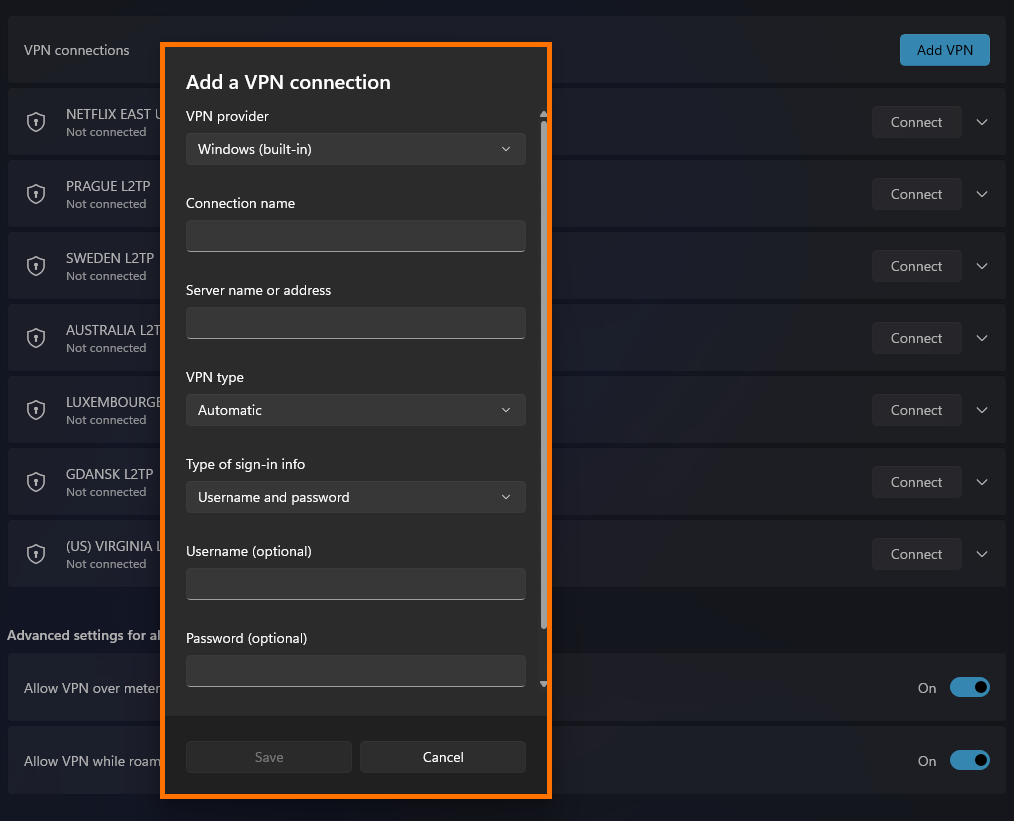
- Now set the VPN Provider to Windows (built-in). Then give your VPN a name in the Connection name area.
- Now proceed down the list and enter all the information from your VPN provider. Where it said Password (optional) enter your password this isn’t optional in nearly all cases.
- Finally, make sure that the Remember my sign-in info box is checked then click Save.
Once you click Save you will see that VPN server added to your list of VPNs. You can add as many server locations as you like using the exact same method. As you can see I have quite a few listed. Remember that the distance from your current location affects speed so you may want to set a few close ones up as well as a few in locations where you want to access content. If you’re looking for a good VPN service at a reasonable price and doesn’t log any data check out BOXPN.
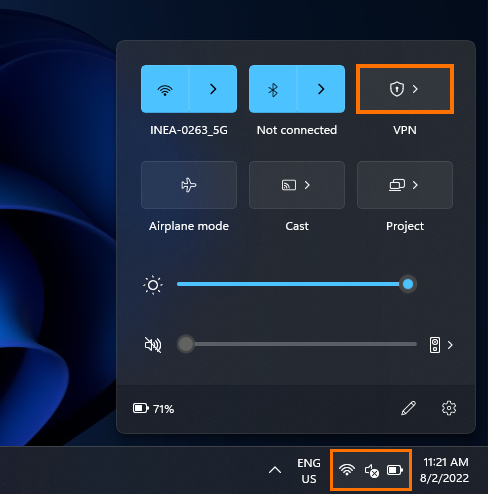
How to connect to a VPN on Windows 11?
Once you have set up a VPN on Windows 11 you can click the Network icon in the Taskbar and then the VPN quick connect icon. Finally, click click the VPN you want to use then click Connect. If you don’t have a VPN quick connect option in the Taskbar you can add one using the steps shown here.