If you are using Windows 11 and are sick and tired of content playing with a huge difference in volume levels. This article will show you how to normalise volume levels ‘aka’ volume levelling on Windows 11. By default, the feature is disabled but can be enabled nice and easy and will make a huge difference to sound output on your device.

Table of Contents
Related: How to fix Cannot remove Xbox Wireless Controller; Remove failed on Windows 11.
Windows 11 has a lot of features under the hood that most people never discover and take advantage of. Which is a shame because a good portion of these features are great quality of life features that make using the operating system so much better. While the main focus is on features like Sub System for Android that allows Android apps to work on Windows 11 other features like volume levelling/volume normalisation are missed.
One of my favourite features that a lot of people miss is called Volume Levelling, Loudness Equalization or normalise volume. It's got a few different names but they all mean the same thing. The feature isn’t exactly new but it is one that is overlooked and allows you to bring low volume and high volume levels closer together. This saves you having to turn up the volume when something is too quiet, only to turn it down again when things get too loud.
How do you enable volume levelling on Windows 11? Bring low and high volume levels closer together.
There are two ways to enable this feature on Windows 11 though they also work on Windows 10.
- First, open Settings by pressing Windows Key + I.
- Next, go to go System > Sounds > Output.
- Here click on Advanced under Enhance audio.
- This will open a new window where you will need to place a tick in the Loudness Equalization checkbox.
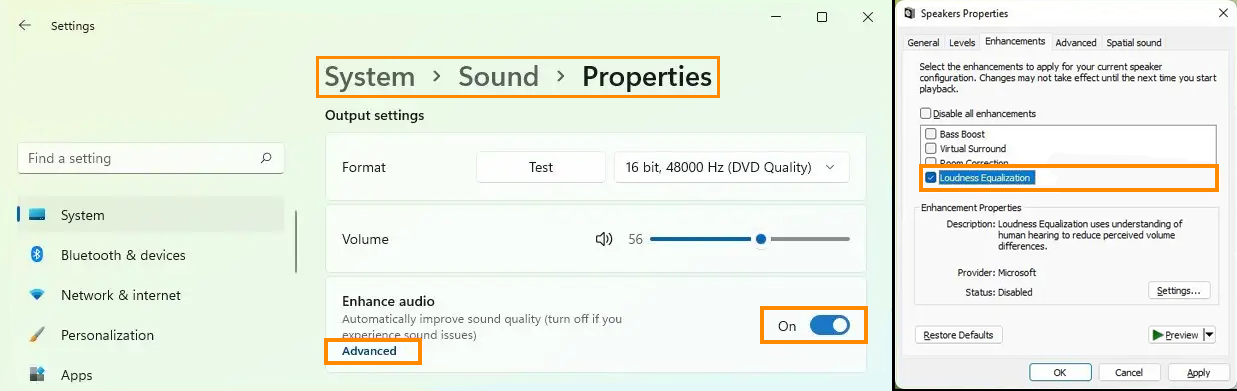
Once you have done this click Apply, to save the change, then Ok to close the window. Once you make this change volume levels will be pulled close to the middle range so that you don’t constantly have to keep changing the volume up or down.
How to enable volume levelling on Windows 11 from the Control Panel Instead.
If you’d rather use the Control Panel (don’t blame you) to make this change you can also still do that. At least at the time of writing.
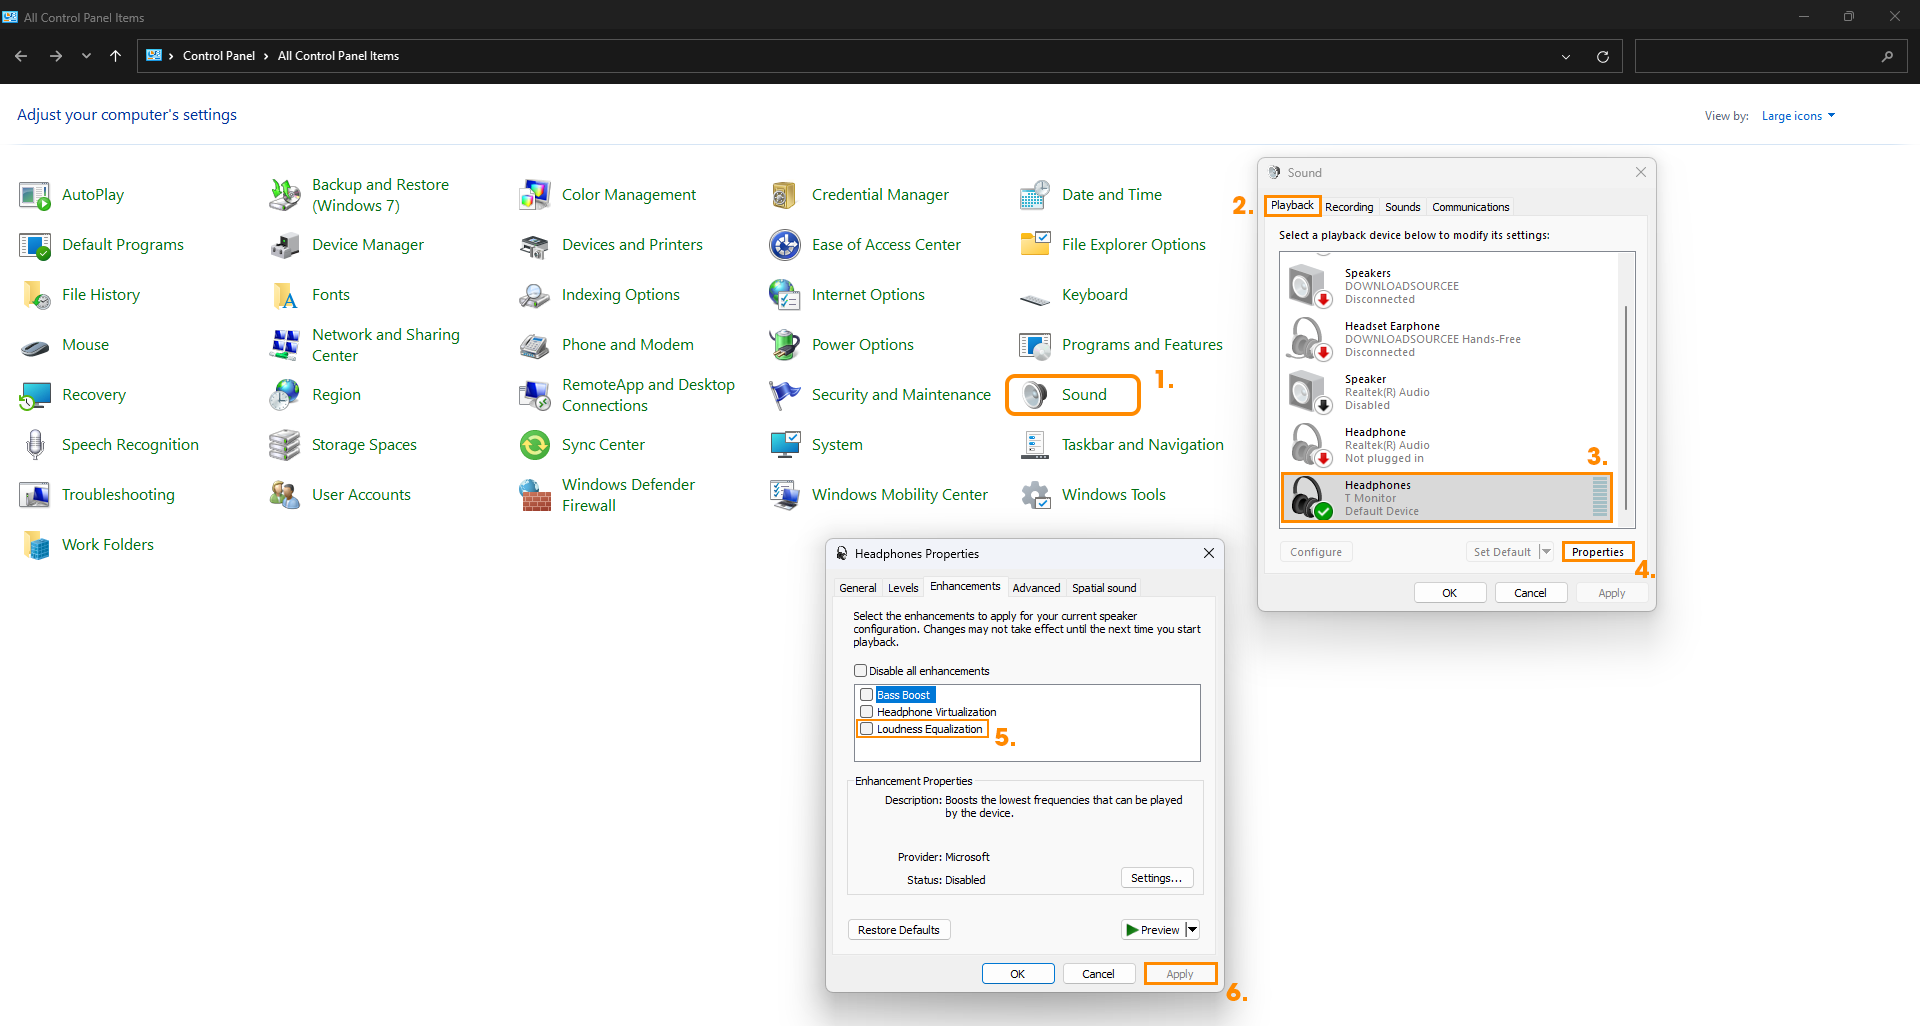
- First, open Control Panel, then click Sound.
- This will open a new window where you will need to find and select the audio device you want to enable volume levelling on.
- Now click Properties and another new window will appear.
- Finally change to the Enhancement tab and place a tick in the Loudness Equalizer checkbox. Click Apply and Ok to save the changes.
As soon as you make the change that particular device will now bring volume levels a little closer together and prevent you from having extreme lows and extreme highs. Just keep in mind that you will have to make this change on each of the sound devices that you use on your computer. It doesn’t apply system-wide which is good because you may not want to use it while you are using your 7.1 channel surround system but do while you have headphones on.
Don’t forget about the new Live Captions feature on Windows 11.
Another really good new feature that has been added to Windows 11 is Live Captions. This puts subtitles on the screen for any and all audio being played on your device, which includes microphones.
How to enable & use Live Captions on Windows 11.