If you have VLC Media Player installed on your Windows computer (I’m sure you do) you can actually use it to make small edits to video content. What do we mean by small edits? Well, you can trim videos using VLC Media Player in a few simple steps. It’s quick easy and don’t require you to download any extra programs or software.

Table of Contents
Related: How to Record Your Desktop Using VLC (Screen Capture)
VLC Media Player is the undisputed best media player in existence. It accepts and plays any media file you can throw at it, including 360 video formats like Insta360s .insv formats with full zoom and rotation support. Something that not many other players can do. Not even YouTube has full support with 360 video which is disappointing. Anyway… Something else that not many people are aware of is VLC's ability to trim video content. Which is super handy for quick edits.
The feature has been around for quite some time now but not all that many people are aware of it. You won’t need to download the latest version or anything as you probably already have the feature installed. So let’s jump straight in and start using the trim feature found inside VLC Media Player. The only downside to this feature is that it’s pretty much for short clips as you will see shortly.
How do you use VLC media player to Trim video content? Trimming videos using VLC.
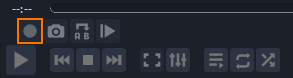
- The first thing you’ll need to do is enable Advanced Control. To do this click View > Advanced Controls. This will bring up a new set of options at the bottom of the player where play and pause are located.
- Once you see these options open a video and go to the part that you’d like to start trimming from.
- Next, click the Record icon and let VLC record the section of the video you wish to keep. Once you get to the point you want to finish stop the recording. The file will record in the exact same quality as the video was originally encoded in so you don’t have to worry about choosing quality settings.
You can find the recording in the default location in your documents. However, you can change this location using the steps shown a little further down. As you can see trimming video content using VLC is quick and easy but isn’t exactly great for long content as you have to wait for the entire recording to take place. For longer recordings, it’s easier to use other programs or even online tools.
How to change the Default VLC Recording location.
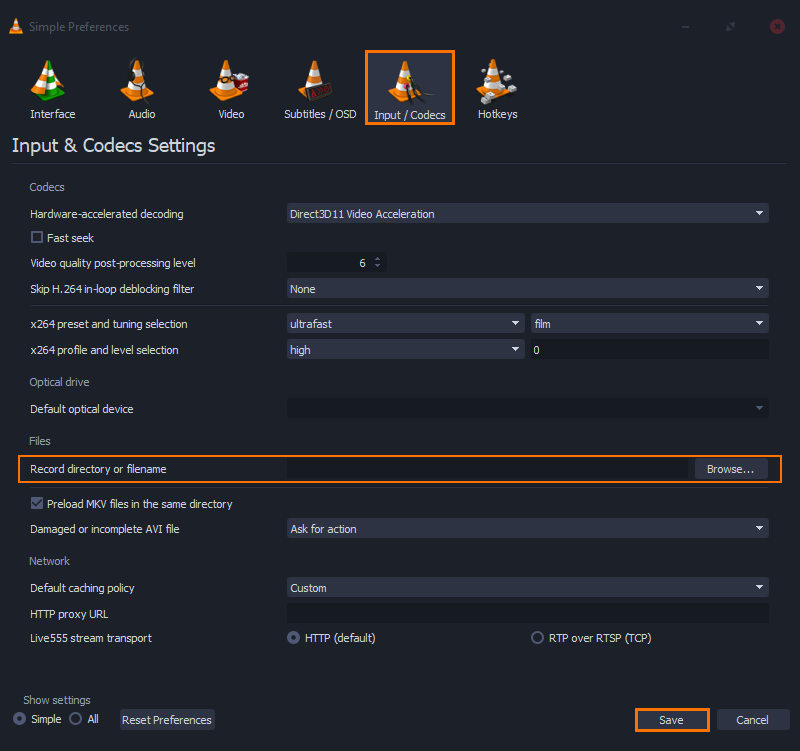
If you don’t want your VLC recordings to be saved in My Documents, you can change the location by going to Tools > Preferences and changing to the Input/Codecs tab.
Here you will see a heading called Record directory or filename. Click Browse then change the location to a location that better suits your needs. You can change this at any time.
Do you work with 360 video from time to time? Maybe even an Insta360 Camera?
If you do have a 360 camera and would like to know a little bit more about the editing process and uploading certain content to YouTube make sure you check out our full guides on Insta360 cameras and 360 video.