Table of Contents
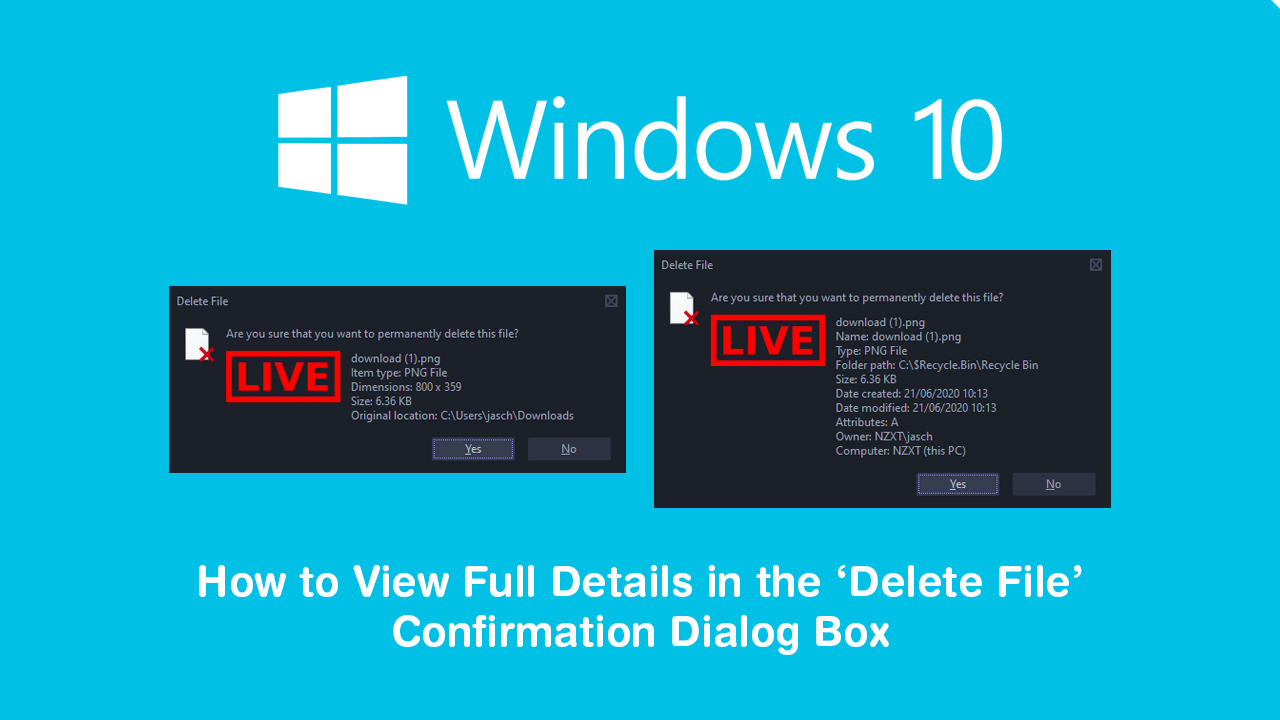
If you would like to increase the amount of information shown when deleting files on Windows 10. This article will guide you through the process, allowing you to see twice as much information on the content you are about to delete.
Even if you have been using Windows 10 for a long time, there are dozens and dozens of little tweaks you can make to the operating system to make life easier for the way you use your computer. Over the years Microsoft has been working very hard on making Windows 10 as minimalistic and easy to use as possible, however, that doesn’t always work for power users and users hungry for more information.
Previously we have covered a ton of different tweaks and changes you can make to Windows 10, however, this one is one that has somehow eluded us until now. Which is a shame because it’s one of the most practical changes you can make to improve the way you interact with Windows 10. With a couple of changes, you can double the amount of info you can view when deleting files on Windows 10.
Related: How to Make Screen Brightness Stay the Same on Power and Battery on Windows 10.
How Do You Get More Information About Files When Deleting Them on Windows 10?
As this process will require you to make changes to the Windows 10 registry, it’s important that you make a System Restore Point before continuing. (This will allow you to revert back to a safe system point if you make any mistakes) To do this, open the start menu, type Restore, then select Create a Restore Point when it shows on the list. From the new window that appears, click Create in the bottom right section of the screen, then follow the instructions given by Windows. Once you have successfully made a restore point, you can continue.
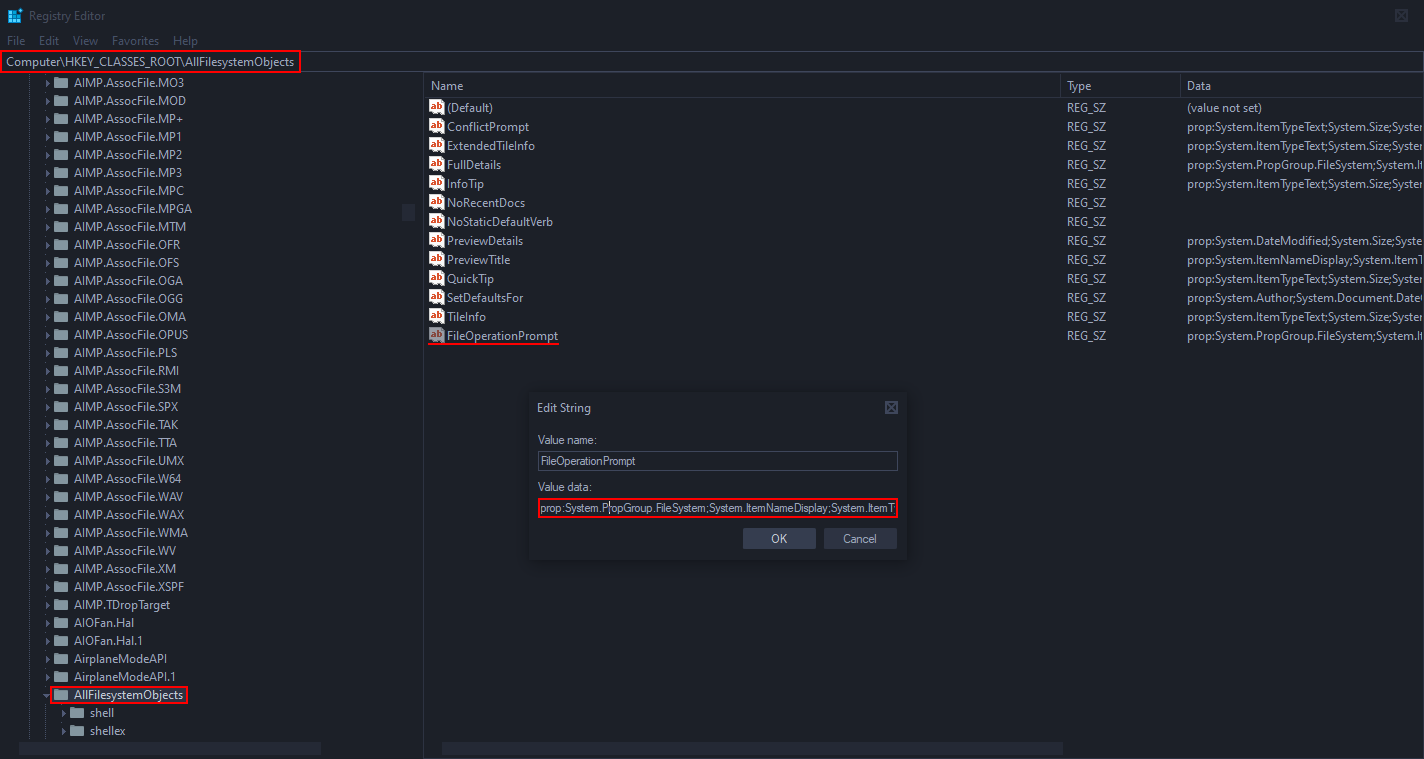
With a restore point set, press the Windows Key + R to open the Run tool, then type: regedit into the text box and press Enter. Once the registry tool is open, navigate to the following address using the left-hand pane.
Computer\HKEY_CLASSES_ROOT\AllFilesystemObjects
Next, double click the FileOperationPrompt entry in the central pane and change it’s Value Data to the following:
prop:System.PropGroup.FileSystem;System.ItemNameDisplay;System.ItemTypeText;System.ItemFolderPathDisplay;System.Size;System.DateCreated;System.DateModified;System.FileAttributes;System.OfflineAvailability;System.OfflineStatus;System.SharedWith;System.FileOwner;System.ComputerName
Note: If you don’t see FileOperationPrompt, you can create it by right-clicking on AllFilesystemObjects and selecting New > String Value.
After you have made the change simply click Ok and the change will take effect after a restart or log off/on
On a Side Note…
If you also use Facebook Messenger Rooms from time to time, you’ll more than likely be looking for a way to blur backgrounds during video calls. Although Facebook Messenger Rooms isn’t focused on a professional user base you never know when this feature may come in handy. This guide will also show you how to get custom backgrounds for Facebook Messenger Rooms.