Table of Contents
If you are desperately trying to find a way to pull data from the Windows 10 clipboard. This article will show you how to do so and uncover some of Microsoft’s shortcomings with the feature on Windows 10.

How to Fix All Firefox Add-ons (Extensions) Expired. (Fix All Firefox Extensions Missing/Removed)
If you are like me, then you have probably spent most of your Windows 10 experience thinking that the operating system stores a short history of all your clipboard data. All the things you’ve cut, copied and pasted during your current session. Unfortunately, this isn’t the case with Windows 10... Windows XP was the last Windows operating system to have clipboard history as a default setting/feature. Which sadly means clipboard history cannot be retrieved in any way on Windows 10.
It’s not all bad news though because Microsoft has finally reintroduced clipboard history to Windows 10. But! There are a few catches. The first is that you have to update to Windows 10 version 1809 (October 2018 update). The second is that you have to manually enable it, as Microsoft has surprisingly left if off by default… Personally, I find this strange, but it is what it is...
If you’re not sure whether to enable it or not I can say from previous situations that it can be a very, very valuable backup should you need to check something you’ve copied recently. So follow along as we guide you through the process of enabling clipboard history on Windows 10.
How Do You View Clipboard History on Windows 10?
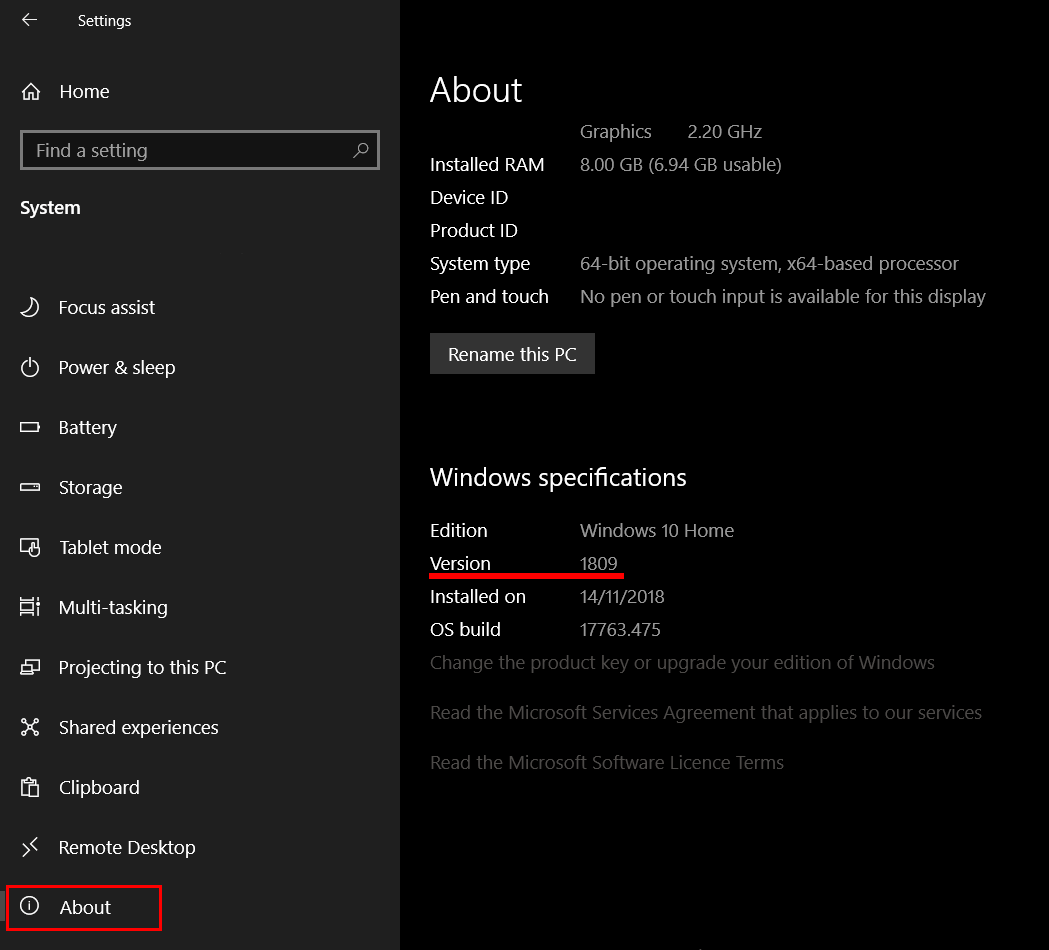
As mentioned above, you’ll first need to make sure you have Windows 10 version 1809 installed on your device. If you aren’t sure, you can check by going to Settings > System > About and scrolling to the bottom of the page. Here you will see your current version number. Once you’re on the correct version of Windows 10, you’ll need to do the following.
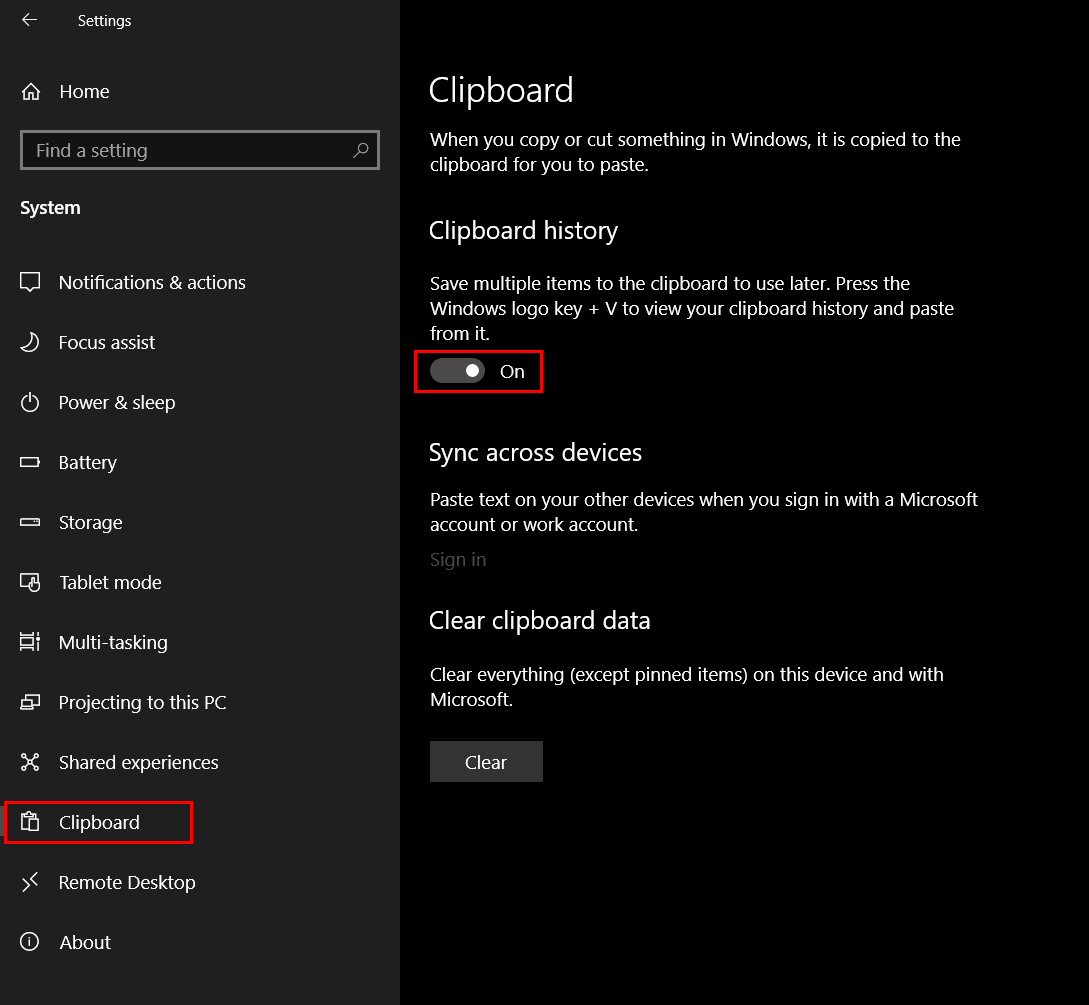
Open Settings go to System, then find and click on Clipboard in the left-hand pane. Now flip the toggle under clipboard history to On. If you’d like to sync this data across devices you can also enable that option as well. However, it will require you to be using the same Microsoft account for all the devices you wish to sync with.
Note: Enabling clipboard history, won’t allow you to view anything prior to the point you enabled the feature if you were desperately hoping for that.
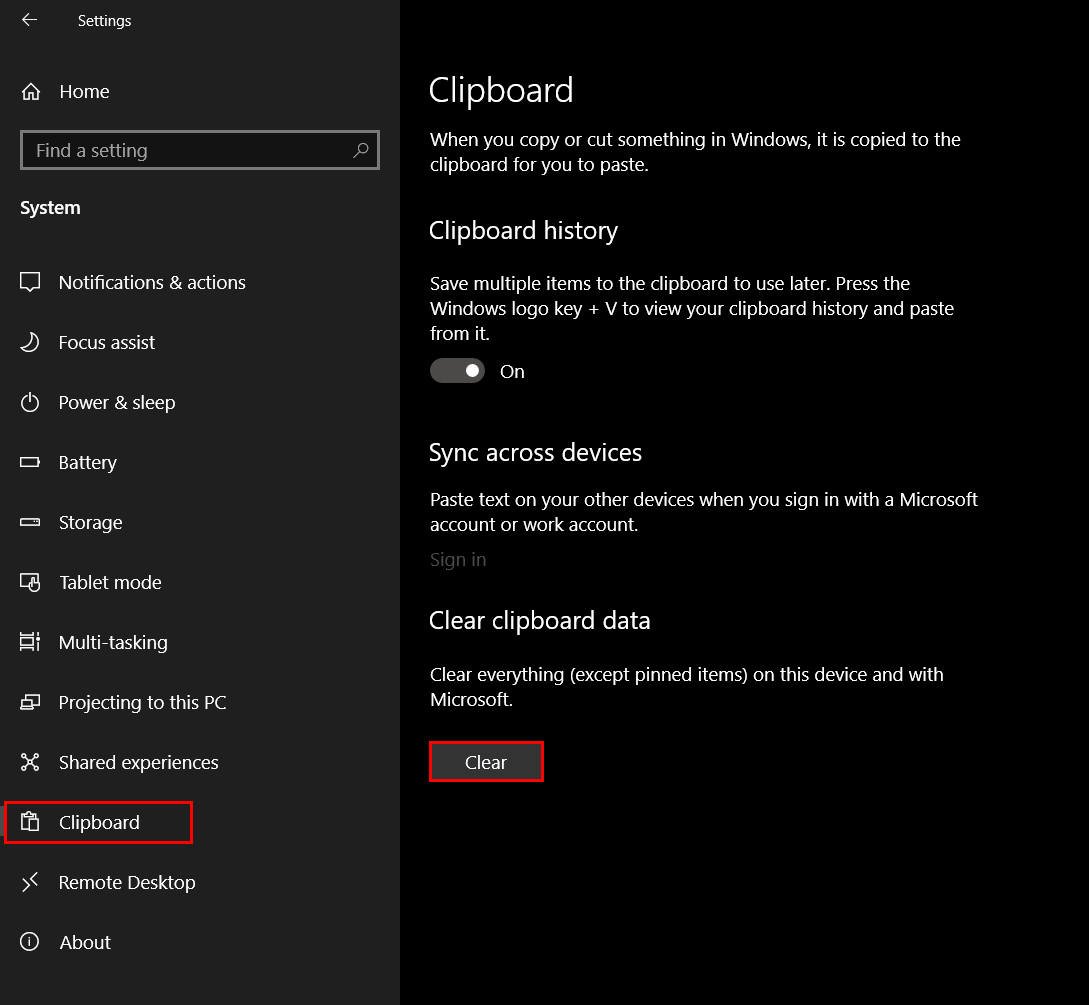
Now that you have clipboard history enabled on your computer, you can view any data stored in the clipboard history by pressing the Windows Key + V. This will open a small window in the bottom right-hand corner of the taskbar where you can view your entire clipboard history, including text and screenshots you’ve captured. If you ever wish to clear your clipboard history open Settings go to System, then find and click on Clipboard in the left-hand pane, then finally use the Clear Clipboard Data option.
On a Side Note…
If you aren’t already aware Microsoft also recently changed the default setting for USB storage device removal, which now sets all devices to 'quick removal' rather than 'better performance'. Although this is great for most users, the below guide will show you how to manually switch back should you not agree with the change.
How to Change USB Storage Device Defaults Between ‘Better Performance’ and ‘Quick Removal’.