The Windows quick launch bar has been around for quite some time, however, it is no longer displayed and hardly used since Windows 7. It was first used in Windows XP and became a very handy tool. If you aren’t familiar with the quick launch bar, this guide will show you how it works and how to enable it.
How to Remove the Lock Screen on Windows 10
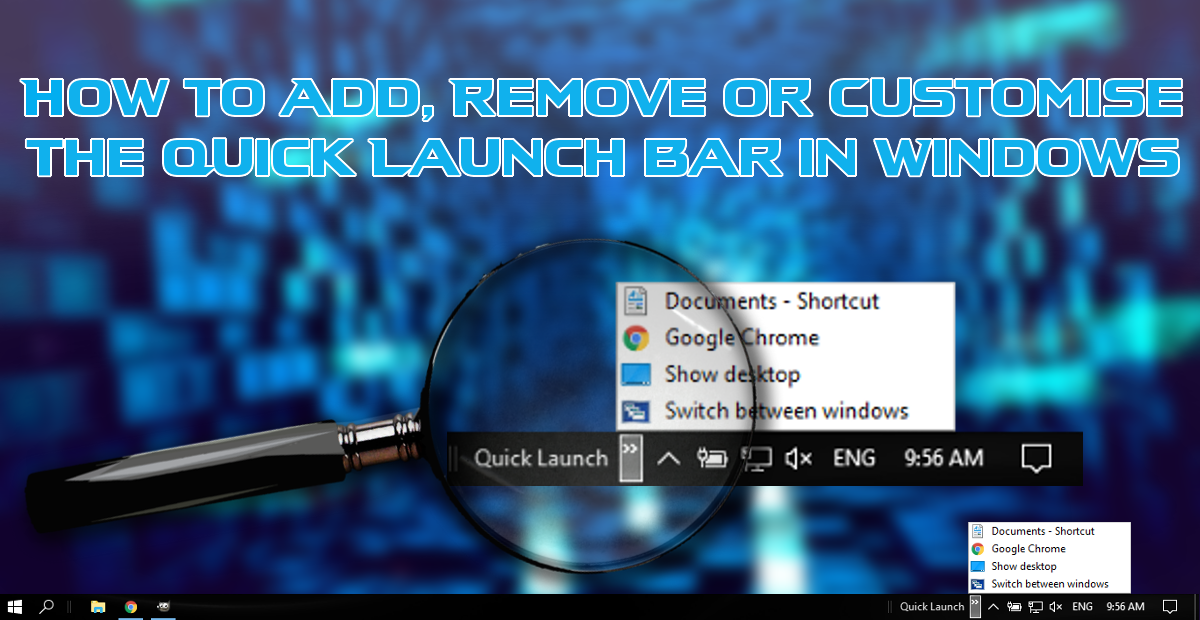
The quick launch toolbar on Microsoft Windows allows you to place icons in the bottom right-hand corner of your taskbar, the same area your clock, volume and Internet settings are located. It’s not enabled by default in Windows 10, however, the option to enable it does still exist.
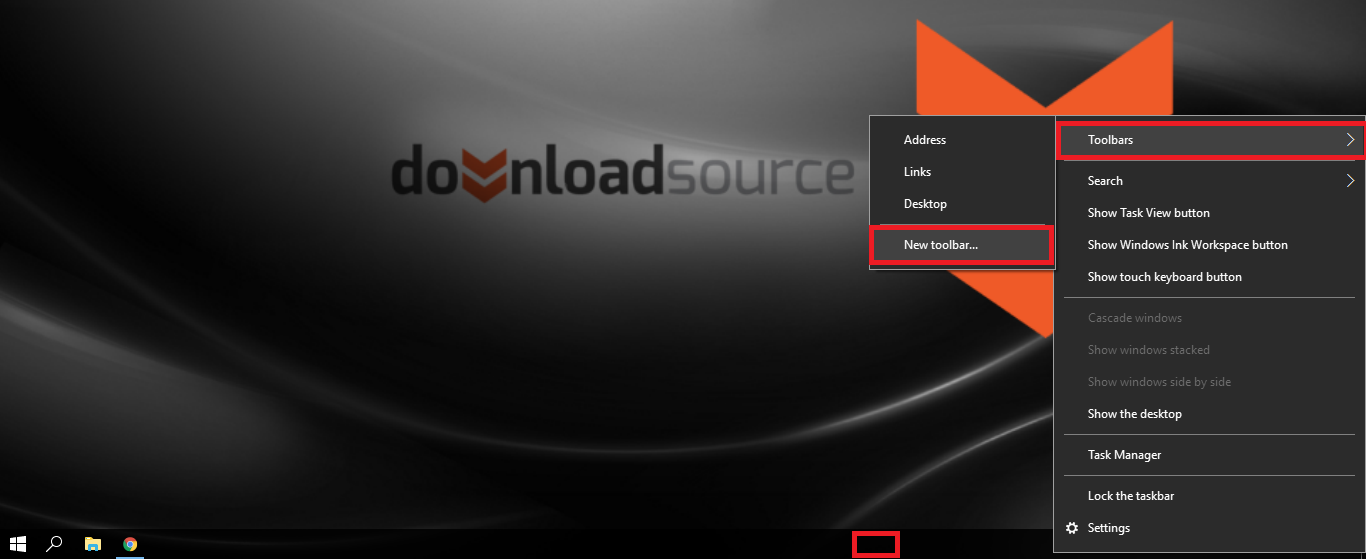
To start the process, you will first need to right-click on an empty part of your Windows taskbar. (somewhere there aren’t any icons, usually in the middle) Once you have right-clicked to bring up the context menu, go to the very top and hover your mouse cursor over Toolbars, when the next menu displays, select New Toolbar. (located at the very bottom.)
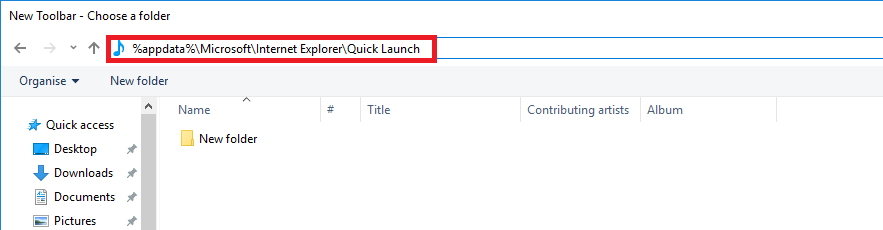
This will open a new screen, the Windows File Explorer to be precise. At the top of this screen, you will see an address bar, it’s most likely showing you: This PC > Documents. In order to get to the location of the quick launch bar, you will need to enter the following address, then press Enter.
%appdata%\Microsoft\Internet Explorer\Quick Launch
Note: You are able to cut and paste into the file explorer bar to make life easier, or just type it if you’re that kind of person.
There is no need to select a file at the address, simply enter it into the address bar press Enter and it will automatically set up your new Quick Launch toolbar. With the quick launch toolbar added, you can now begin to customize it. The positioning of the bar can be moved around, as well as the contents found inside.
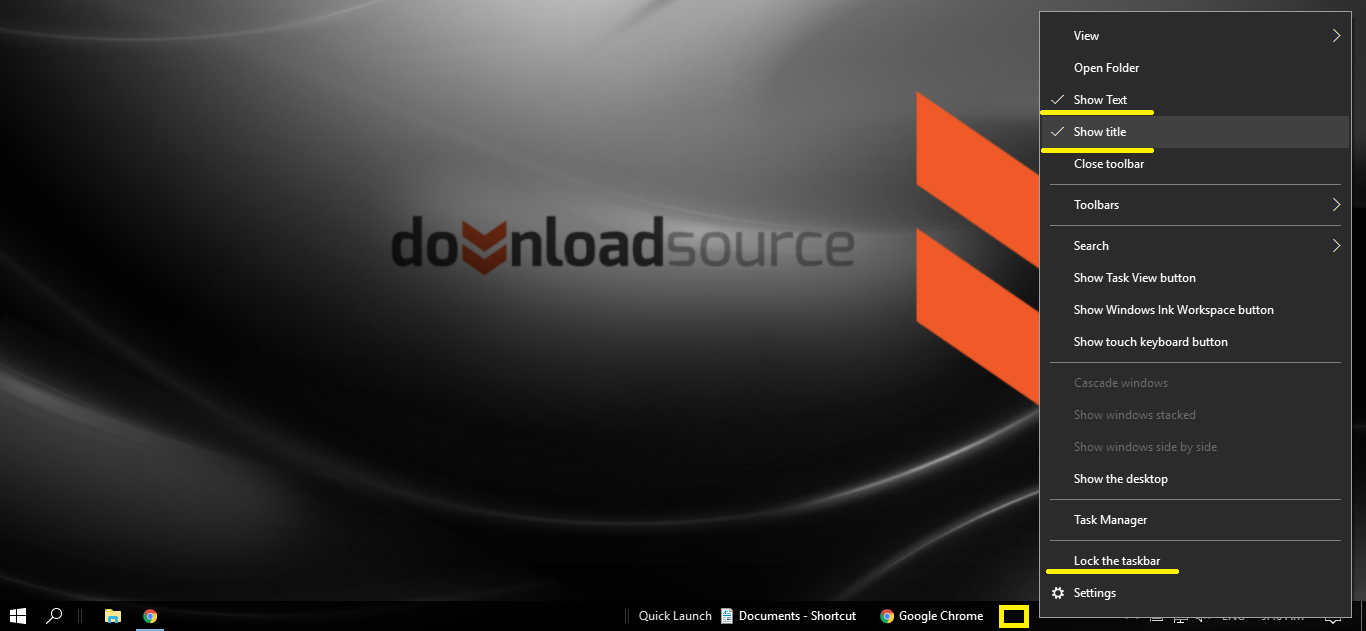
In order to start moving the quick launch bar around, you will need to right-click on some empty space on the taskbar and untick the Lock the Taskbar. With this unticked, you will be able to move the quick launch bar from left to right using the draglines. To change the settings of the bar, including removing the ugly Quick Launch text, you simply have to right click on the same draglines, then scroll up and untick Show Title. You can also remove the text labels from the icons by going to the same menu and unticking Show Text.
Once you've finished customizing the position of your quick launch bar, you can add icons by dragging and dropping them into place. Once you have your icons all stored nicely in your New Quick Launch bar, you can right click once and select Lock the Taskbar to lock everything into place, so you can't accidentally move things around.

If you don’t like the look of the Quick Launch bar or just prefer to drop your icons on the left-hand side near the start menu instead, you can remove the quick launch bar even easier than you placed it. Simply click on an empty space on your taskbar once, scroll up to Toolbars, hover over Toolbars, then scroll down to Quick Launch at the bottom and untick the box.