Table of Contents
If you are wondering if your Windows 10 device has Miracast support. This article will explain the requirements of Miracast and how to check if your Windows devices support the feature. A feature that allows you to easily share screen content from one device to another.
How to Stream Steam PC Games to Your Xbox One Console.
Miracast has been around for a long time now and most modern devices support it without any difficulty. However, there are some devices (usually a little dated) that may not have obvious support for Miracast. As a result, you may wish to find out before making any plans to invest in Miracasting tools. A little bit of side information, you can now use Miracast alongside Microsoft’s updated Wireless Display app to stream games from your PC to your Xbox One console (Steam Games Included).
Thankfully, on Windows 10 there is a very easy process available that will allow you to quickly and easily check if your device supports Miracast. It’s also good to know that the process isn’t overly complicated and can be performed in a few simple steps. So let’s begin.
Related: How to Change Audio Device Names on Windows 10. (Rename Audio Devices)
Miracast System Requirements.
- Graphics driver must support Windows Display Driver Model (WDDM) 1.3 with Miracast support
- WiFi driver must support Network Driver Interface Specification (NDIS) 6.30 and Wi-Fi Direct
- Windows 8.1 or Windows 10
How Do You Find Out if Your Computer Supports Miracast?
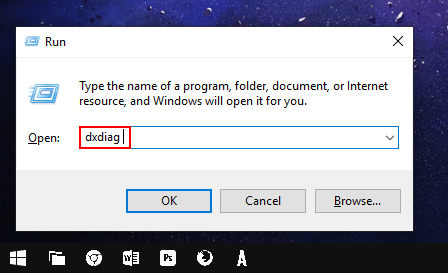
Even if you couldn’t be bothered checking the above system specs, you can still check to see if your device supports Miracast. To do this, open the Run tool by pressing the Windows Key + R. When you have the Run tool text box open in front of you, type dxdiag into the window and press Enter.
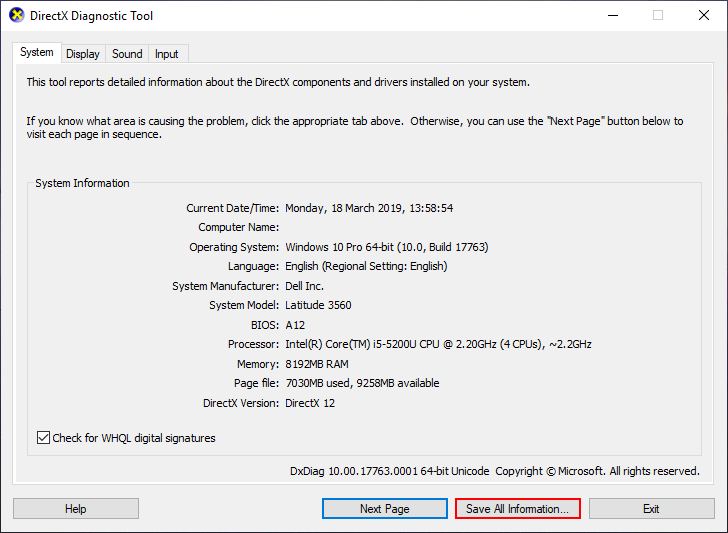
This will open the DirectX Diagnostic tool which will allow you to access the information you need. From the DirectX Diagnostic tool click Save All Information, select a location you would like the .txt file saved, then click Ok.
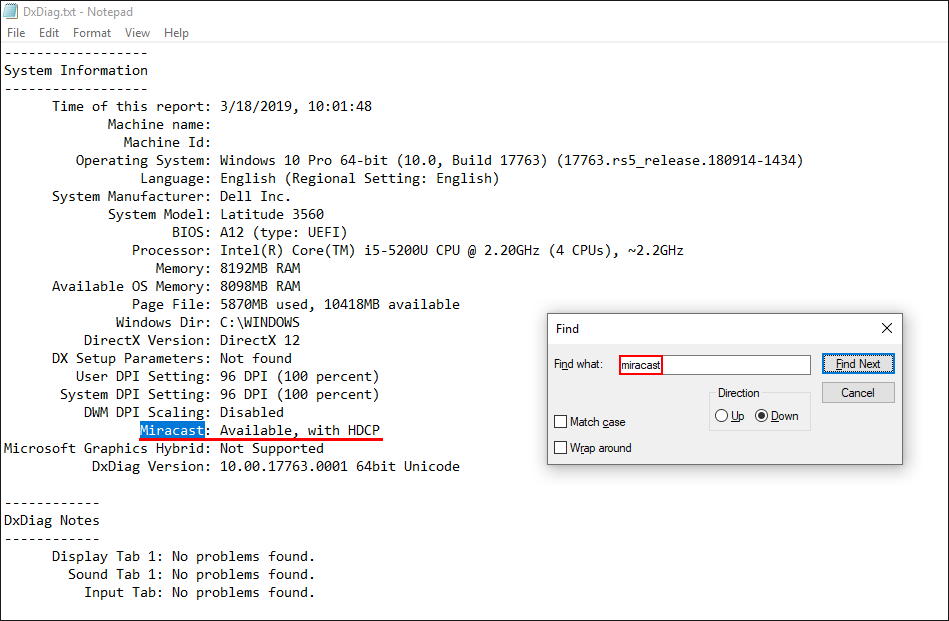
The tool will spend a little time getting everything in order and generate a file with all the information you need. Finally, go to the location you saved the file to and open it. Press Ctrl+F to bring up the Search tool, then search Miracast. This will bring you straight to the text line which states your computer’s Miracast ability. You can now close all of the windows that were opened for this process and delete the .txt file as it has no further purpose.
It’s important to note that both Windows 8.1 and 10 only have the ability to broadcast a Miracast signal. They can’t receive a signal. At least not by default. That said, It is possible to use third-party apps to extend Miracast in this way so that Windows 8.1 and 10 can receive a Miracast signal.
While you are making some changes to your Windows 10 operating system, make sure you check out the following article which will show you how to quickly and easily import or export Windows 10 VPN network connections. A really easy way to transfer VPN settings without having to manually add them. How to Transfer VPN Settings to Different Windows 10 PCs.