If you have a Windows 11 computer and would like to set up a system that will periodically scan your device for malware, viruses, and the like. This article will show you how to manually configure Defender Periodic Scanning on Windows 11 devices. Don’t bother with third-party tools like Avast, AVG, Norton, and TrendMicro, let Windows deal with it all.

Microsoft Defender ‘aka Windows Defender is a fantastic tool in Windows 10 and 11 that gives users the ability to keep their devices safe and secure without installing any bloated data-hungry third-party apps. Back in the day users had to rely on services from Avast, AVG, Norton, McAfee, TrendMicro, and a range of others. Although these tools were good at their jobs back then, they are no longer anything that they used to be.
They are now data-hungry, resource hogs that service their own interests above user privacy and security. So it’s best to avoid all of these programs with the exception of Malwarebytes, which doesn’t need to run constantly and can simply be opened periodically to scan your system. Microsoft Defender is now more than capable of protecting your computer from all the usual threats that exist on the internet. It also has Ransomware protection as well should you feel the need to enable it.
With Microsoft Defender Antivirus you can enable Periodic Scanning to help find and remove malware viruses and most other malicious content. Periodic Scanning periodically scans and removes threats that other antivirus software may have missed, and in this guide, you’ll learn the steps to enable it.
How do you enable Periodic Scanning on Windows 11?
To enable Periodic Scanning in Microsoft Defender Antivirus for Windows 11, you’ll need to do the following:
- Open Windows Security by searching Windows Security from the Start menu.
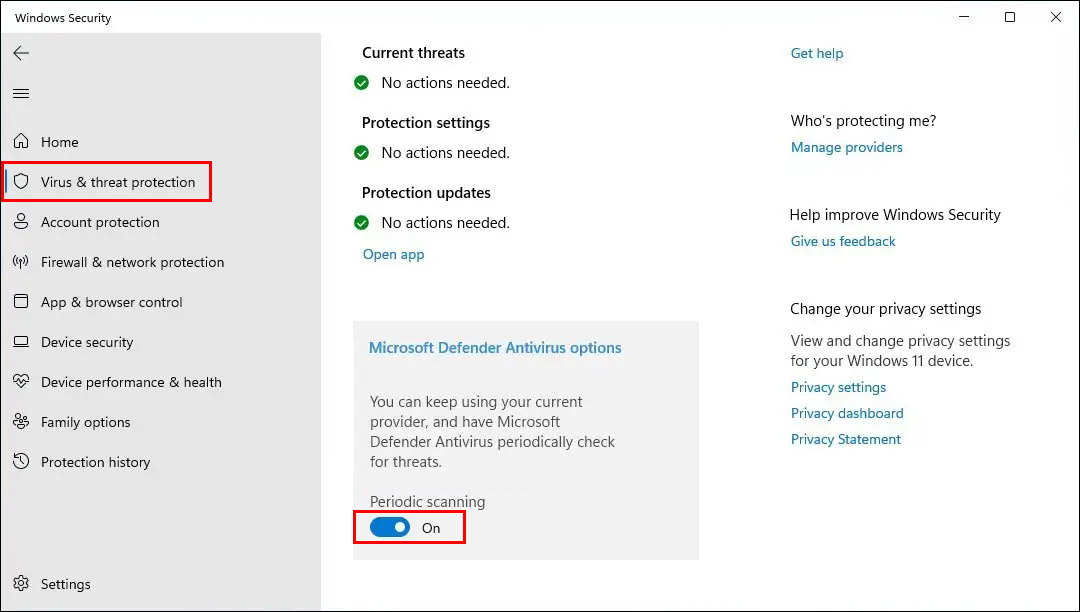
- Next, click Virus & threat protection.
- Click the Microsoft Defender Antivirus options section.
- Turn on the Periodic scanning toggle.
Once you have made the change Windows 11 antivirus will use the Automatic Maintenance feature to make sure your computer is periodically scanned at optimal times to minimize the impact on you, your systems performance and your battery.
How do you disable Periodic Scanning on Windows 11?
To disable Defender Antivirus periodic scanning on Windows 11, use these steps:
- Open Windows Security by searching Windows Security from the Start menu.
- Next, click Virus & threat protection.
- Click the Microsoft Defender Antivirus options section.
- Turn on the Periodic scanning toggle.
Once you have made the change, Windows 11 antivirus will not automatically scan your device, so you’ll have to make sure you manually scan your system from time to time to make sure you aren’t harbouring any malicious content.
Another handy Windows 11 change you may like to make allows you to disable the lock screen. This will allow you to enter your password straight into the password box, rather than having to click first to remove the lock screen then enter your password. How to disable the Lock screen on Windows 11.