If you are using Windows 11 you may or may not be aware of a feature called Clipboard History. This feature has been around since Windows 10 and stores your copy and paste history in a small catalogue during each Windows session. It’s super handy but not everyone is going to be a fan so follow along as we should you how to enable or disable Clipboard History on Windows 11.

Related: How to turn off Suggested Actions in Windows 11.
The Clipboard History tool on Windows 10 and 11 is one of the best-hidden features of the operating system. By default it is disabled but once enabled lets Windows keep a history of everything you copy an paste, including images captured using the print screen key. All the information captured by the Clipboard history tool only remains accessible for a single session of windows (unless you pin it). This means that all the data is deleted after each and every restart.
While most people find this clear at the end of a session option adequate, it’s also possible to clear the data from the Windows Clipboard History tool whenever you like. If you aren’t using the Clipboard History tool yet or want to disable it instead, follow along as we show you how to enable or disable the Clipboard History tool on Windows 11. You can enable or disable this feature as often as you like it’s quick and easy.
How do you enable the Clipboard History option on Windows 11?
In order to enable clipboard history on Windows 11, you will need to do the following.
- To begin, first open Settings by pressing Windows Key + I.
- Next, stay on the System tab and click Clipboard near the bottom of the page.
- On the next page flip the toggle next to Clipboard history to On.
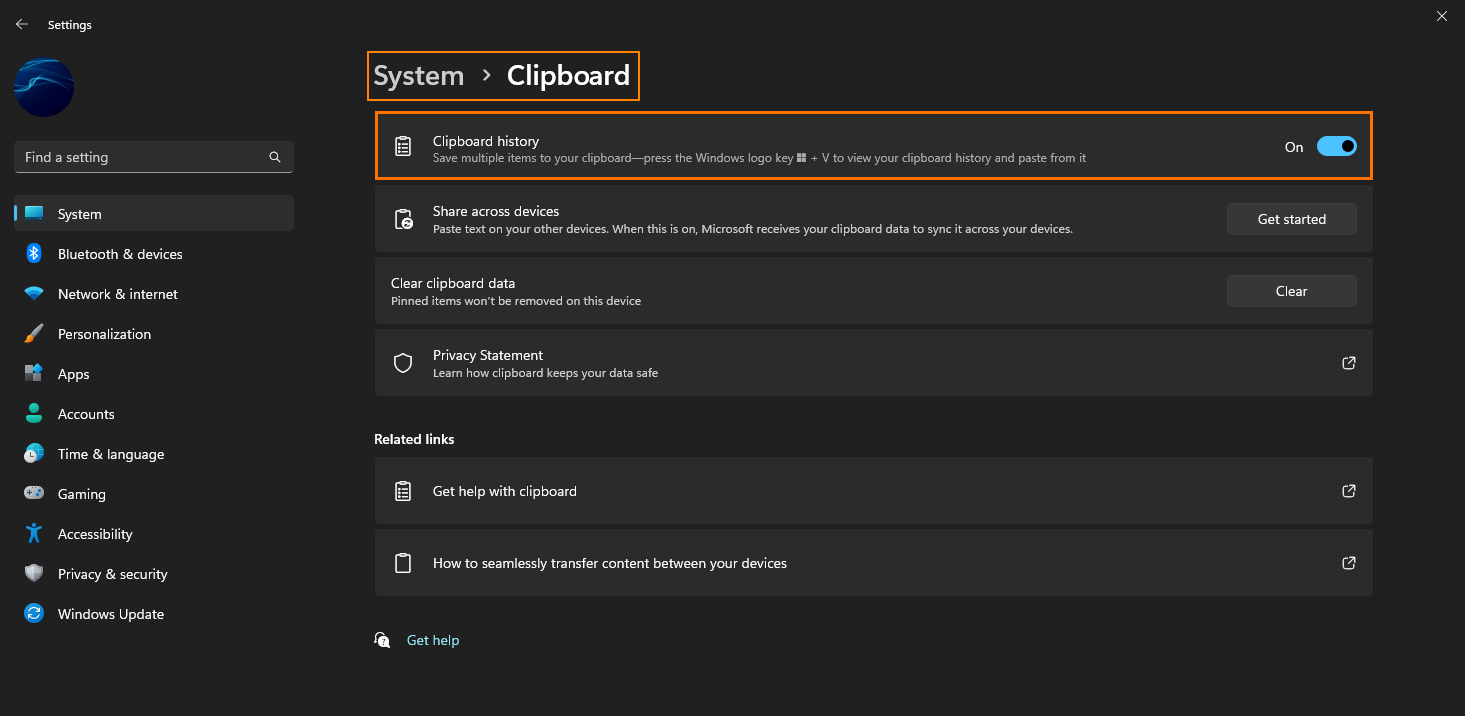
Before you exit you have the option to enable cross-device clipboard history sharing. This will allow you to quickly and easily access your Clipboard History from other devices you have enabled the feature and are using the same Microsoft account on. You can also clear your history from this location as well.
How do you access and view your Clipboard History on Windows 11?
Once you have enabled Clipboard history on Windows 11, you can access the feature by pressing the Windows Key + V. This will bring up a small little window with all your recent clippings. Simply place your mouse cursor into the location you want to paste something from your clipboard then open the Clipboard history tool, click the dots next to something you want to paste then click Paste.
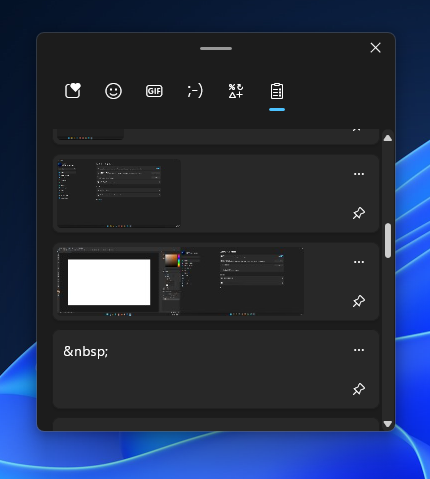
Alternatively, you can open the tool and click the Pin icon to save content to the tool so that it remains accessible even after clearing your history.
How do you disable the Clipboard History option on Windows 11?
In order to disable clipboard history on Windows 11, you will need to do the following. Just remember that all pinned items and history are automatically removed once you disable the feature.
- To begin, first open Settings by pressing Windows Key + I.
- Next, stay on the System tab and click Clipboard near the bottom of the page.
- On the next page flip the toggle next to Clipboard history to Off and you’re done.
You can also clear your clipboard history from this location simple click the clear history icon and it will be removed.