If you have recently started using Artboards in Photoshop and now need to export your projects as usable files and documents, you're probably wondering how the hell you go about doing it. And! There are quite a few different ways you can do this, so follow along as we show you a couple of different ways you can Export Artboards in Photoshop 2025.

Takeaways:
- How do you export Artboards in Photoshop 2025
- Where do you export Artboards in Photoshop 2025
- Export Photoshop Artboards as individual files.
Table of Contents
How to Export Artboards in Photoshop 2025
Just like creating them, exporting artboards can be done in a few different ways. So, pick the method that best suits your project, as some are better than others for certain project types.
Option 1: Export Using “Export As”
This is one of the most straightforward methods for exporting high-quality images.
- Go to File > Export > Export As
- In the Export As window, all your artboards will appear as separate items
- Select the artboards you want to export (or keep them all selected)
- Choose your file format (PNG, JPG, PDF, etc.)
- Adjust any settings like size, resolution, and background transparency
- Click Export and choose the destination folder
Tip: You can rename artboards beforehand in the Layers panel, their names will be used as filenames.
Option 2: Quick Export for Speed
If you’re exporting everything with the same settings, this is the fastest way.
- Go to File > Export > Quick Export As PNG (or your preferred default format)
- Photoshop will export all artboards into a single folder using their layer names
To change the default format or location, go to Edit > Preferences > Export.
Option 3: Export Layers to Files (Legacy Option)
This older method still works if you need more control over output naming and folder structure.
- Go to File > Export > Layers to Files
- Choose your file format and set a filename prefix
- Select a destination folder
- Check “Artboards” to treat each one as a separate output
- Click Run
This method is helpful for automation-heavy workflows or working with older versions of Photoshop.
Exporting to PDF
If you want to send multiple artboards in one PDF file:
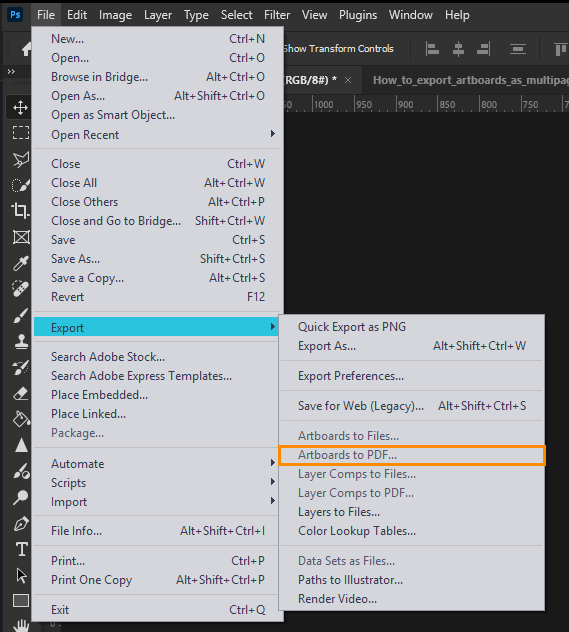
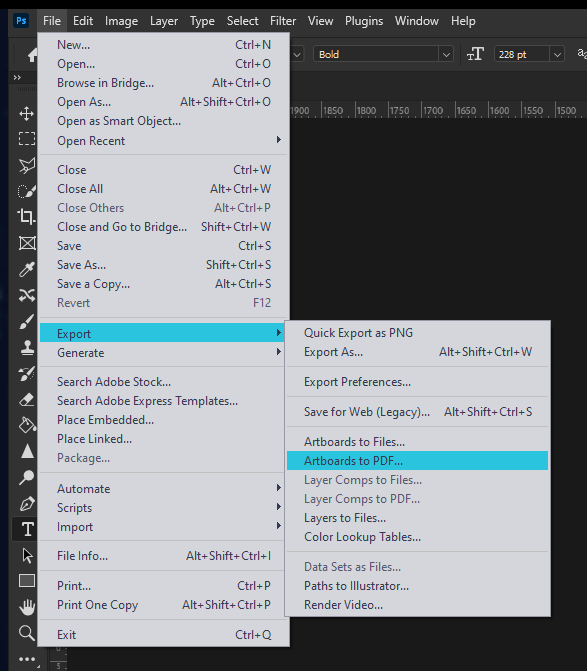
- Go to File > Export > Artboards to PDF
- Choose a location and name for the PDF
- Select which artboards to include
- Set PDF quality and whether to preserve vector data
- Click Run
This is ideal for presentations, portfolios, or sharing mockups with clients.
How to Export Artboards in Adobe Photoshop as Multi-Page PDF Files
Before exporting Artboards in Photoshop, you'll need to make sure that you have your Artboard configured correctly.
- Open Photoshop and create a new document (“File > New”).
- In the New Document dialogue box, enable the “Artboards” option.
- Choose the dimensions for your artboards and set the number of artboards you need.
- Once your document opens, you can add or rearrange artboards using the Artboard Tool (nested under the Move Tool in the toolbar).
- To make your PDF easier to navigate, rename your artboards descriptively.
- Go to the Layers panel, double-click on an artboard name, and type in the desired name.
Optimising Your Multi-Page PDF (IMPORTANT)
- Keep all artboards the same size for a cohesive look and to make the exporting process a lot easier.
- For digital sharing, reduce the file size by lowering image resolution or using stronger compression.
- If you use custom fonts, ensure they are embedded in the PDF to avoid display issues.
Export Artboards as PDF Files.
Once your artboards are ready, follow these steps to export them as a multi-page PDF:
- Click “File > Export > Artboards to PDF...
- In the “Artboards to PDF” dialogue box, you’ll see several options:
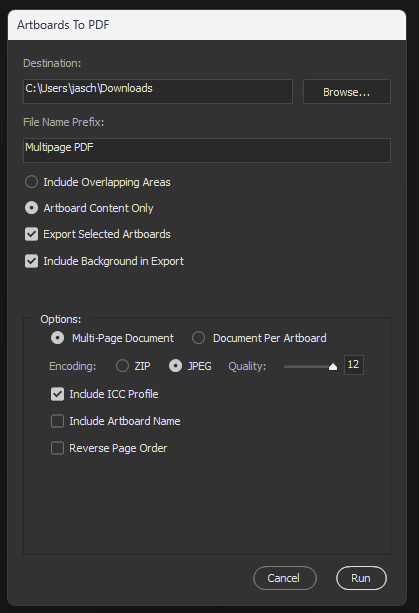
- Choose where you want to save the PDF file.
- Name your PDF file.
- Make sure this box is checked.
- Arrange the order in which artboards appear in the PDF. Options include arranging by artboard name or layout order.
- Click the “Settings…” button to customise the PDF options.
- Choose the quality of the PDF (e.g., High, Medium, or Low).
- Select “Preserve Photoshop Editing Capabilities” if you’ll need to edit the PDF later in Photoshop.
- Adjust image compression to balance file size and quality.
- Ensure the correct colour profile is applied (e.g., RGB for digital use or CMYK for printing).
- After adjusting the settings, click “Run” to begin the export process.
- Photoshop will generate a multi-page PDF containing your artboards in the specified order.
Check the PDF File is Exactly How you want it.
Before sharing or printing, take a moment to review the exported PDF:
- Open the file using a PDF viewer (e.g., Adobe Acrobat, Preview on macOS, or your browser).
- Confirm that all artboards are included and in the correct order.
- Ensure the text, images, and colours display as expected.
- Look for any issues such as missing elements, alignment problems, or resolution discrepancies.
- If you find errors, return to Photoshop, make the necessary changes, and re-export the file.
Export Tips
- Keep artboard names short and clear, they’ll be used as filenames
- Make sure all content is inside the artboard bounds, or it may be cropped
- Use “Scale All” in the Export As window to export at multiple resolutions (like 1x, 2x, 3x)
- For UI work, export using SVG or PDF to retain vector quality