This article is a step-by-step guide for new content creators who might be using inexpensive microphones but want to get excellent audio quality in their podcasts, streams, or YouTube videos. While getting a better quality microphone might seem like the only fix, there are some changes you can make in OBS or Stream Labs, that will significantly enhance your overall output quality without spending a cent.

Table of Contents
Related: How to Enhance audio quality for YouTube videos and Podcasts using Adobe Enhance Speech.
In the realm of content creation, audio quality often takes a backseat to video quality. However, it is crucial to recognize that good quality audio can profoundly impact the overall viewer's experience, regardless of the medium. Whether you're starting a podcast, streaming gameplay, or producing YouTube videos, implementing the settings outlined in this article will dramatically improve your audio quality.
Important First Steps to Take When Configuring Your Microphone.
Positioning and Distance: Proper microphone positioning and distance are super important for capturing clear and balanced audio. Experiment with getting the perfect positioning before you make any adjustments in OBS. To get some really good feedback with your microphone's default settings try using Adobe’s FREE Microphone checker.
Microphone Placement: Depending on what microphone you have you should also consider your options desktop stands, boom arms, or shock mounts, all play an important role so if you have access to a boom arm and shock mounts using them will help a lot!
Pop Filters and Windscreens: While they may look ugly and be annoying to position Pop filters and windscreens make a huge difference to audio quality by reducing plosive sounds and minimising background noise, providing cleaner audio recordings. They also help with annoying wind noise from your breath. If you don’t have one you can also try sliding a sock over your microphone which helps quite a lot!
Microphone Gain and Volume Control:Adjusting microphone gain and volume using the physical slider or dial is important. Try to have the gain set about halfway or on the lower side. Having it set too high will make your microphone too sensitive and it will pick up a lot of annoying background sounds.
Once you have dealt with all of those things you can move onto configuring your Microphone in OBS or StreamLabs
Make Any Mic Sound Expensive In OBS | Mic Settings & Filters
Now that you have all of the other stuff out of the way you can start configuring things in OBS.
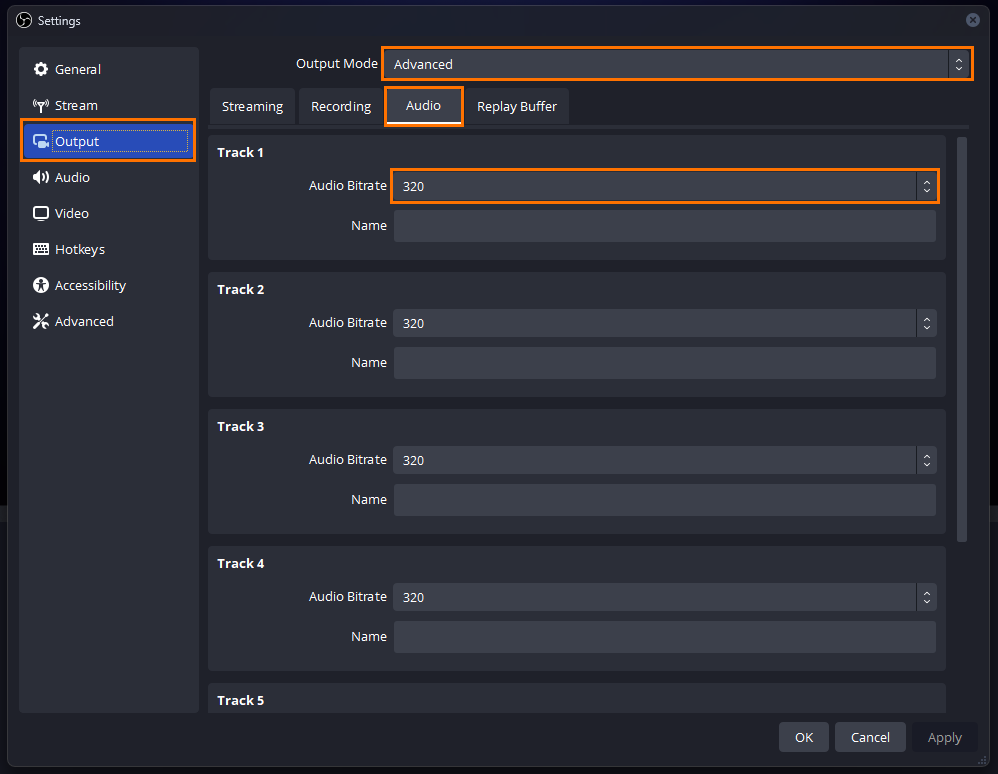
- First open OBS and go to Settings > Output > Audio and change the Audio Bitrate to 320. Then click Apply and OK to save the change.
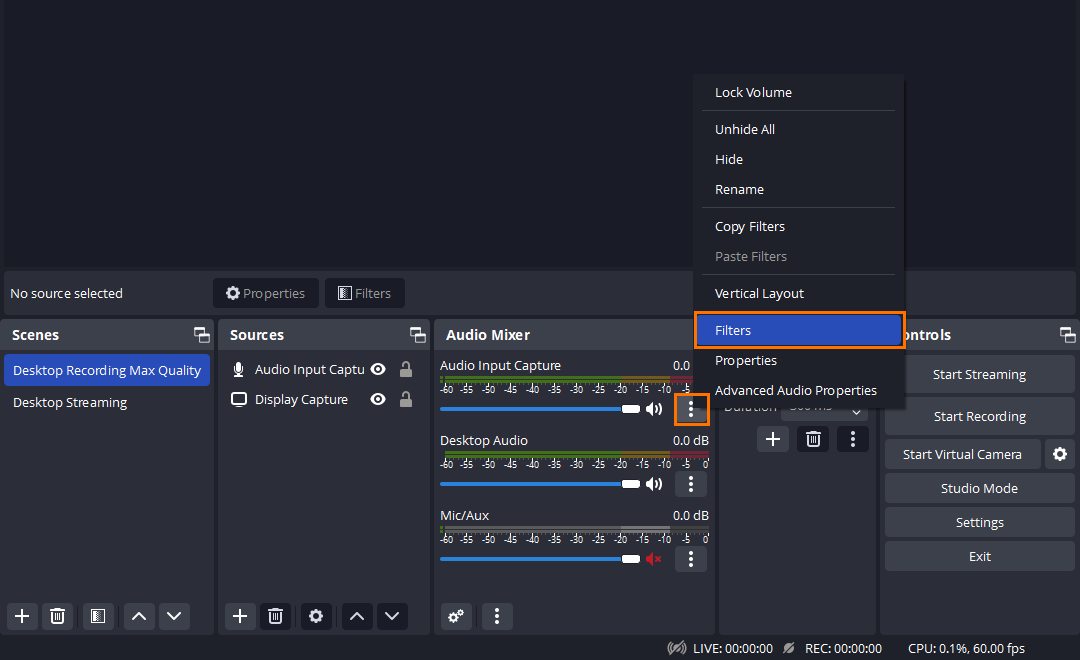
- Now we can start with filters. To add and adjust filters click the 3 dots next to your Microphone or input capture under the Audio Mixer tab, then select Filters.
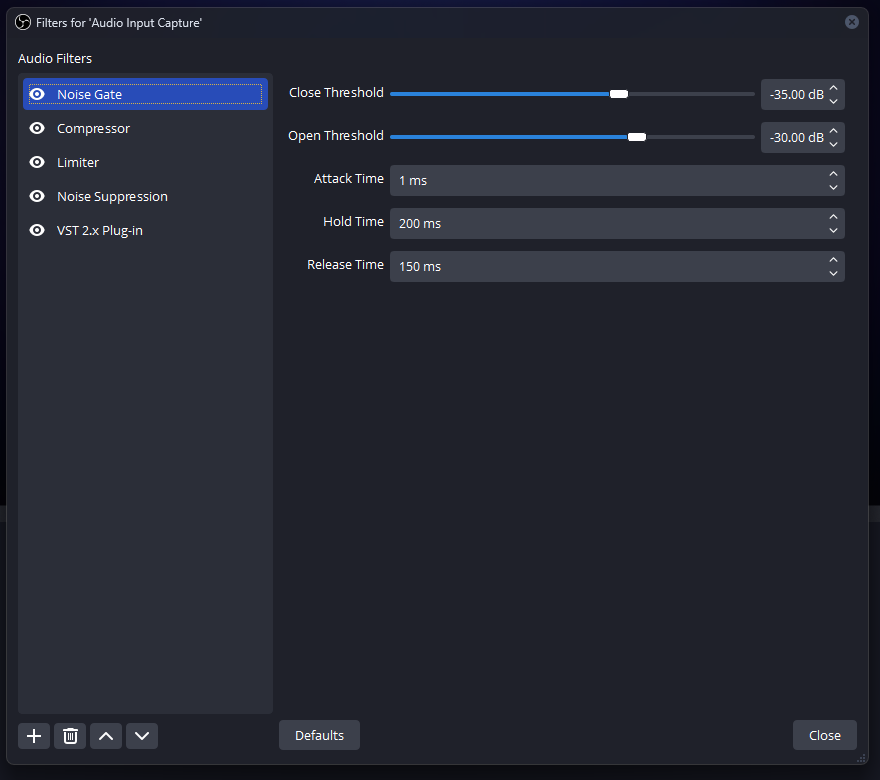
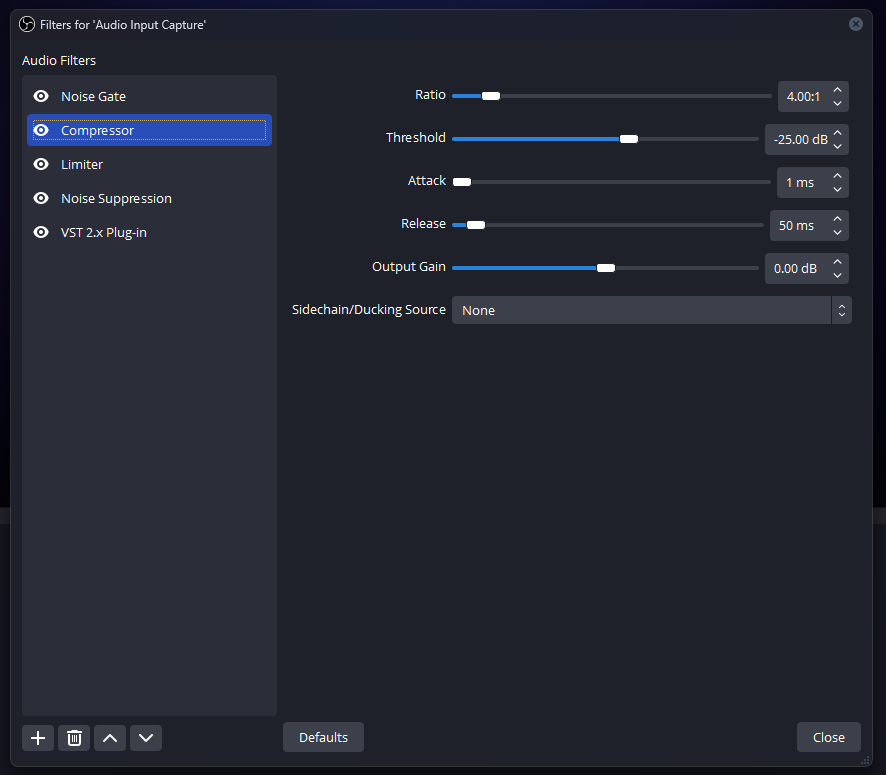
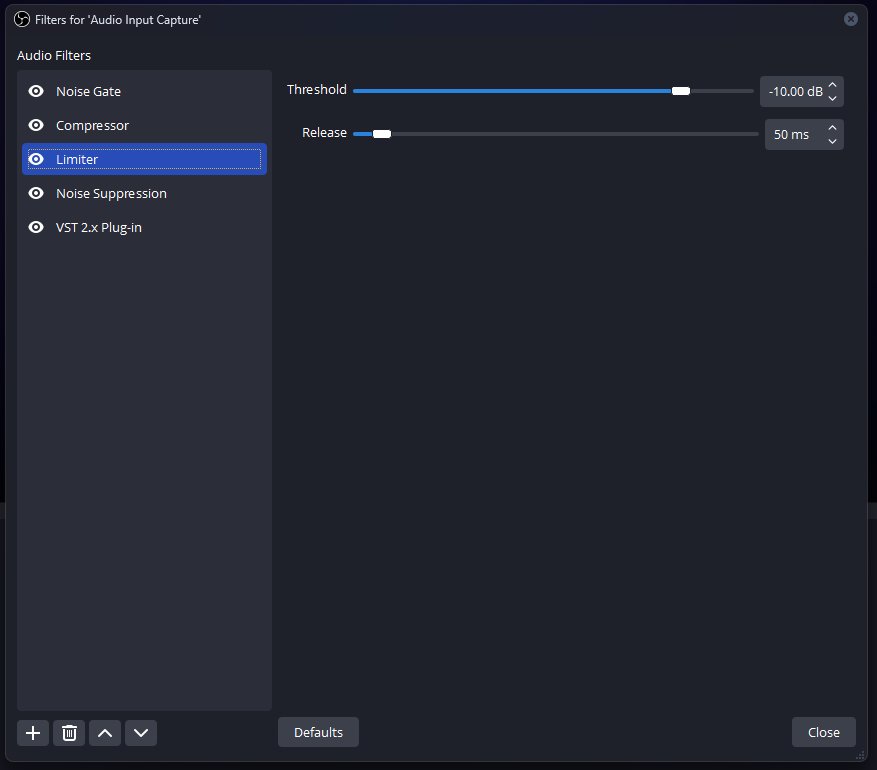
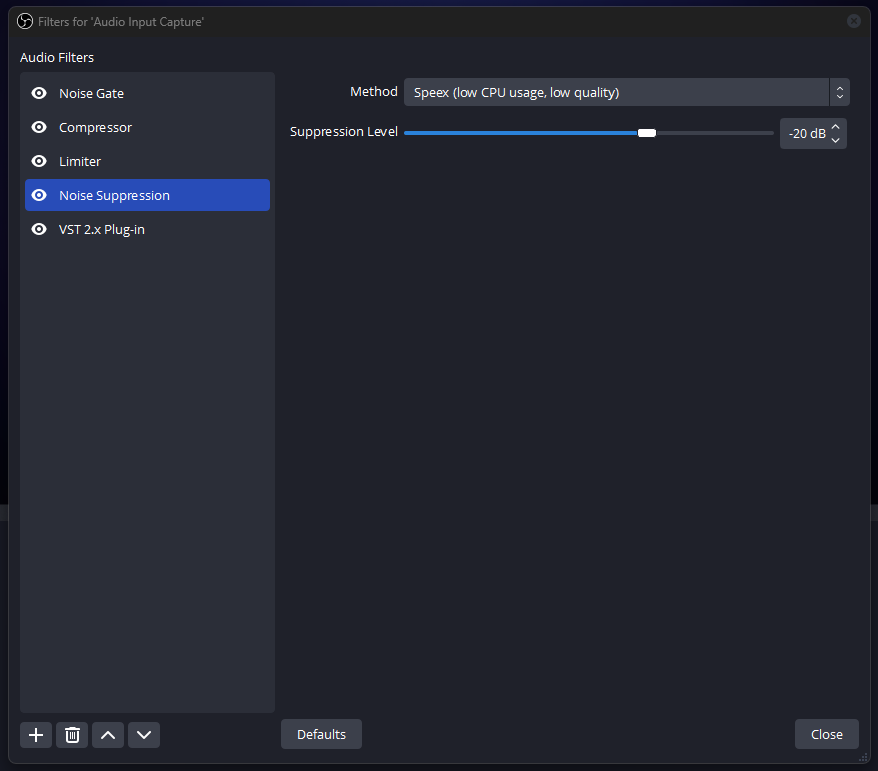
- Here you will see a + icon in the bottom left hand corner. Click that to add a new filter. Now work your way down the list and set everything exactly the same as the images. This will give you the perfect base settings to work with for just about any microphone.
NOISE GATE
COMPRESSOR
LIMITER
NOISE SUPPRESSION
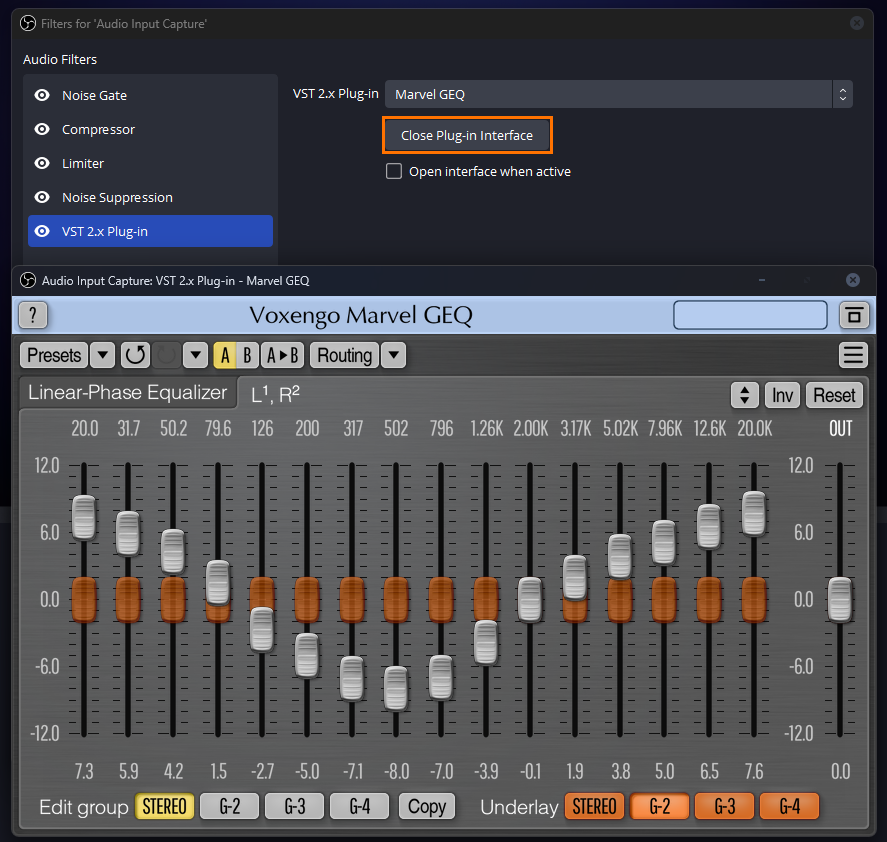
VST 2.x Plug-in (OPTIONAL)
This Filter is optional but does add a little warmth to your voice if you have it configured like the example below. You can adjust it however you like though or just use some of the presets. Simply download and install it from here. Then click the + icon and choose VST 2.x Plug-in.