If you are using Windows 11 you may have noticed a new feature recently added to the operating system called Featured Search. Featured Search will prioritise interesting moments from around the world and content gleaned from your usage. So if you aren’t a fan of it follow along as we show you how to disable it.

Related: How to fix error 0xc00d6d6f when opening media files on Windows 11.
If you don’t particularly want Microsoft displaying even more “custom” content to you while you are using Windows 11 Search, you can disable the search highlights, ‘aka Featured Searches. Microsoft's Featured Search option has been introduced in Windows 11 and replaces the initial content of the search pane. Instead of the usual list of recent apps and documents, it will now display specific content from the Internet. And potentially ads at some stage.
All of this extra “Highlighted Search” information will correspond with global and local events, holidays, anniversaries and ultimately, things that happen in your local area. If you have location services active. If not Microsoft will guess based on your IP address. Highlighted Searches may also show content that occurred on this day/year and historical events and milestones. Oh and don’t forget ads! There’re always ads at some stage.
The only good part about this feature is that networked computers and computers part of organizations, companies, schools, universities, etc, and will also see a box with people, files and shared projects. If you’ve just got a single PC at home though, you might as well disable Search Highlights.
How do you turn off Search Highlights in Windows 11 from settings?
The quickest and easiest way to disable Search Highlights in Windows 11 is from the Settings app.
- First, open the Windows 11 Settings app by pressing Windows Key + I.
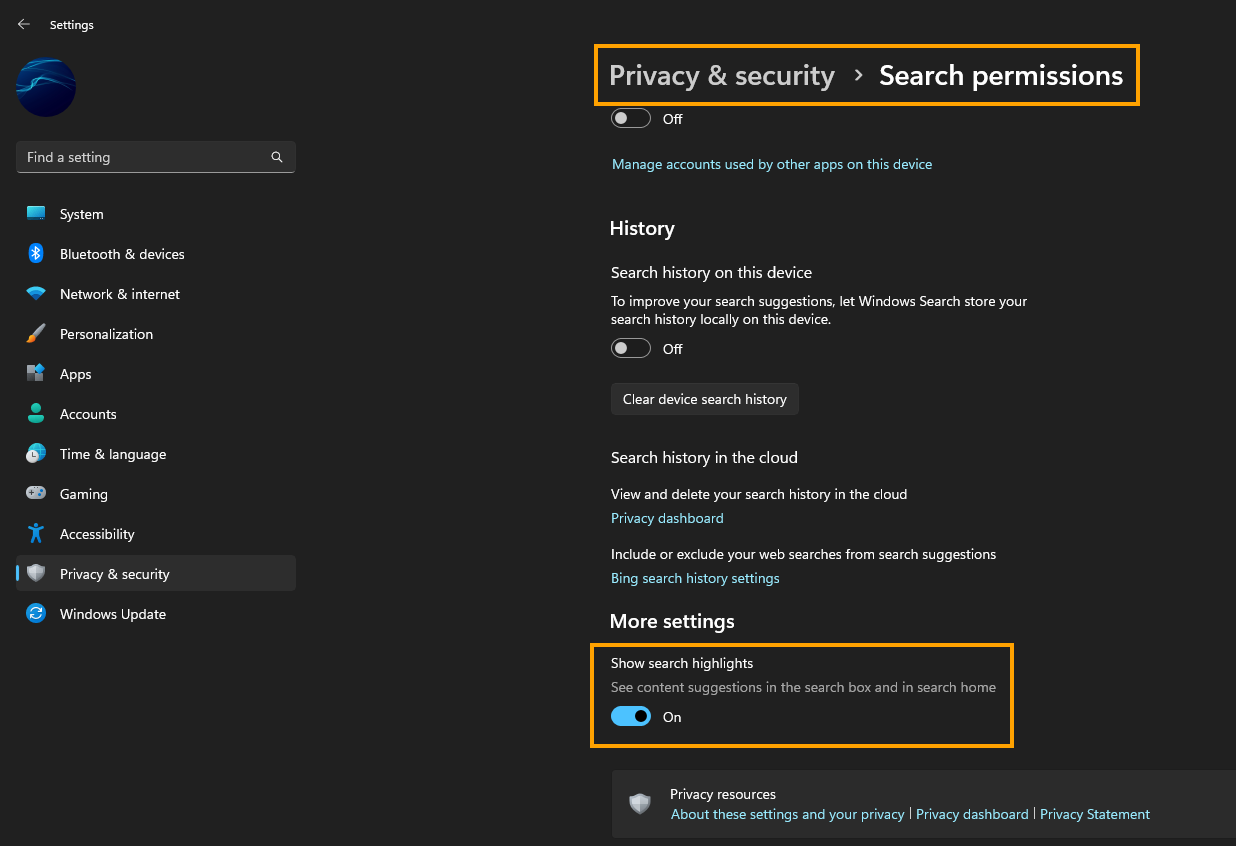
- Now change to the Privacy and Security tab on the left.
- Finally, click Search permissions in the central pane, then scroll down and disable the toggle next to Show search highlights. By default, it will be enabled.
How do you disable Search Highlights in Windows 11 from the registry editor?
Alternatively, if you are looking for a bit more of a challenge you can make the change from the Windows registry. Just make sure you have created a system restore pointfirst.
- To begin, open the Windows 11 Registry Editor by searching regedit from the start menu.
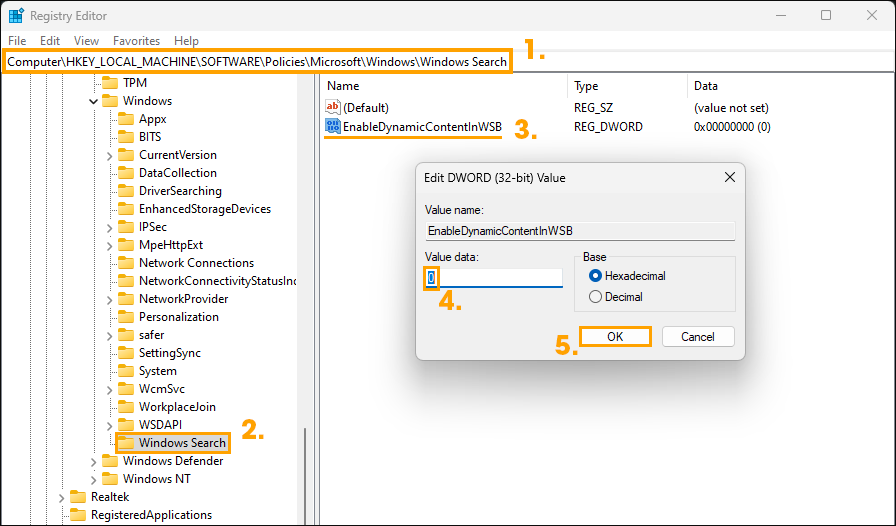
- Once you have it open use the left-hand pane to navigate to the following location:
Computer\HKEY_LOCAL_MACHINE\SOFTWARE\Policies\Microsoft\Windows\
- Now select the Windows folder (key) and right-click on it and choose New > Key.
- Name this new folder (key) Windows Search.
- Next, select the Windows Search folder (key) then right-click in the central pane and select New > 32-bit DWORD value.
- Name this new file EnableDynamicContentInWSB.
- Finally, double-click EnableDynamicContentInWSB and change its Value Data to 0. Then click Ok to save the changes.
Now you can Restart your computer and the change will take effect. Just keep an eye on it because Microsoft has a tendency to reset features like this in Windows Updates so it may automatically re-enable at some stage. If you are looking for more Windows 11 guides, you can check them all out here.