If you aren’t happy with the quality of your YouTube Shorts and get the feeling that something is killing your quality! You might be right. There are quite a few different things you need to take into account when capturing and creating your YouTube shorts to get the best possible upload quality.

Table of Contents
Related: How to Lock Individual Chats in WhatsApp | Lock WhatsApp Conversations.
When publishing content to YouTube shorts it should theoretically remain at the same level that you are viewing it at on your phone or PC. However, that isn’t always the case. Depending on how your content was captured, created, and then exported will influence how it looks as a YouTube Short. What exactly does this mean?
Another factor affecting video quality is the internet speed during the publication process. If you upload a YouTube Short while connected to a public Wi-Fi network or using mobile data, the quality will be scaled back to save your data rather than kept stable for quality. So to post YouTube Shorts videos with the absolute best quality possible there are a few things you need to consider. Obviously, you will need to record in the best possible settings but you also need to take care of some stuff when you finally get around to uploading your videos to YouTube Shorts.
Post Production - Best Quality YouTube Shorts.
If you are recording content on a camera or even your phone and then editing it in a program like Premiere Pro. Then transferring it to your Android or iOS device to upload to YouTube Shorts, you need to use a specific set of export settings to get the video perfect. Pay attention to the bitrates, this is super important so try something between 6-20 and see what works best with your footage. I’ve had a lot of success using 16mbps for the bitrate when exporting YouTube shorts. Going too low will reduce your quality significantly, whereas going too high triggers YouTube Shorts’ compression tools to step in and smash your quality.
How to Configure YouTube Shorts for Maximum Video Quality.
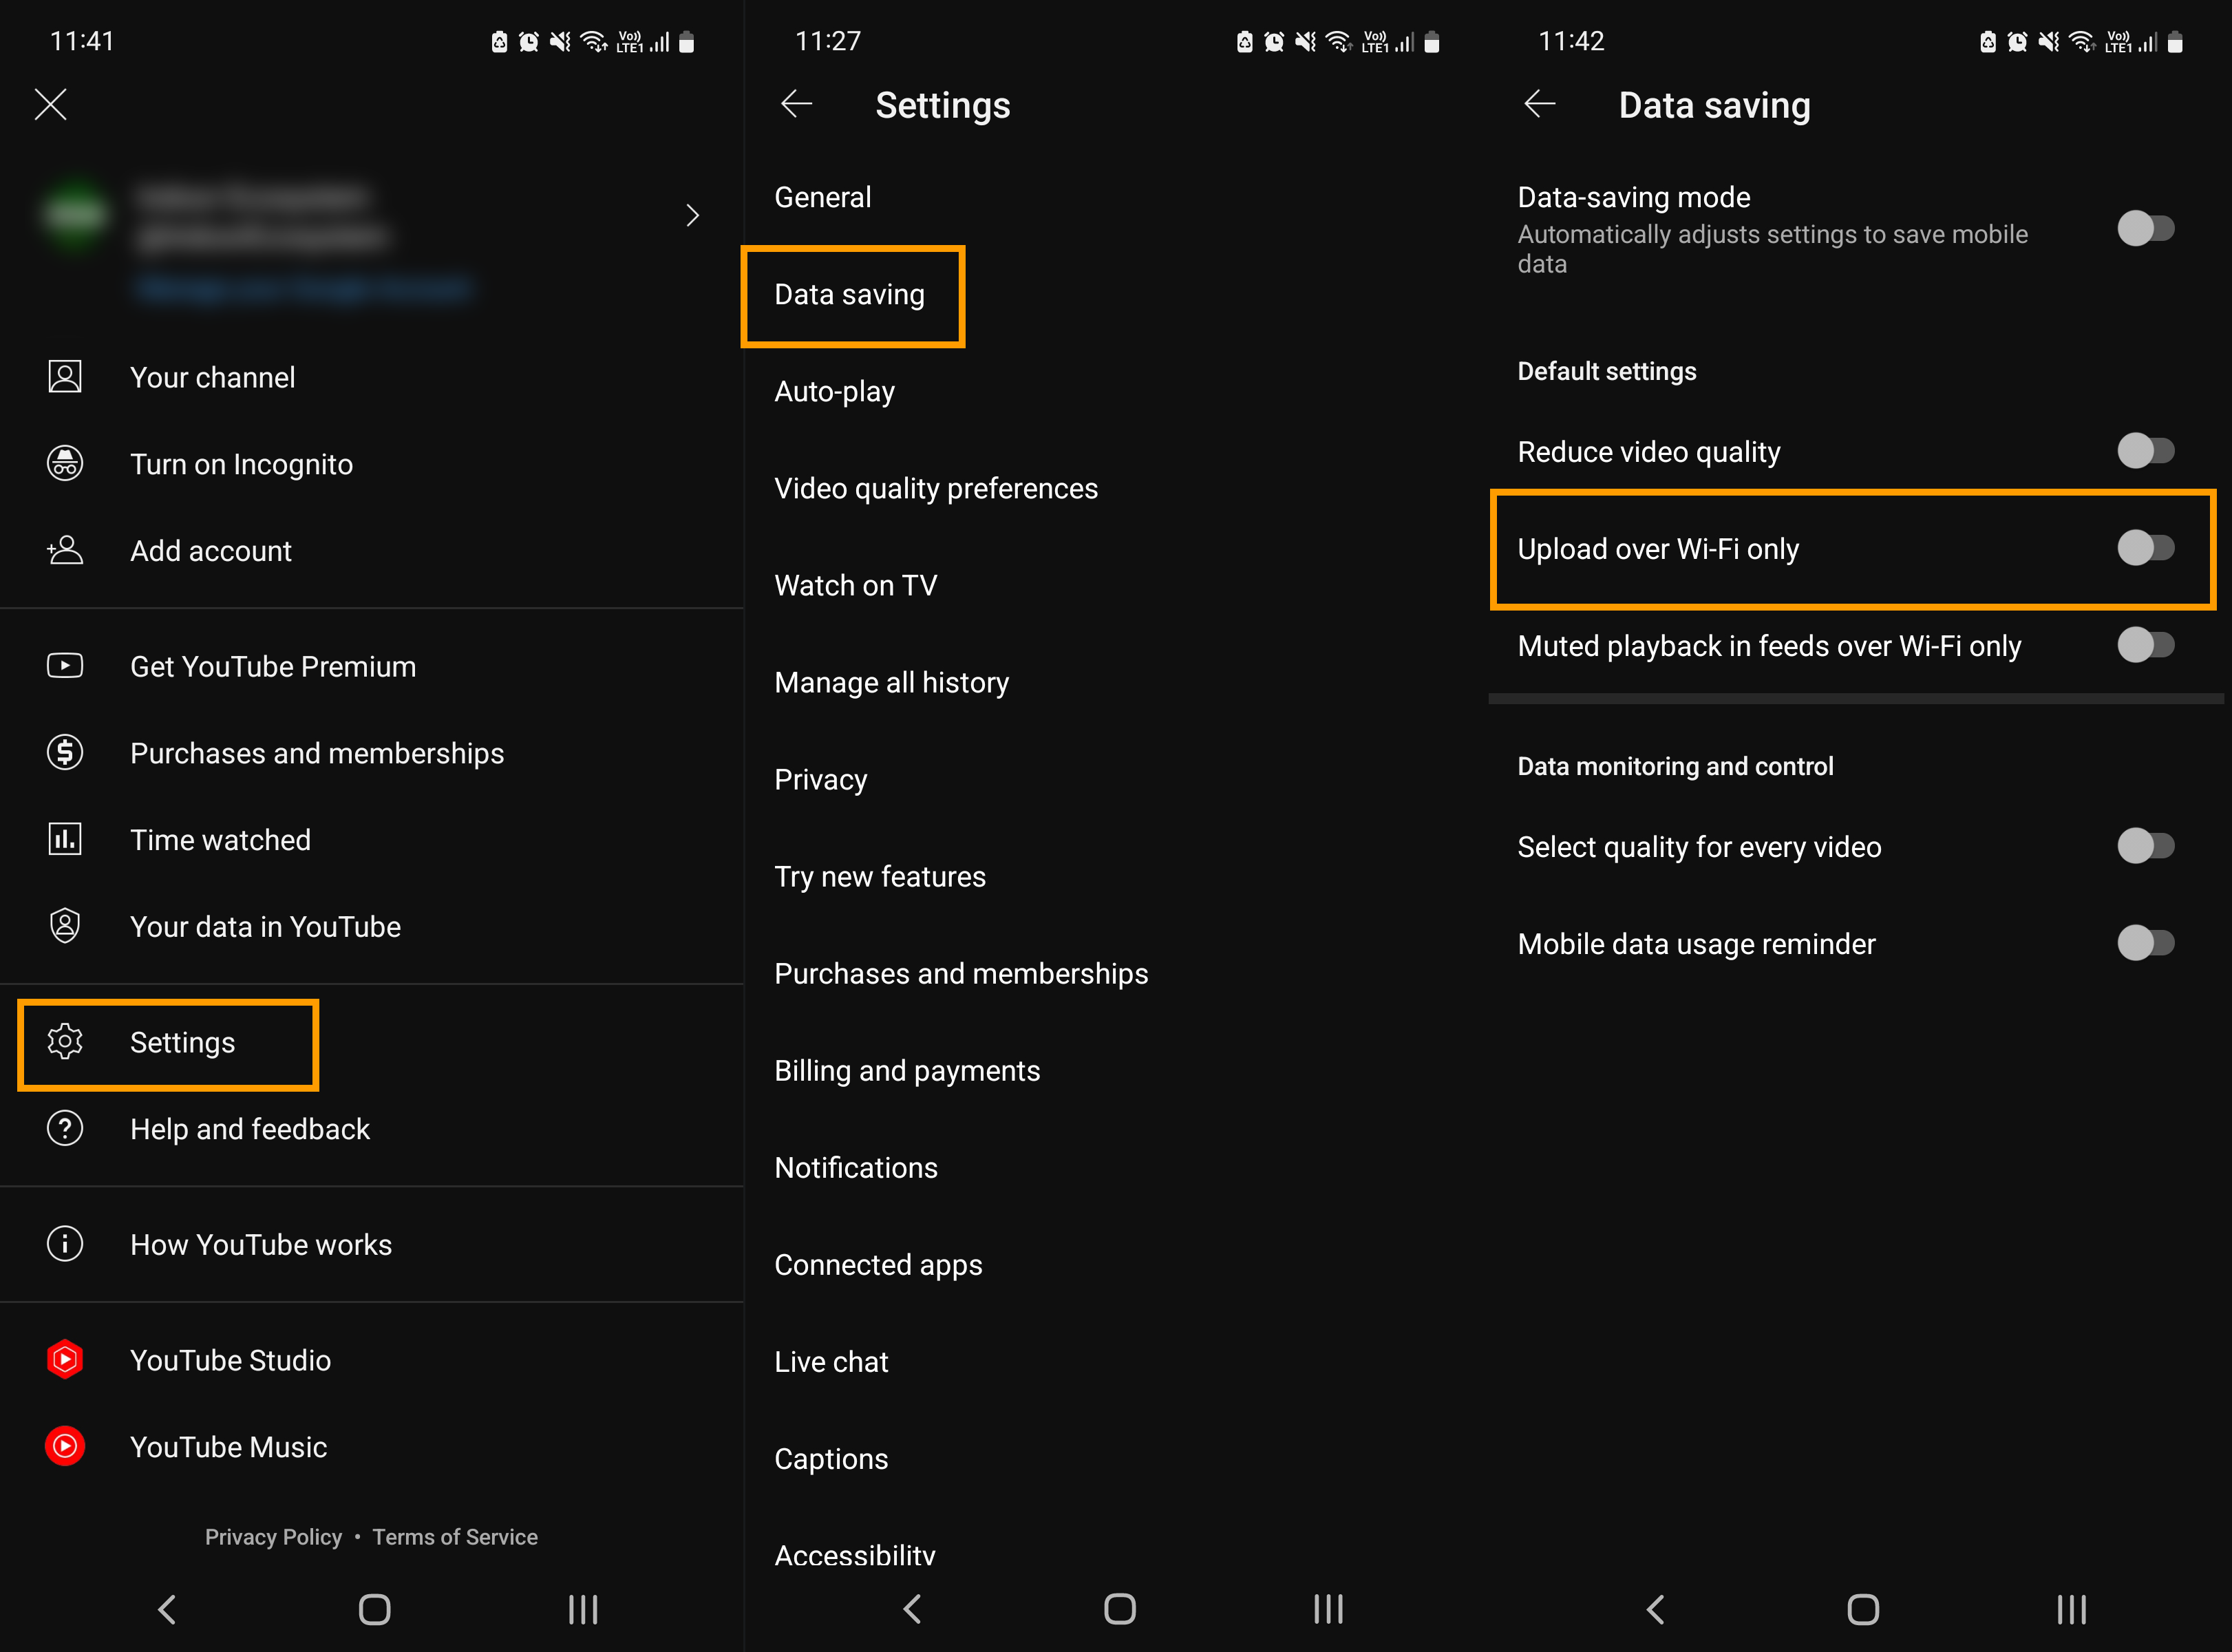
The next part of the process requires you to change a few settings in the YouTube app on your phone.
- First, open the YouTube app, then Go to Settings.
- Next, go to Data saving and make sure the reduce video quality is disabled and to be extra safe make sure the Upload over Wi-Fi only option is ticket. This will only upload content when you are connected to a WiFi network. Thus saving you potential problems.
- You can disable the Data-saving mode entirely if that’s more your style.

The final part of this entire process is to make sure that you let your uploaded content play all the way through without interrupting. For whatever reason doing this can help quite a lot with quality. The same process works for Instagram and TikTok as well.
If you’re also uploading content to Instagram Reels and TikTok you will need to follow similar processes, however, as usual each different app has different settings that you need to adjust in order to get the best results. Below are our guides that are dedicated to both.
How to Upload TikTok Videos with the Best Quality.
How to Upload Instagram Reels with the Best Quality.
