If you need to use more than one WhatsApp account at the same time on Windows 10, Linux or MacOS, this article will show you how to quickly and easily set up multiple accounts that can be used simultaneously. A really useful WhatsApp tool to have at the ready.

How to Get Dark Mode For WhatsApp on Windows 10. (WhatsApp Dark Mode Windows Client)
WhatsApp is one of the worlds biggest messaging services and is used by billions of people around the world on a daily basis. It’s free, secure, easy to use, and provides services most other messaging apps don’t have or require a premium for. The only downside of WhatsApp is that multiple accounts can’t be used at the same time, at least not on mobiles devices.
However, on Windows 10, Linux and MacOS, things are a little different as WhatsApp can be made to function in instances, allowing multiple accounts to be used at the same time. Sadly the feature isn’t native to the official WhatsApp client but can be gained using third-party tools, so follow along as we guide you through the best way to use multiple WhatsApp accounts on Windows 10. The process is very similar on MacOS and Linux.
How Do You Use Two or More WhatsApp Accounts at the Same Time on Windows 10, Linux or MacOS?
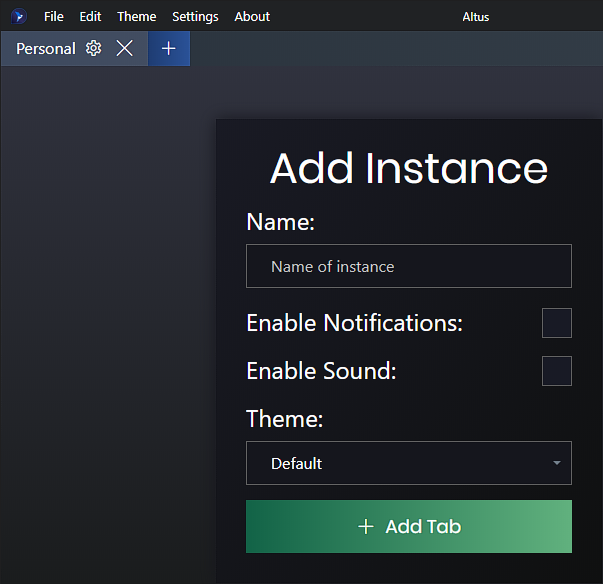
In order to start using multiple instances of WhatsApp on Windows 10, you’ll need to download a small piece of software called Altus, which can be acquired from Github here. Once you have the client on your computer (you may need to allow access if Windows Defender prompts you to be cautious) extract it to a location that works for you. After you’ve installed Altus, open it, then give your first instance a name, select your preferences, then click Add Tab.
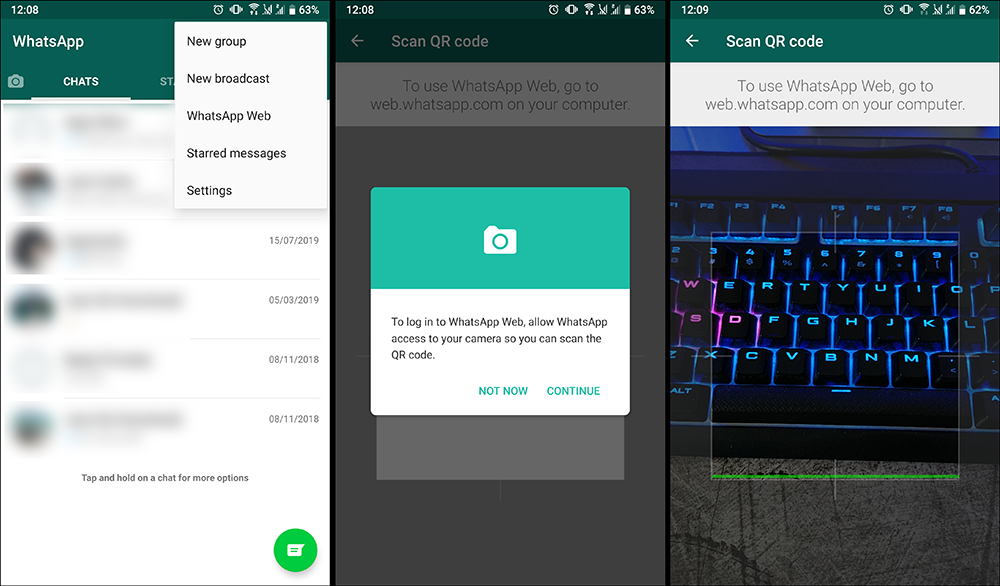
This will bring up a QR code which you will need to scan using your mobile device and WhatsApp.
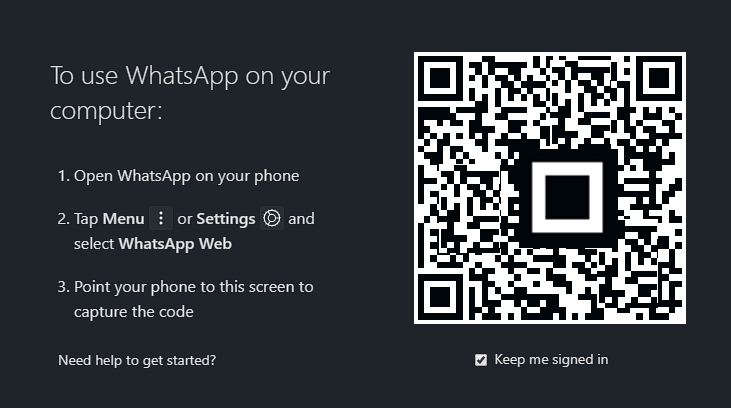
To do this open WhatsApp, then tap the three dots and select WhatsApp Web and follow the process to sign in to your account.
Now that you have added your first account, repeat the process with your second, third, or fourth accounts, until you’ve added all the accounts you require. Just remember that you must sign into the correct accounts on your mobile device to link them with Altus.
Adding a Custom Theme to Altus WhatsApp For Windows 10.
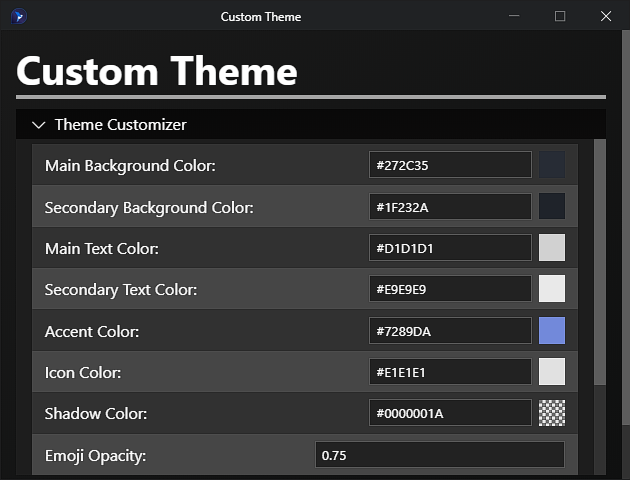
If you aren’t happy with the two default themes (normal and dark) you can create your own fully custom theme using the option found under Theme > Custom Theme. When the customisation client appears, use the headings and corresponding colour hex codes to create a theme that works for you. Just remember to name your theme, then save it before closing the theming window. If you don’t you’ll have to reconfigure everything from scratch.
On a Side Note...
On a side note, if you have recently updated Windows 10 to version 1909 and can’t stand the new start menu hover menu. The following article will probably be a godsend for you, as it shows how to revert the start menu back to its old, traditional hover expand free state.
How to Disable the Start Menu Auto Expand on Mouse Hover on Windows 10.