Table of Contents
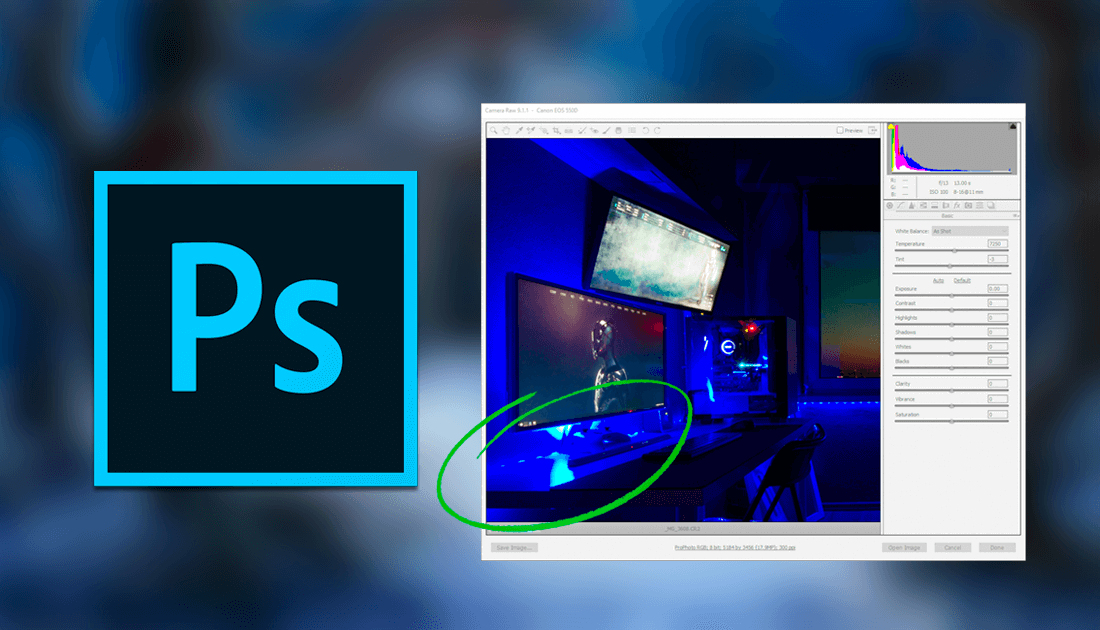
Photoshop is an invaluable tool for editing, tweaking and creating completely new and original digital artwork. Sometimes though, things can be a little complicated to get your head around as the options and adjustments are seemingly endless. This guide will show you how to fix Image quality and distortion issues when opening Raw files with Camera Raw.
How to Create Your Own Social Media and Messenger App Emojis. (Android, iOS & Web)
Photoshop has been around since 1988, evolving from a simple raster graphics editor, into the world’s most famous and most used image editing/creation tool. It has become so widespread the term ‘Photoshop’ is now listed in the English dictionary as a verb. Having been around such long it’s no wonder that Photoshop is exceptional at what it does. That said, it doesn’t mean photoshop it's easy to use or completely bug-free.
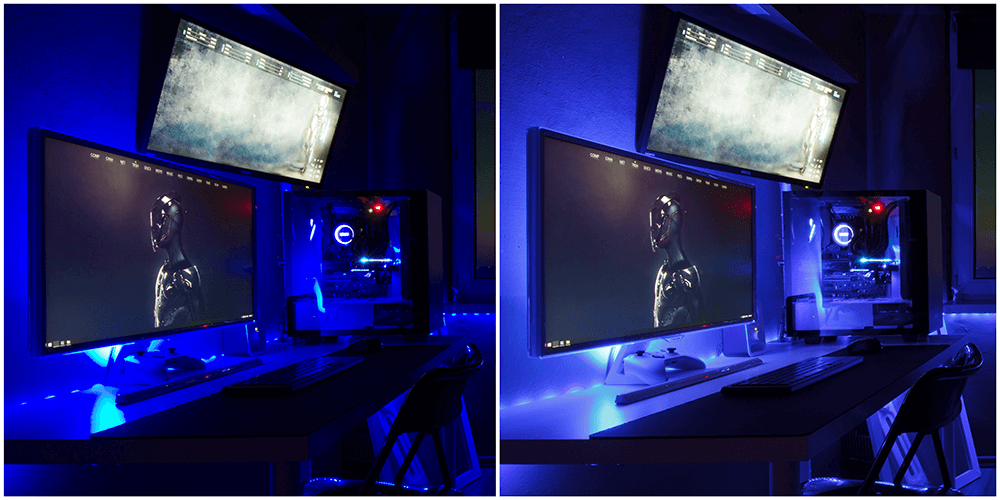
The issue this guide will address is based in Photoshop Camera Raw, specifically Camera Raw running in Photoshop CS6, however, if you are using any of the newer versions, the fix should also work. If you are opening certain raw files in using Camera Raw, you may have noticed the colouring, quality, sharpness etc is completely out of balance.(more common if your image has one dominant colour) Below is an example and a comparison between XnView and Camera Raw opening the same file. As you can see XnView opens the raw file with perfect colour representation. Even if you are using Windows built in Photos app you will notice the quality difference is very dramatic.
Note: If you are also using Adobe Lightroom, you will most likely see the exact same effect.
How to Fix Photoshop CS6 Camera Raw Colour / Histogram Problems.
The first thing you probably checked when you noticed this error was Photoshop's Colour Space settings. Unfortunately, no matter what colour space you use, the image quality doesn’t improve. You would have also noticed that the Histogram for the image is also skewed dramatically. Now, you can tweak some of the problems away using Camera Raw’s sliders, however, this isn’t a proper fix and you are still going to suffer quality loss.
Instead, to Fix this issue, you will need to change Camera Raw’s Camera Profile Settings. Before we start though, it's best to make sure you are also running the most up to date version of Adobe Camera Raw you can. The link below will direct you to the Adobe Camera Raw Download page. Just make sure you get the right version for your software. Remember, Photoshop CS6 users can only update to version 9.1.1.
Download Adobe Camera Raw (Windows & Mac)
Once you have downloaded and installed the latest version of Adobe Camera Raw that works for your system, we can begin. First, find and open any Raw file you are having problems with. From the main camera raw screen, find and click on the camera icon in the tools row. This is the camera calibration row and contains the Camera Profile settings. By default, it is set to Adobe Standard and is what is causing the dramatic distortion of some images. To fix the problem, change the Camera Profile Name to Camera Neutral. If you’re not 100% happy with the way Camera Neutral looks, you can choose any of the other options you think better suits the image, Camera Standard is also a very compatible option.
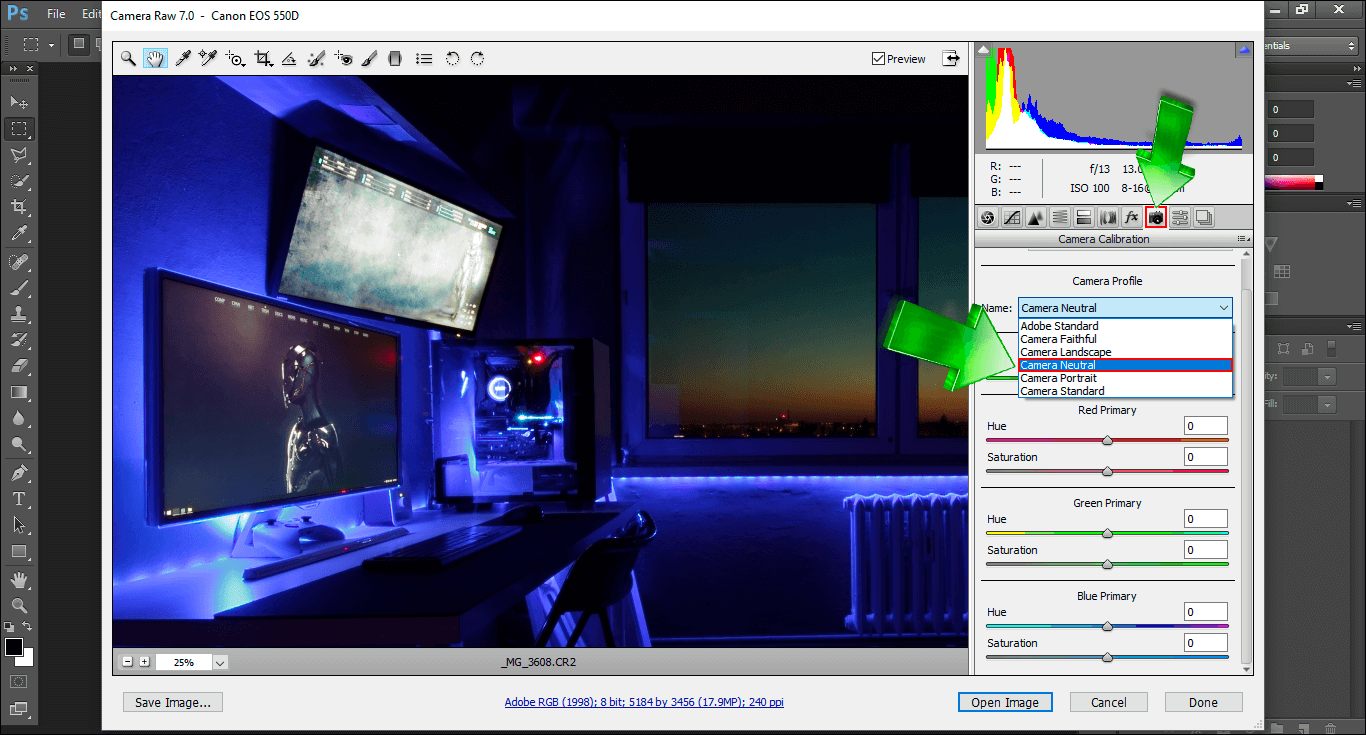
Camera Neutral does, however, seem to be the most stable and accurate representation for images with strong colour, obviously, this will depend somewhat on your camera and hardware. After picking the correct camera profile you can continue using Camera Raw to make all the necessary change you would like to your image, then open it into photoshop as you normally would.