Table of Contents
If you are into photography or would simply like to edit an image you’ve found online. This article will show you how to quickly and easily remove noise and grain using free online AI (artificial intelligence) based tools. A very powerful way to remove annoying levels of grain and grit from photos.
How to check hard drive temperatures on Windows 10 with built-in tools.
Over the last couple of years, online tools that use a range of different processes to repair, fix, and tweak images and photos have become quite popular. With AI-based offerings taking up a large percentage of the market. These tools range in quality, however, are generally free and easy to use, making them a great way to fix photos that aren’t quite up to the standard you like.
For the most part, these tools generally concentrate on skin smoothing, sharpening, exposure, lighting, etc. Although these are all fantastic tools that most people use regularly, they don’t address the core issue of a lot of photos. Grain! Thankfully, this can be resolved relatively easy using Imglargers image denoiser.
Related: How to change what subtitles look like on Netflix. Change Netflix subtitle appearance.
The best online tools for removing noise, grain and grit from photos and images? AI-based noise removal tools.
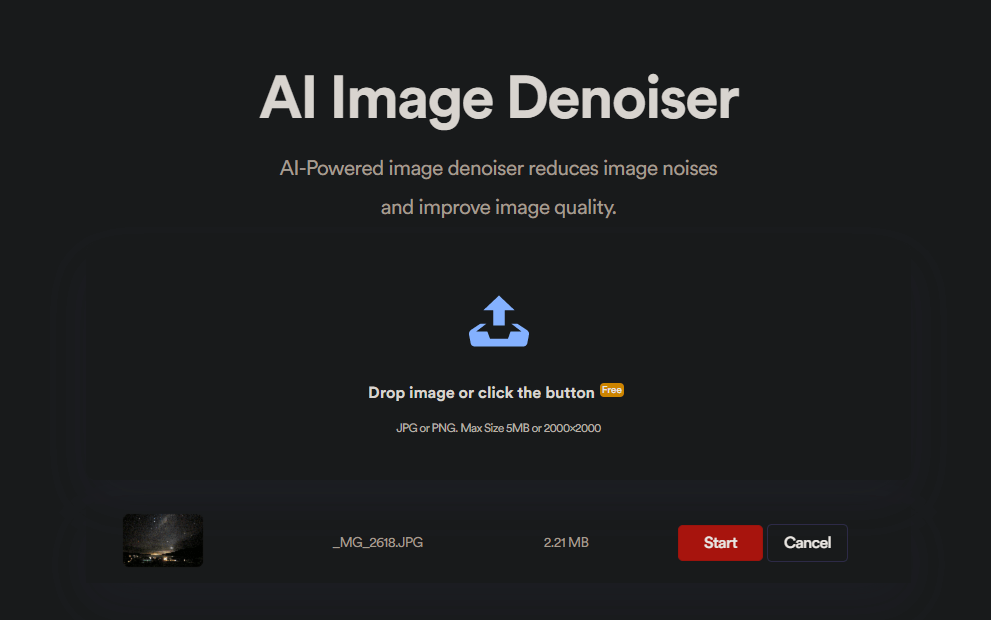
Image Denoiser is a fantastic free online tool that lets you quickly and easily remove a huge percentage of noise from images with little effort and absolutely no cost. It’s also super impressive to see machine learning and artificial intelligence working together with such great results.
To begin, simply head on over to the Imglarger website and upload your image. You can use JPG and PNG files up to 5mb in size with dimensions up to 2000x2000. Which is decent enough for a free service. You can resize (upscale) them using another program if you need bigger images.
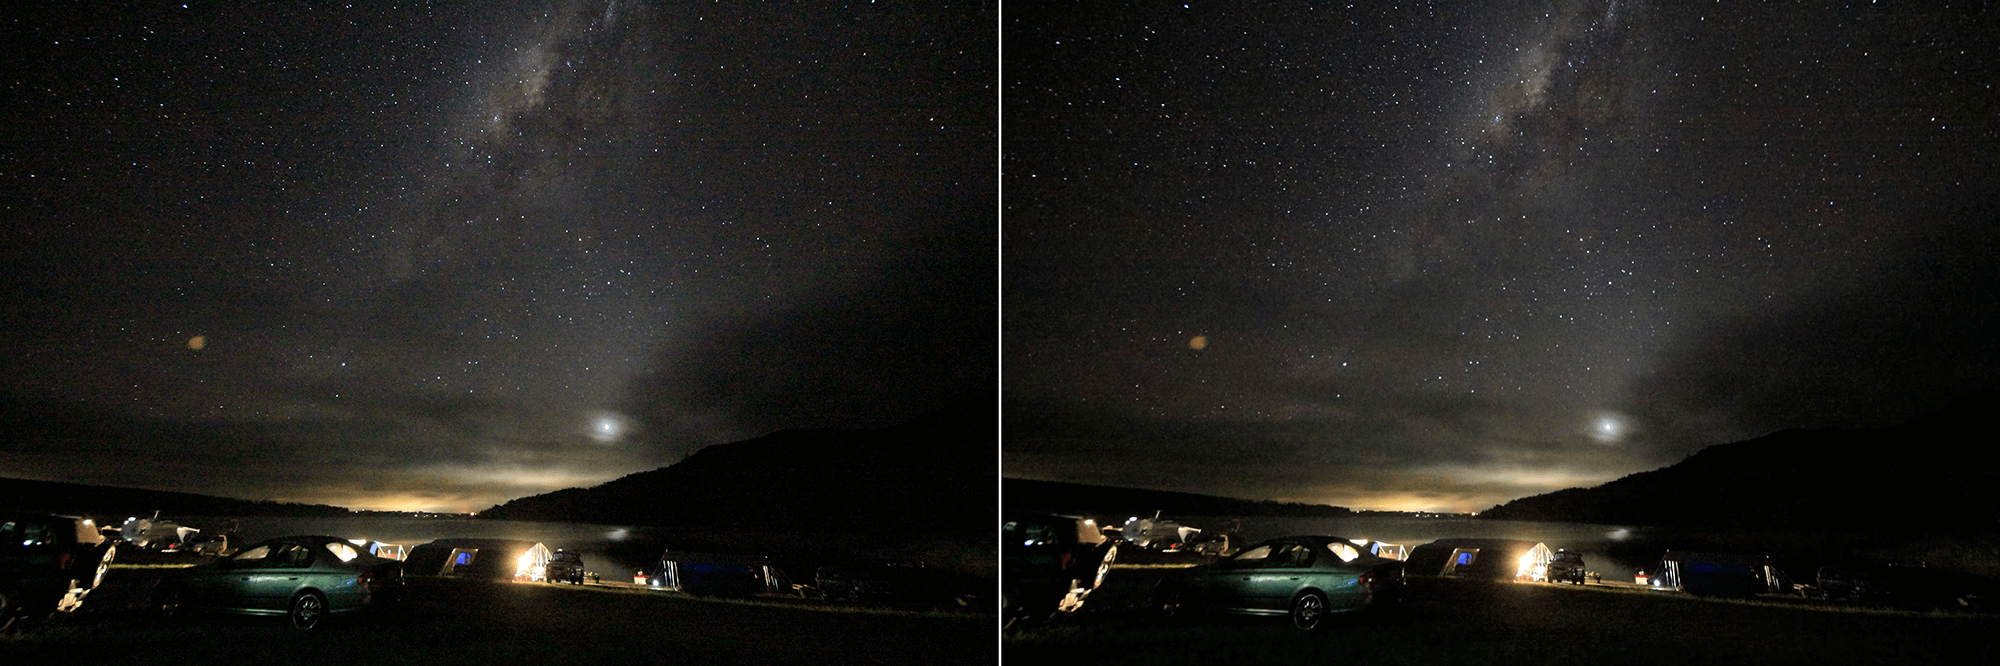
After uploading your image it only takes a few seconds for Imglarger to work its magic and denoise your file. I’ve attached an extreme example below of a comparison. Left is the before image, right is the after image. I also ran the image through the latest version of Photoshop and didn’t results that were any better, so the tool works pretty damn well considering that test. If you are using a less extreme image, you’ll end up with far better results.
Generally speaking, most images that have been run through noise removal processes end up a little soft, so it’s a good idea to run them through a sharpening tool straight afterwards. To do this simply use the Our Products drop-down box in the top-left hand corner select Image Sharpener then follow the exact same process as the noise removal tool. You can probably also give the Image Enhancer tool a whirl too while you’re at it.
On a side note…
If you also wouldn’t mind looking into a few other online photography tools, you’ll probably enjoy checking out one of our other very popular articles which lists and explains some of the best portrait retouching tools.