If you are editing 4k footage in Davinci Resolve and are having problems with choppy playback or crashing it’s a good idea to change the playback resolution from 4k down to 1080p (1920x1080). This will drastically improve performance and reduce the chance of Davinci Resolve freezing or crashing.

Table of Contents
As 4k content slowly becomes the dominant quality standard for footage on YouTube, and other platforms you may be feeling the pressure to start filming and recording content in 4k. The only problem is that editing 4k footage takes way more system resources to edit and often causes Davinici Resolve to crash or grind to a stop. Editing a video at 1080p on a laptop isn’t a problem but as soon as you switch to 4k 3840x2160 everything falls apart.
Thankfully changing the Timeline Resolution in Davinci Resolve is a quick and easy process and will generally solve most of the other performance issues you are having. However, you should also check out the following guide if your problems continue to persist.
How to Fix Davinci Resolve Crashing on Windows 11.
How do you change the Timeline Playback resolution in Davinci Resolve?
To change the playback resolution of the Timeline in Davinci Resolve do the following.
- First open Davinci Resolve, and a project.
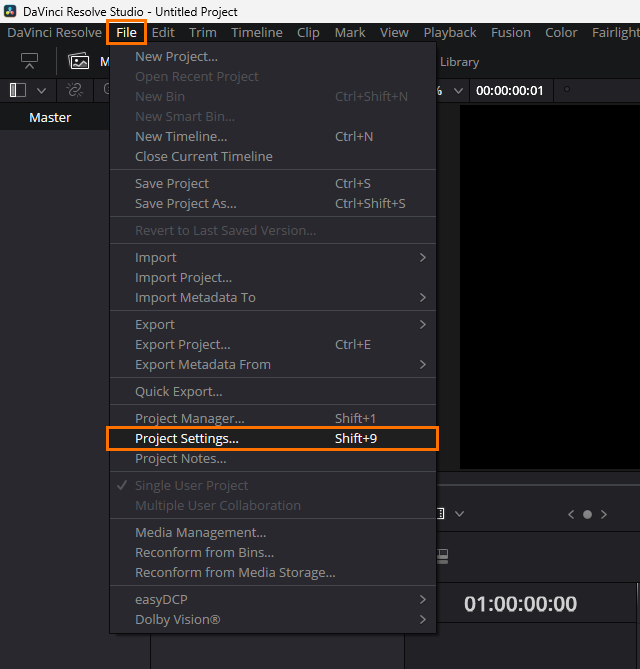
- Once you have a project open go to File > Project Settings.
- In the new window that appears use the drop-down box next to Timeline resolution and choose 1920x1080 for horizontal footage or 1080x1920 for landscape footage. You can use even lower resolution if you want to but 1080p should work fine for most modern devices.
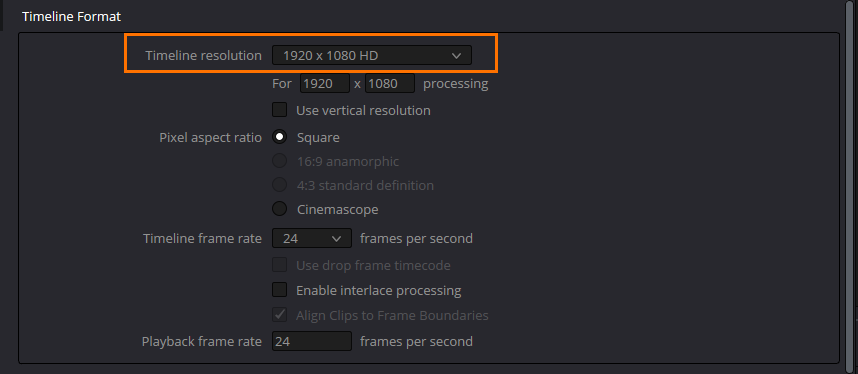
- Alternatively, you can also use completely custom timeline resolutions if your project is a completely random resolution.
- After you have made the change click Save at the bottom of the screen to confirm the changes. If you don’t do this and close the window the timeline will revert back to the project's default video resolution.
Now you can work on your projects without your system trying to play 4k content the entire time. This simple change will dramatically reduce the hardware usage of your computer as well. If you want an even bigger boost you can look into using proxies to edit 4k footage on your PC. It will make an even bigger difference when using Davinci Resolve but will take a little more time to prepare. If you are having some other problems with Davinci Resolve, make sure you check out the following guides or our full library here.
How to Fix Mono Audio in Davinci Resolve - Fix Left Ear Only Audio in Davinci Resolve.
How to fix the render STOP Problem in DaVinci Resolve.
How to fix DaVinci Resolve Unsupported GPU Error.
How to Fix Davinci Resolve Intel Hardware Acceleration Error.