If you use Premiere Pro to create video content and want to try exporting using AV1, this article will show you how to do it with the help of a third-party tool called Voukoder. This plugin gives you extra export options and allows you to fine-tune the quality and video size of your exports in Premiere Pro. And in case you didn’t know, AV1 is YouTube’s top preferred encoding format.

Related: How to Enhance audio quality for YouTube videos and Podcasts using Adobe Enhance Speech.
There are a lot of different video encoding formats currently available and choosing between them can be quite a challenge. While HEVC formats are probably the most common, there are also some other formats that offer better results in both compression and quality. They are also the preferred formats of popular platforms like Youtube. At the time of writing H.264/AVC, H.265/HEVC: H.265, VP9, AV1, and AP8 are some of the most popular, though YouTube has two clear favourites!
VP9: Is an open-source video compression standard developed by Google. It is similar to H.265 in terms of compression efficiency and features and it's used in applications such as YouTube, Android and Chrome.
AV1: Is a video compression standard developed by the Alliance for Open Media (AOMedia). It is similar to VP9 in terms of compression efficiency and features and it's used in applications such as YouTube, Firefox, Chrome and Netflix.
Both of these codecs are designed to provide higher visual quality at a lower bitrate, making them ideal for streaming and online distribution. Which is exactly why YouTube favours content that is uploaded in either of these two formats. That said, AV1 is currently the top preference so follow along as we show you how to get AV1 encoding and export support for Adobe Premiere Pro.
How do you Export from Adobe Premiere Pro using AV1 format? You’ll need a plugin.
To begin, you’ll need to add the Voukoder plugin to Premiere Pro in order to get access to the AV1 encoder and quite a few others. You can check out the setup guide for that here. Once you have everything setup you can follow the steps shown below to start exporting from Premiere Pro in AV1.
Depending on the version of Premiere Pro you are using will determine how you access it. Just explore the Export page and you should find it easily enough.
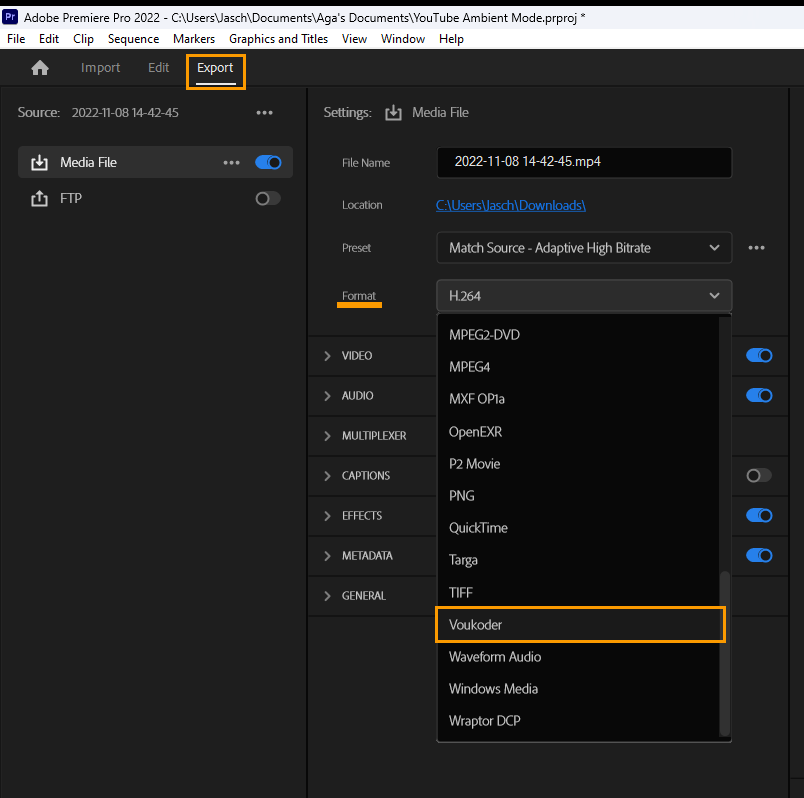
- For Premiere Pro 2022 and 2023 change to the Export tab then choose Voukoder from the Format section.
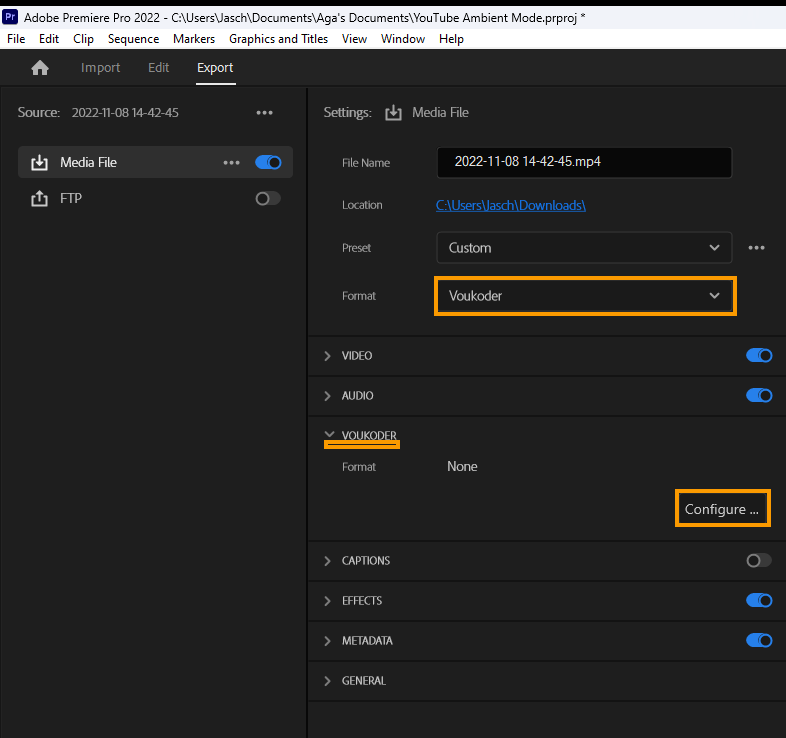
- When you have selected this you will see a new Voukoder option appear in the list of options below. Expand this and click Configure.
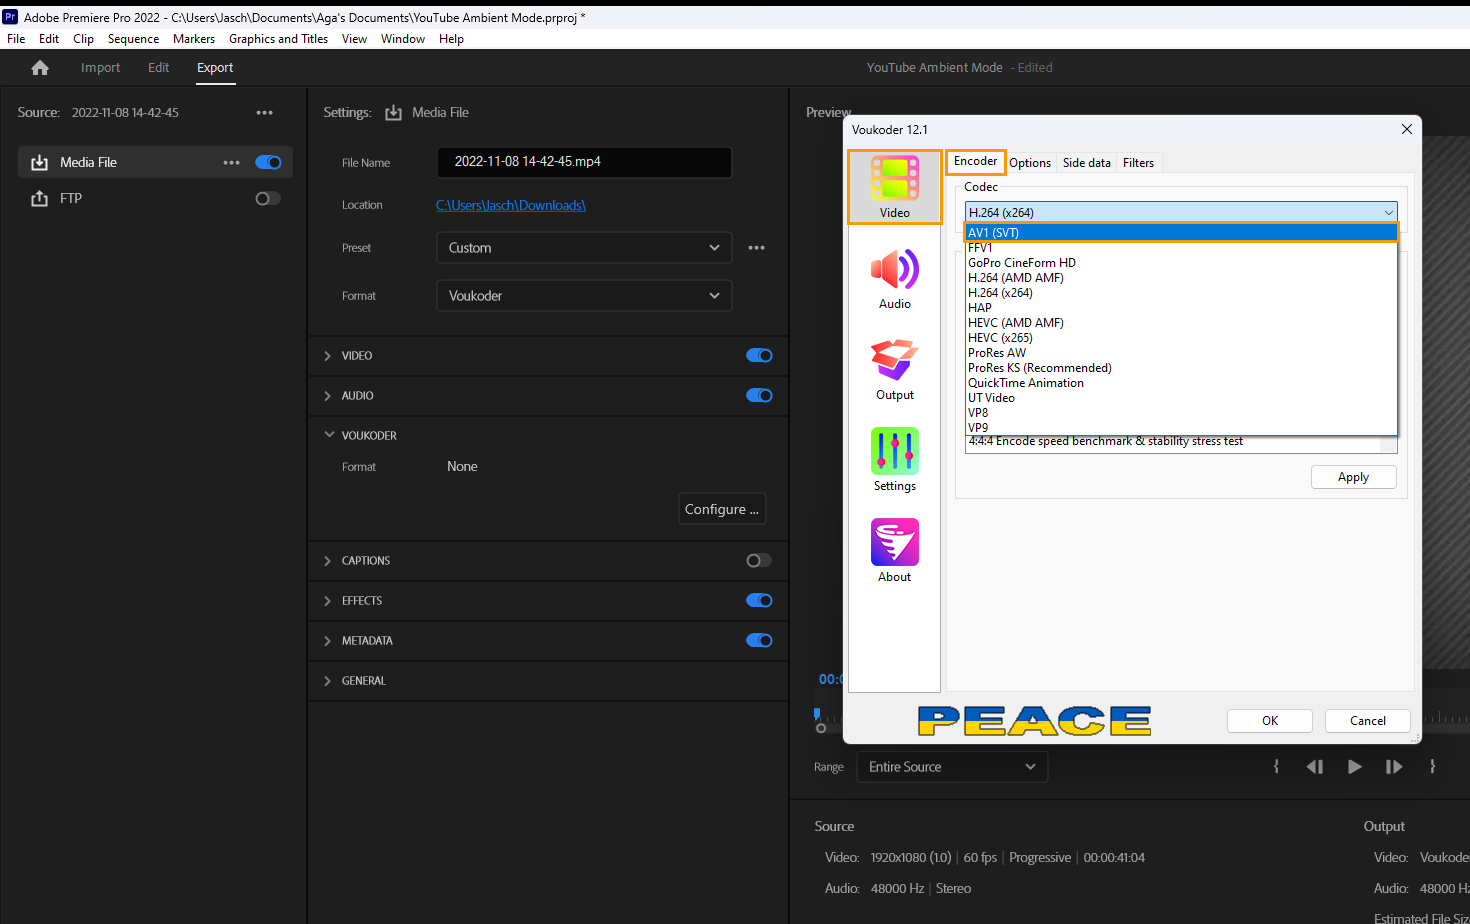
- This will open the Voukoder tool where you can change the encoder to AV1. Simply click the drop-down menu under the encoder heading and select AV1 from the list of options. Then click Apply to save the change.
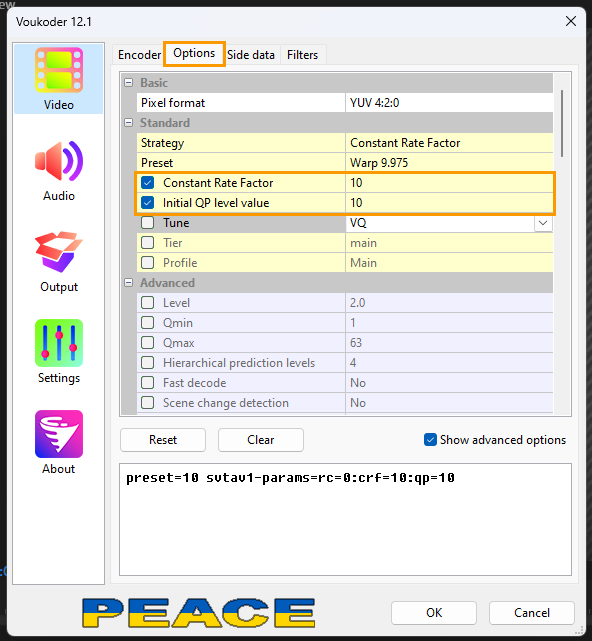
- The default options are pretty good, however, if you want to fine-tune things a little more change to the Options tab. There are plenty of options here, however, I would only adjust the Constant Rate Factor and Initial QP Level Value. The lower the number the higher the quality. However, this will also increase file size and render times.
- Finally, you can use the other tabs on the left to adjust your preferences for audio and change the output file format under the Output section. That said, the defaults are usually the best though I would stick with MP4 as your export format.