If you have updated to Windows 11 and are using Windows Subsystem for Android (WSA). It’s important to understand that there are two very different ways that WSA works. The first option is to have WSA configured to only run when required, which saves system resources but dramatically increases the time it takes for apps to load. Whereas the second works in reverse.

Related: How to enable Clipboard Sync between SwiftKey and Windows 10 & 11.
Running Android apps on Windows is finally (officially) a thing. With Windows 11 you can now install Android apps natively without the need for anything crazy third-party emulators or random software. If you haven’t already set up Windows Sub System for Android check out our guides below:
How to sideload Windows Subsystem for Android on Windows 11.
How to install .apk files on Windows 11. Sideload .apk files on Windows 11.
Now that you have everything you needed sorted you have two important configurations to consider. Do you want Android apps on Windows 11 to be given priority service or do you want them to only get service at the moment you require them? As the choice is entirely up to you, we’ll explain the difference between both and show you how to configure WSA for each scenario.
- As needed: Subsystem runs when needed, apps start more slowly. (Only uses system resources when required)
- Continuous: Subsystem is always running, apps start more quickly. (Constantly uses system resources)
Where can you download Android APK files to install Android apps on Windows 11?
If you are looking for a place to download Android .apk files from, make sure you checkout Apkmirror. They have the biggest library of safe to install Android apps on the Internet. Each .apk file also comes in a large assortment of versions so if you have a favourite stable version, you can choose it from the list.
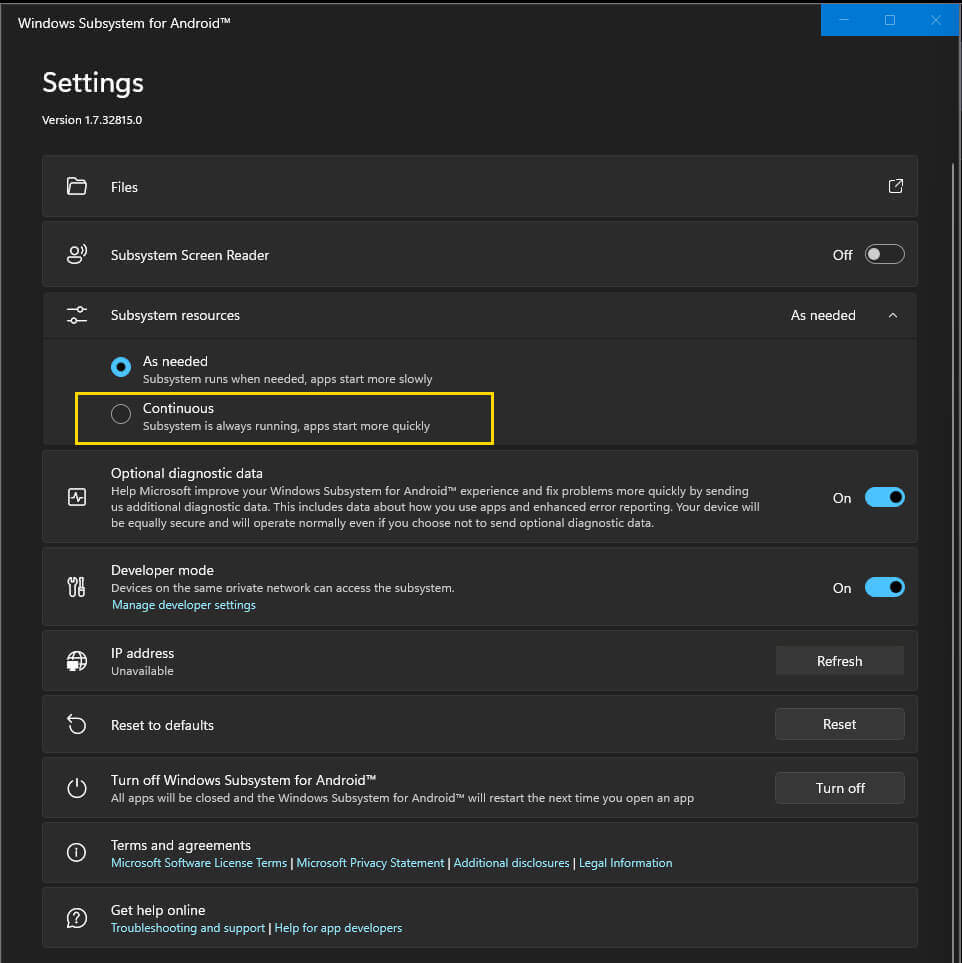
How do you make Windows Subsystem for Android (WSA) constantly run in the background on Windows 11?
To make sure WSA, Windows Subsystem for Android is constantly running in the background you’ll need to do the following:
- Open Windows Subsystem for Android on your PC.
- Expand the Subsystem resources menu.
- Select the Continuous option.
- Restart the Windows Subsystem for Android app.
Note: If you want Windows Subsystem for Android to launch when Windows boots, you can paste a WSA shortcut in the following location: C:\Users\[username]\AppData\Roaming\Microsoft\Windows\Start Menu\Programs\Startup
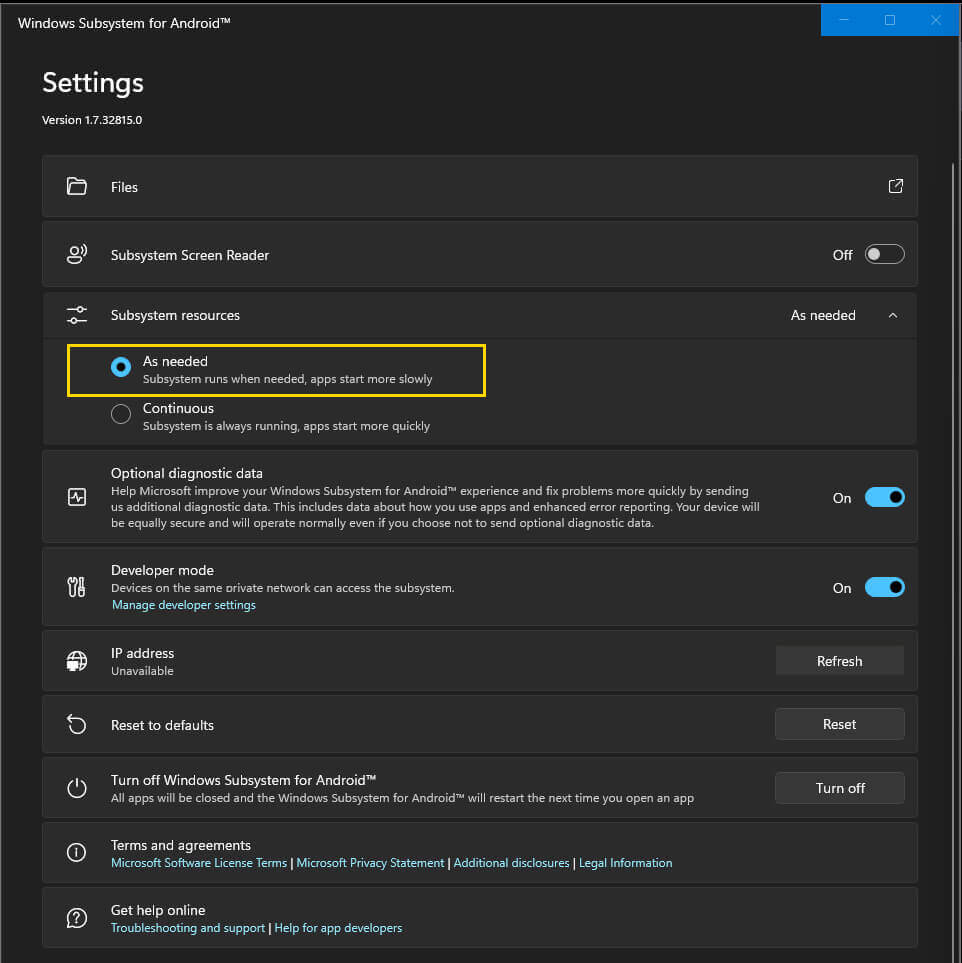
How do you stop Windows Subsystem for Android (WSA) from constantly running in the background on Windows 11?
To stop Windows Subsystem for Android running in the background on Windows 11, you’ll need to do the following:
- Open Windows Subsystem for Android app on your computer.
- Expand the System resources menu.
- Select the As needed option.
- Restart WSA app.
Note: If you created a shortcut in the Windows 11 startup folder (shown below), you’ll need to remove the shortcut from the folder or WSA will still start at boot: C:\Users\[username]\AppData\Roaming\Microsoft\Windows\Start Menu\Programs\Startup
Other Windows 11 guides?
While you are here make sure you check out some of our other comprehensive Windows 11 guides. Windows 11 has a lot of fancy new features to explore and just as many changes to relearn. You can check out all of our Windows 11 guides below.