If you have a cheap microphone and want to make it sound ten times better without spending any money or upgrading everything. This article will show you how to use Audacity to make all your audio and voice recordings sound better. Unlike a lot of guides and processes this one is super quick, super simple and will make any microphone sound almost professional!

Takeaways:
- Use Audacity to make any microphone sound like it's a professional microphone.
- The best quick settings to use in Audacity to make your voice sound deep and professional.
- The best settings to use in Audacity to get better audio quality.
Table of Contents
How to get Better Sound Quality for Your Microphone in Audacity
First things first you are going to need to download Audacity if you aren't already using it. Once you have it installed record or drop a sound file into Audacity. Then make sure that your microphone is set up correctly and that you have it nice and close to your mouth for the best results.
Noise Reduction
- To start, click record then be silent for five to ten seconds. This will allow you to identify and remove annoying background noises and humming in a future step.
- Next, select the silent portion, then go to Effect > Noise Reduction.
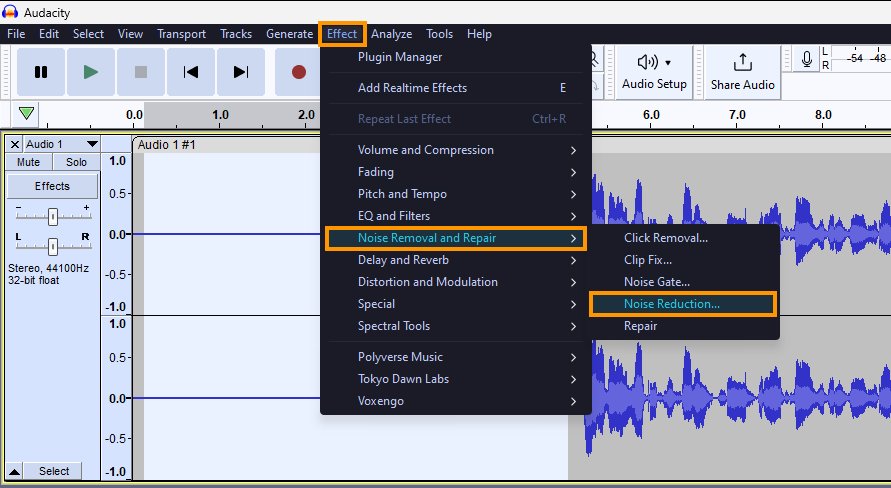
- In the window that appears click Get noise profile.
- After that, double-click to select the entire audio file, then go to Effect > Repeat Noise Reduction.
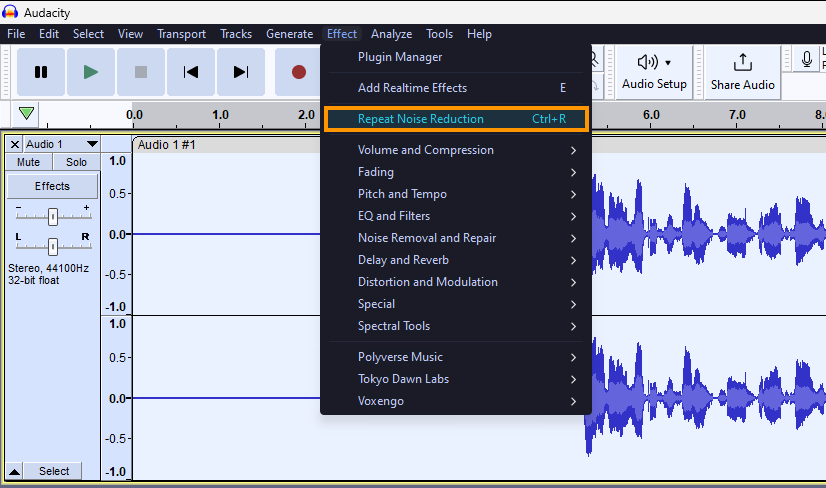
This will get rid of the background noises that are in your environment. As well as any annoying sounds your mic might make by default.
Adding a Filter Curve for a Bass Boost
After you have cleaned up the noise from your recording it's time to make things sound a lot nicer with some bass.
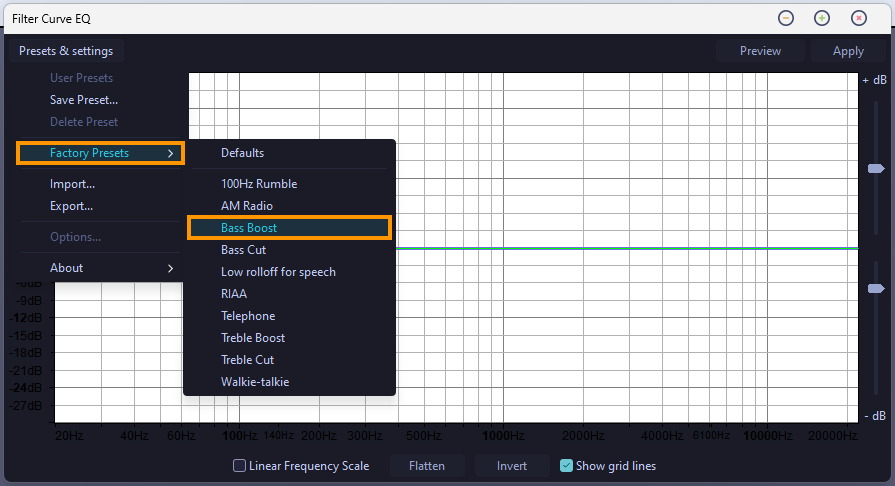
- Double-click to select the entire track again, then go to Effect > EQ and Filters > Filter Curve EQ.
- In the curves window click Presets & Settings > Factory Presets > Bass Boost. Then click Apply.
Adding a Filter Curve for a Treble Boost
After you have added some bass to your audio track you can add some treble.
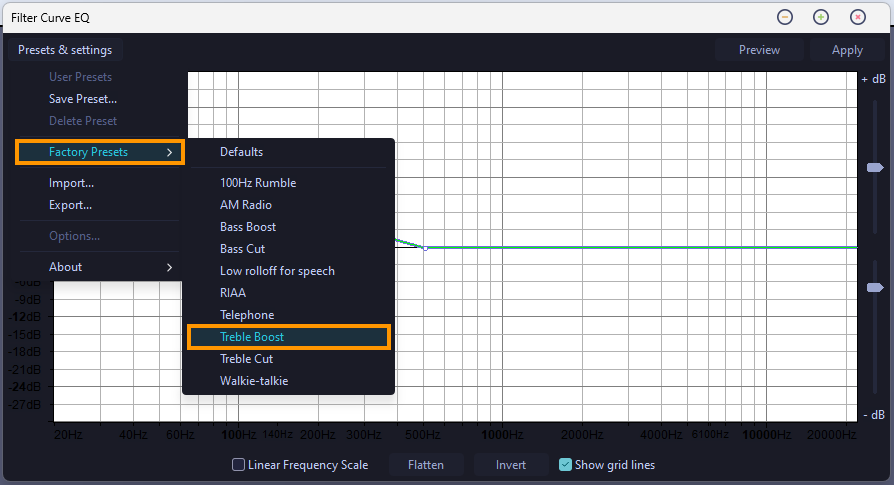
- Double-click to select the entire track again, then go to Effect > EQ and Filters > Filter Curve EQ.
- In the curves window click Presets & Settings > Factory Presets > Treble Boost. Then click Apply.
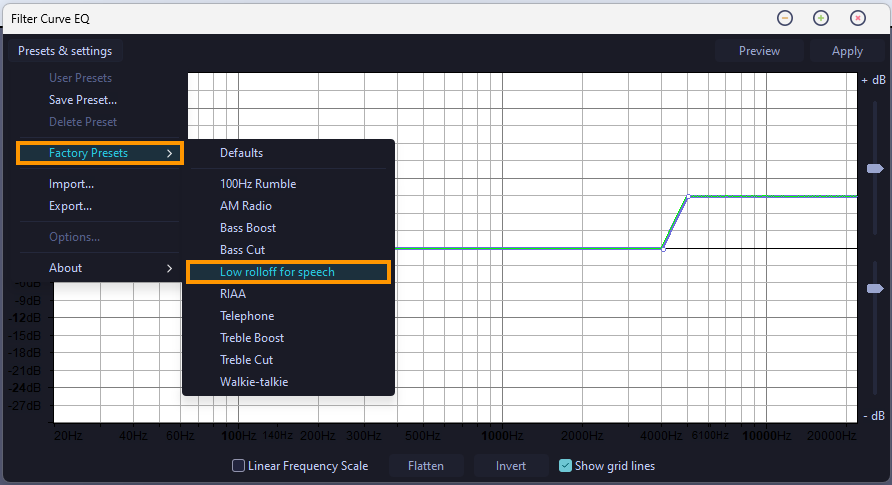
Adding a Filter Curve for Speech
With both bass and treble sorted you can clean up the speech track to make it sound a little more crisp.
- Double-click to select the entire track again, then go to Effect > EQ and Filters > Filter Curve EQ.
- In the curves window click Presets & Settings > Factory Presets > Low roll off for Speech. Then click Apply.
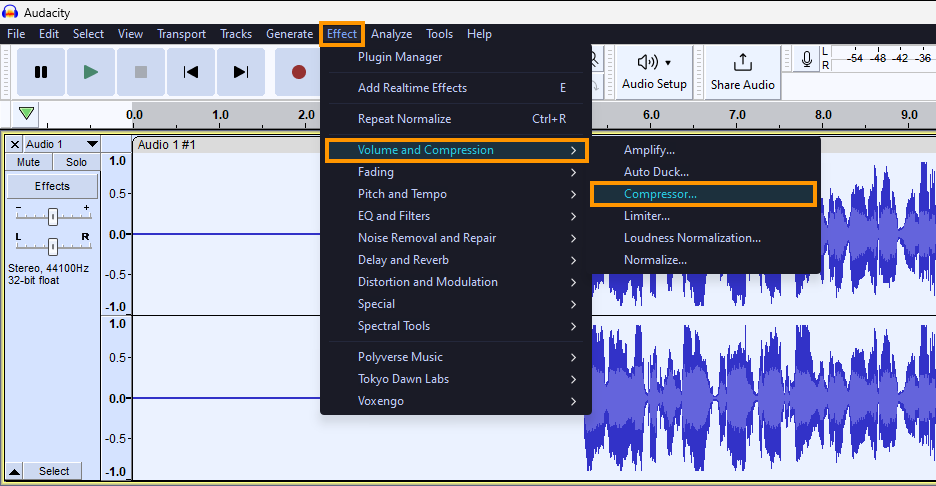
Adding a compressor for some volume adjustment
Now that Bass, Treble, and Speech are sorted, it's time to add a compressor to deal with volume.
- Double-click to select the entire track again, then go to Effect > Volume & Compression > Compressor.
- You can use the defaults for this. They were quite well. However, you can also experiment with it if you aren't quite happy with the default settings. When you have it set, click Apply to save the changes.
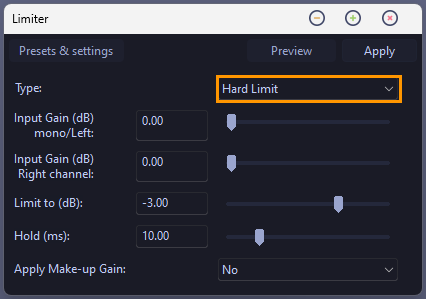
Adding a Hard Limiter
The last thing you need to add is a Hard Limiter.
- Double-click to select the entire track again, then go to Effect > Volume & Compression > Limiter.
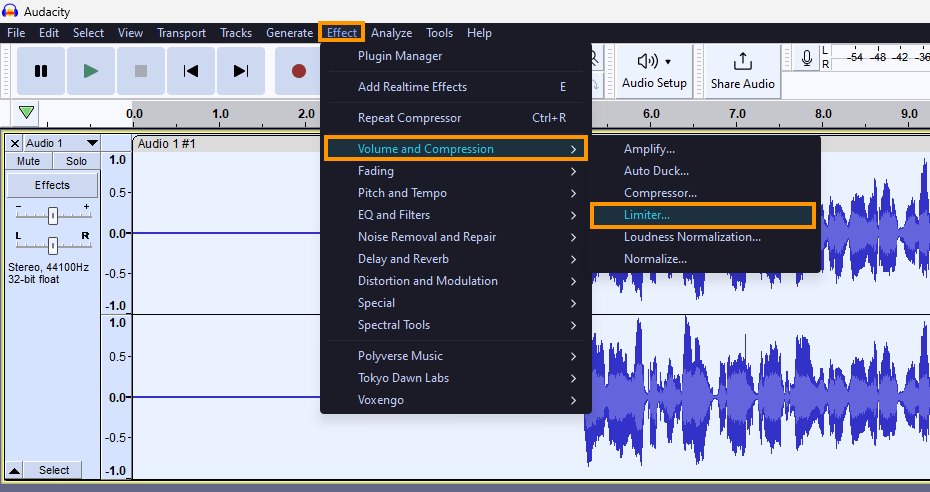
- Now set the limiter to Hard Limit. This will make sure you aren't booming too much. Click Apply to save the changes.
 \
\
Use Audacity to get the best possible sounding recordings for free with any microphone.
Even with a cheap microphone, it is possible to get some really, really good sounding audio without any annoying background noise or a hollow-sounding voice track. This will also work well for good-quality mics that sound great as well so don't be afraid to test it out. For the best results make sure you are using a pair of headphones so you can hear exactly what's going on without any distractions then work your way through the steps shown above. They will guide you to the quickest and best quality in Audacity without having to spend a ton of time fine-tuning settings. As with everything you can tweak all of these settings further to sound even better again but for the average user the default settings for each step will give you a huge boost.