Table of Contents
If you are using Windows 10's File History tool and OneDrive, now’s the perfect time to make sure your OneDrive content is being backed up using the File History tool. A feature of both services that isn’t enabled by default.

How to Disable Storage Sense on Windows 10. (Settings, and Registry Options)
On Windows 10 there are two very useful tools that allow you to make backups of your precious data, OneDrive and File History. Depending on how you use your system you are probably using one or the other, however, on the odd chance you are using both, you’ll be excited to know that you can now add your OneDrive folder to the File History tool.
If you haven’t used the File History tool before, you can access it from Settings > Update & Security > Backup. Once you enable it, it's best to click More Options, then customise which data is backing up and where it is backing up too. An external or separate drive is the best option.
By combining these two tools, you’ll be able to add your OneDrive contents to the File History tool, allowing you to have an even safer backup system. Although it may sound excessive, it’s always better to be safe than sorry, so follow along as the steps below show you how to include OneDrive in your File History backup.
Related: How to Remove the OneDrive Sync Icon From File Explorer on Windows 10.
How Do You Add Your OneDrive Folder to File History on Windows 10?
To make OneDrive and File History cooperate on Windows 10 you’ll need to disable OneDrive’s relatively new Files On-Demand feature. This will store your files locally and on the cloud, allowing File History to access them as it would any other data on your system.
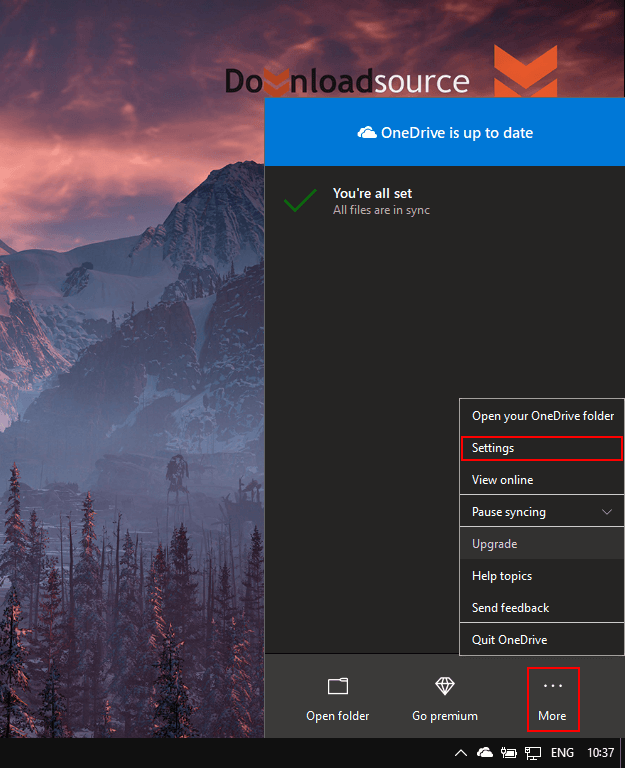
To disable Files on Demand in OneDrive on Windows 10, open OneDrive, then click the icon in the taskbar and click More, and finally Settings.
This will open a new window, in this new window change to the Settings tab, then find and untick the Save space and download files as you use them under the Files on Demand heading.
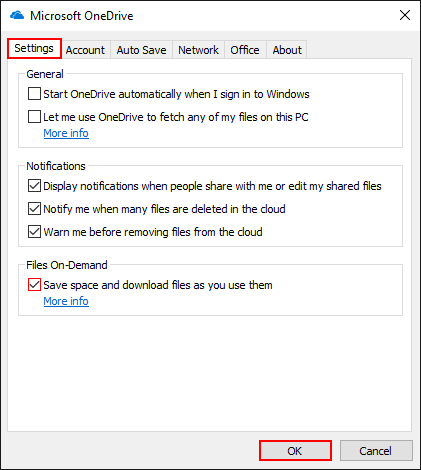
Once you have done this, click Ok and save the changes. After the change, File History will include your OneDrive folder contents the next time it runs. However, you can manually start the backup process by going to Settings > Update & Security > Backup > More Options and clicking the Back up now button under the Overview section. You should also make sure that your OneDrive folder is included in the list of folders being backed up. While you are working with OneDrive and File History, you may find the following article quite useful as it shows you how to remove old file versions from File History on Windows 10.
How to Delete Old Versions of Files From File History on Windows 10.
If you are looking for some more interesting OneDrive tips and trick, make sure you have a look at the following articles as well.
How to Fix OneDrive Won’t Sign-in or Install on Windows 10.
How to Sign into Two OneDrive Accounts at the Same Time on Windows 10.
How to Prevent OneDrive Images Appearing in the Photos App on Windows 10.
.
.