Table of Contents
If you use Skype for a range of different personal and business meetings or conversations. This article will show you how to use one of Skype’s lesser-known features, ‘System Audio Sharing’. A super useful way to share clean and clear system audio with your skype call participants.
How to Fix Windows 10 Update Error 0x8024a000 – WU_E_AU_NOSERVICE.
Skype is one of Microsoft’s biggest investments and has seen quite a few changes over the years. After a short spell trying to compete in the Snapchat and Instagram era, Microsoft has finally restored Sykpes focus and credibility as a serious business platform. As a result, Skype has seen some serious content added, including the ability to capture and record conversations and meetings made on the service.
As well as this Microsoft has also added the ability to share System audio across conversations and meetings. Although this was possible using standard microphone support, the quality of audio as never been up to business quality standards. However, the new and advance system audio sharing feature of Skype allows for the best possible audio to be shared directly from your PC across the Skype call/meeting.
Related: How to Format a Drive on Windows 10 That Says it is Being Used By Another Service or Process.
How Do You Share System Audio Across Calls in Skype? (Share System Audio During Skype Meetings)
If you have used Skypes screen sharing tool in the past, you’ll find the system audio sharing tool very similar and just as easy to access. To begin, you’ll need to make sure you have the latest version of Skype installed on your system. Although Skypes usually pretty quick to force an update, you can manually force one by going to Settings and clicking Check for updates. Alternatively, you can visit the Skype website and download it from there.
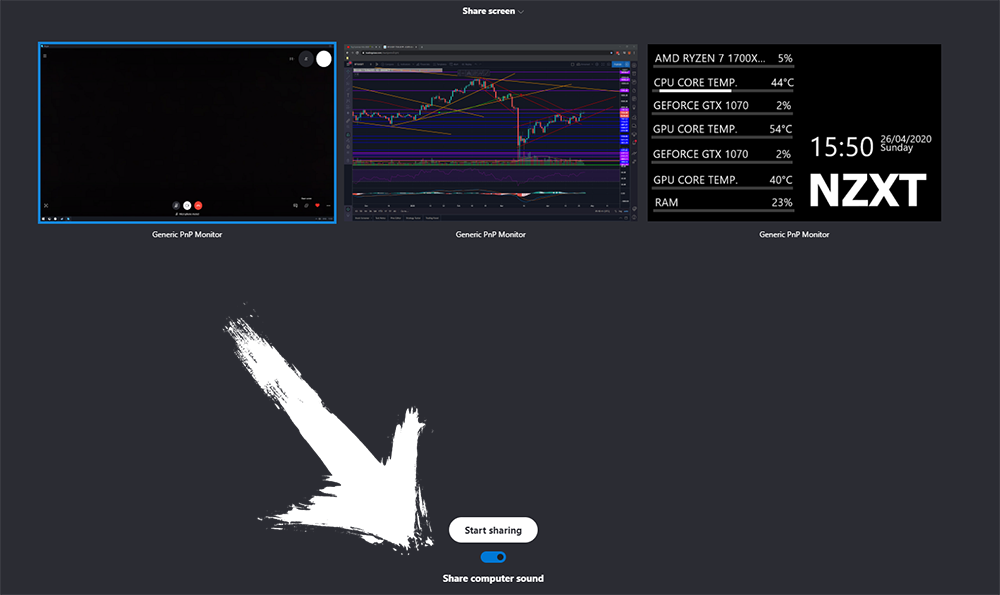
Once you have the latest version of Skype installed, you’ll need to make sure you are in a video conference. With a conference started, click the Screen Sharing icon in the bottom right-hand corner of the screen. This will give you the option to choose which screen you wish to share to your meeting or conversation (if you have more than one screen).
If you have a single screen, that screen will be shared along with everything that is open. At the bottom of this selection page, you will see a secondary option to share sound. Flipping this toggle to On will share your screen and audio. Sadly at this stage, it isn’t possible to share system audio without sharing your screen at the same time. Hopefully, future versions of Skype will see this feature expanded upon to include two separate options.
On a Side Note…
If you’re also a big Windows 10 user, make sure you take the time to check out the newly designed File Explorer. More than likely it’s going to take a fair bit of getting used to, but it does fit with the current material design of Windows 10 very well. It’s also a work in progress, so it’s best to take it with a grain of salt as it still has a lot of work to go.